Are you looking for a contractor?
Submit our quick form and get quotes now!
Table of Contents
6 min read
Beginner's guide to installing a toilet
6 min read
Beginner's guide to installing a toilet
BathroomBeginner's guide to installing a toilet
Installing a brand-new toilet in your bathroom isn’t exactly a desirable project. Plumbing aside, this isn’t a job for the faint at heart and takes some time, effort and heavy lifting. However, if you’ve got a spirit for adventure and you’re feeling up for it, this is a DIY job that you can easily take on!
If your well-used but well-loved toilet has developed cracks, leaks or permanent stains, then it might be time to consider a replacement. The time required will vary, depending if you've got some backup plumbing skills or if you're a straight up novice. Regardless, the installation of a toilet isn’t so difficult if you follow our step-by-step guide, helping you to be back up on that throne in no time!

How to install a new toilet
Step 1: Start Setting Things Up
Alright, so we’ve rolled up our sleeves and we’re ready to tackle the installation of a new toilet. But, where do we even begin? First, if you have an existing toilet in place, it will need to be taken out. Most importantly, cut off the water supply to the toilet or bathroom in order to prevent flooding. Drain remaining water and plunge whatever is left. All water residue in the surrounding area should also be removed by way of a sponge or cloth. Dry the pipe inside and out using a rag.
Then, remove the trim caps from the base and loosen the nuts of the closed bolts as well as the washer to easily detach them. If these pieces have rusted and deteriorated, the nuts may be difficult to remove and may need to be hacked off. Following this, disconnect the tank from the bowl.
The toilet can be removed from the ground with a simple back and forth motion, lifting slowly as it becomes dislodged from its place in the ground. Next, prep the surrounding floor and soil pipe for the new pieces and toilet. Stuff a rag, cloth material or newspaper into the now exposed pipe in order to block sewer gases from escaping, while preventing anything from falling in.
Step 2: Wax, Seal and Prepare!
Now, it is important to remove the old wax seal and scrape away any debris from the surrounding area. Look at the flange; if it is broken in any way, it will need to be replaced. Also, if you are replacing the flange, make sure the hole in the floor is large enough to accommodate the closet flange up to its collar. The steps to replacing a flange are slightly more complicated, so make sure to consider the instructions before proceeding. If the flange is in good shape, keep moving forward with the rest of the installation.
Locate the closet bolts and turn the T-shaped head of each bolt so that it slips into the slot of the flange. The closet bolts should line up parallel with the wall behind the tank, with the threaded end up. Turn bolts so that the head cannot be pulled out of the flange. Next, slide retainer washers of your chosen material down the threads to hold bolts neatly in place. Gently press the wax seal ring, positioning them in their proper slots in the flange.
Step 3: Begin Toilet Assembly

source: Pixabay, Svyatoslav
Turn the bowl of the toilet upside down, and rest it on a padded surface. Following this, locate the toilet horn, which is the short spout in the center of the toilet's base. Place the wax ring and its sleeve onto the toilet horn and press down firmly. The wax ring compresses against the drain flange as it is pressed into the floor. Once the wax-ring compresses, it will not spring back. Therefore, this next step is very important.
Lift the bowl of the toilet over the flange, aligning the holes in its base with the closet bolts. Lower the base onto the ring without twisting or rocking it. It may be necessary to employ another person to assist with this job, helping to line up bolts with the holes in the base. Now, press it gently onto the wax ring, making sure that the base of the bowl eventually rests on the floor.
Further, make sure the bowl rests evenly, you can check this by placing a level across the toilet base. If the floor is uneven, shim the bowl with stainless steel washers. Slip a nylon washer over each bolt, then head-thread the nuts. Tighten nuts with an adjustable wrench, stopping when the wrench begins resisting. Any overtightening will crack the bowl. Cover these bolts with trim caps, and then shorten the caps with a hacksaw. Remember to be careful about doing this part of the job!

Step 4: Finish Toilet Assembly
Most toilets come with the flush mechanism installed, but if necessary, now is the time to install the mechanism. Next, turn the tank upside down and carefully attach the rubber seal to the pipe that sticks out from the base of the tank. This rubber seal is often referred to as the spud washer.
Now, carefully turn the tank right side up, centring the spud washer over the water intake opening. The water intake opening will be located at the back edge of the bowl in the base of the toilet. Align the tank bolts and washers with the holes in the tank and lower it to the back of the bowl. Insert mounting bolts through the available holes.
Next, move to the underside of the toilet and thread the washer and nuts, using hands to tighten at first and then working with a wrench. Again, do not overtighten, as this will lead to cracking in the porcelain. Now, connect the supply tube, also known as the riser, and shut-off valve.
This can be completed by fastening the coupling nut to the tank fitting, and the compression fitting to the shut-off valve. It is recommended that you use a reinforced flexible tube, rather than the standard plastic, as the former is much more reliable.
Turn on the water supply to fill the tank, and check for any leaks while the toilet is filling. Make sure that the water stops at the fill line marked inside the tank. Tighten connections if you notice leaks of any kind. Now, the job is almost complete! It’s time to install the seat of the toilet, pushing the seat bolts into the holes located in the toilet base. Tighten the bolts with a large screwdriver or by hand, and voila! Your newly installed porcelain throne awaits.
Would you like to have an estimation of the cost of your next bathroom renovation project!
Get 3 renovation quotes for your toilet upgrade project
RenoQuotes.com can help you get quotes for your toilet installation project. If you submit your project to us, we’ll put you in contact with top-rated contractors. Fill in the form on the homepage (it only takes a few minutes), and you will get estimates from trusted professionals.
Dial 1-844 828-1588 to speak with one of our customer service representatives
Last modified 2023-11-07
Looking for something else?
Related articles
The latest industry news, interviews, technologies, and resources.
Amanda Harvey • 07 Nov 2023
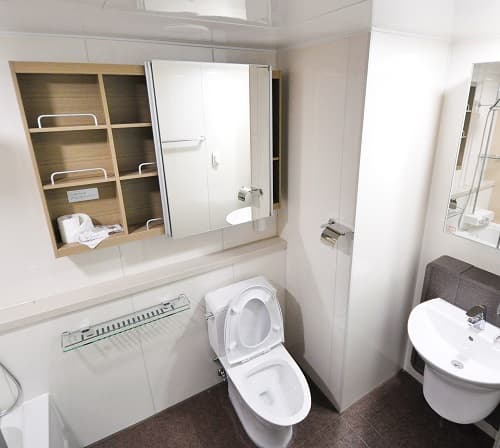
As one of the most frequented rooms in the home, the bathroom needs a little bit of TLC every once and a while. As a result, it's necessary to offer up a bit of modern love as well as tend to the rougher edges that face wear and tear over the years.

N/A • 07 Nov 2023
Kitchen cabinets can be the centrepiece of the space, and beautiful, well-designed ones will make a huge difference in both the layout and feel of the room. Custom kitchen cabinets are an excellent way to add a unique element to your home as well as increasing the resale value.

RenoQuotes.com • 21 Mar 2024
During the COVID-19 pandemic, several economic sectors crumbled under restrictions and a global pause. Albeit everything is slowly being restored to normal, the construction industry is still facing setbacks in this post-pandemic world: material shortage, supply depletion, delayed deliveries, unstable prices, lack of labour on all fronts… In a nutshell, the entire building material supply chain is suffering the consequences. On one hand, such a situation is a total turmoil for contractors attempting to wrap up their worksites and projects on time. On the other, one can benefit from such hurdles by taking this opportunity to innovate and improve know-how to better face future unexpected challenges of such a magnitude.

Léa Plourde-Archer • 07 Nov 2023
Are you looking for ideas for your renovation projects and your decor transformations? We've gathered links to all the articles published in the "Reno Inspiration" category. By doing this, you will be able to discover the most relevant articles to better meet your needs.
N/A • 07 Nov 2023
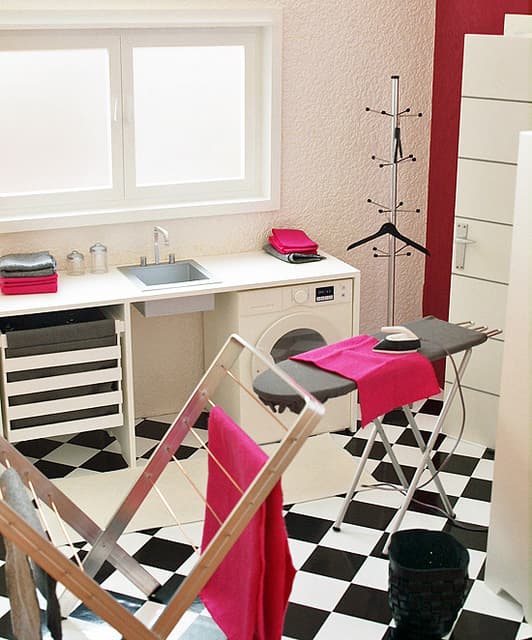
The laundry room is a space that is notorious for being cramped. Since it is a multipurpose room, there is a constant quest to try to keep this room organized and utilitarian while still being an attractive space in the home. Especially in the case of smaller houses and apartments, the laundry room often lacks much-needed storage.