Are you carrying out a home renovation or building project? Installing PEX plumbing pipes is a great option. Reputed for its flexibility and durability, PEX pipes are increasingly sought after. It’s a remarkable system given its reliability, resistance, and versatility. What are the upsides? How much does it cost? What are the proper guidelines for installation success? All this and more detailed below.
Equipped with the right tools and a bit of know-how, you will be able to manage your own plumbing project with near professional ability. Follow along with our advice to ensure a reliable and durable plumbing system.
What Is a PEX Piping?

Source: Canva
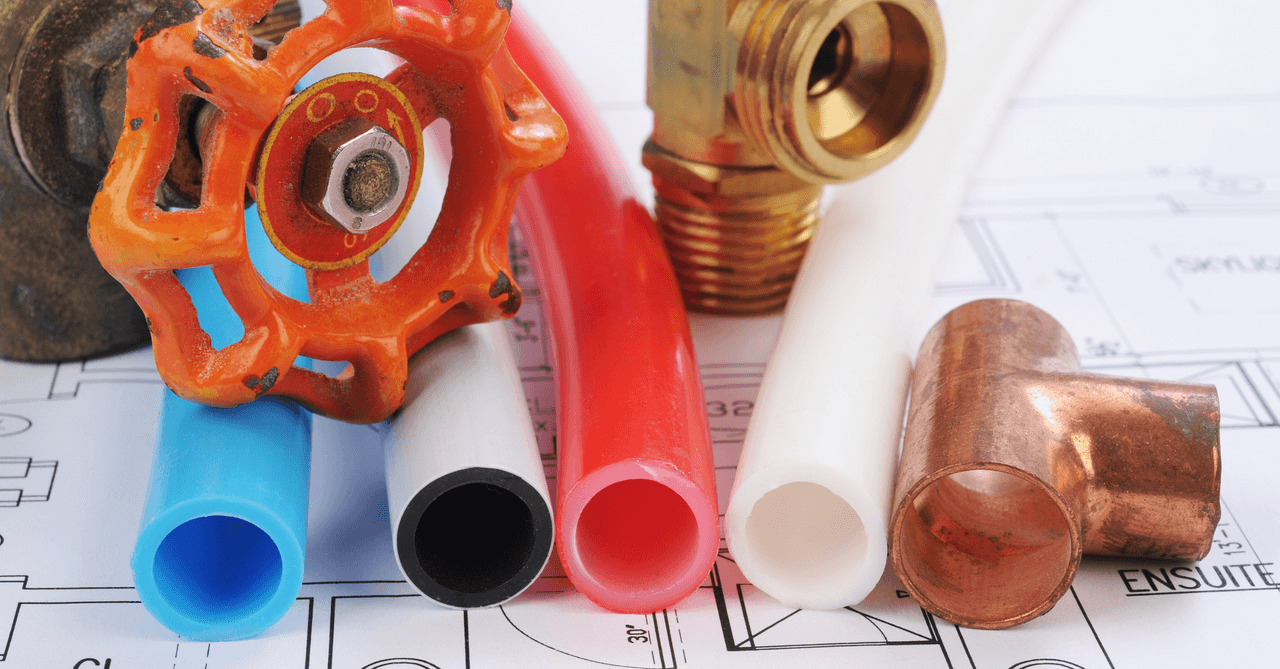
PEX piping, or cross-linked polyethylene, is a type of plastic mostly used for residential or commercial plumbing installations and water lines. Said material has gained momentum due to its flexibility, corrosion resistance, and relatively affordable price point compared to traditional materials like copper or rigid PVC.
PEX is a lightweight, smooth, and non-porous material. It’s easy to cut, requires few fittings and its installation is super easy, as to join two sections, one simply needs to compress a ring using a dedicated tool, which you can rent for the day. No soldering is necessary; PEX plumbing pipes can be installed with a crimping tool.
Sink faucets can be connected to PEX piping with flexible and replaceable water supply hoses, also known as “speedways.” Averaging a 12-year service life, its accessories are made with easy-to-connect and disconnect supple plastic.
PEX vs. Copper: Which Is Best?
While copper pipes have long since proven their worth, PEX has numerous undeniable advantages that, in fact, are so interesting industry professionals have chosen them over alternative systems retailed.
PEX piping, unlike copper pipes, suits restricted spaces, making for great flexibility. It’s unlikely to corrode, doesn’t scale, is soundproofed, and is freeze-resistant. As a bonus, using such piping allows for about 60% savings on retail costs and requires half the installation time.
How to Install PEX Plumbing Pipes

Source: Canva
Below are listed the PEX plumbing pipe system installation guidelines.
Step 1: Drill through the dowel and sill plate
Drill through the sill plate and subfloor where needed for every water supply line. Make sure every hole drilled is along the same line to ensure that your pipe sits parallel to the ground.
Step 2: Run the pipes
In most cases, water lines will run through the floors. However, in others, they run through wall studs. When dealing with the latter, make sure to drill the intended holes in the middle of the studs to ensure screws or nails don’t puncture the pipes.
Step 3: Secure the pipelines
Insert the supple pipes through the already drilled holes in the subfloor, then run them to the dwelling’s water supply. Make sure there’s an additional pipe at either end.
Use collars to secure the flexible pipes to the joists. Allow for as much space as possible between the hot water and cold water lines to limit heat transfer.
Step 4: Connect hoses to sinks
Install a copper fitting suited for PEX pipes. On its end, you’ll find a fitting cap. The latter allows you to check for potential water or air leaks. If no leaks are detected, you can cut the cap off and install finishing valves.
Step 5: Proceed with crimping
This might be the trickiest part. Start by cutting the PEX pipe in a straight, clean cut. Slide the crimping ring around the pipe, then slide it onto the fitting. Each fitting has a small elbow connector, and that’s where the PEX pipe will be fitted.
Use your fingers, or slip joint pliers, to slide the crimp ring upwards. You will know when it’s properly positioned when it sits ⅛ to ¼ inch from the pipe’s tip. Disregarding said instructions could cause leaks.
Step 6: Fit the parts
Given that soldering near PEX piping is out of the question, instead, you can use a PEX 90 fitting that sweats on the mixing valve. Once the solder has cooled down, you can go ahead and connect the PEX water supply line safely.
Step 7: Position fittings and solder
Position the fittings so that they’re both facing down when the valve is suspended and secured. Solder the parts in place. Allow the valve to cool down completely before installing it.
Step 8: Open water supply
You can connect the water supply now. Screw the support brackets to the dowels. Make sure they’re plumb and holding tightly.
Affix the manifold to the support with the manufacturer-provided screws. Install the lower support to the manifold. Make sure the installation is level prior to securing the supports to the studs.
Step 9: Mark and drill holes
Align the gauge with the manifold, then to the dowels. Mark each hole or drill them as you go, one by one. Make sure the drill isn't damaging the manifold as you work. You may need to remove the manifold when drilling.
Step 10: Position the ball valves
Once all the holes are drilled and the manifold is mounted, secure the PEX ball valves to the manifold. Grab hold of one line, routing it to the valve. Doing so ensures every apparatus has a dedicated gate valve.
Avoid bending the pipes.
How to Connect PEX Tubing to an Existing System

Source: Canva
PEX piping suits different existing plumbing systems since it can be connected using dedicated fittings. As such, PEX isn’t solely meant for new installations. When renovating an older house, you may reap the benefits of a faster and easier installation using a PEX system, no matter the pre-existing piping.
To connect PEX piping to an older system, you first must choose a suitable fitting for the existing plumbing (copper or steel pipes with threaded ends). Copper fittings can be paired with compression connectors while threaded steel fittings ensure a watertight assembly.
Compression fittings can be slid onto the copper. Make sure to twist the compression nut until it’s secured tightly. Pull on the fitting to make sure it’s secured properly. Add some plumbing tape (white tape) around the steel pipe’s threaded ends, then screw the threaded fittings around the steel threaded pipe. Tighten with dedicated pliers.
Cut the PEX pipe using a tube cutter. Use a dedicated tool to ensure there are no burrs between the pipe and fitting (burrs could cause leaks).
Install the PEX ring on the tube. Place the PEX on the PEX (as far as the original plumbing connection), then crimp the ring according to the manufacturer’s instructions. If you opt for expansion loops, insert the tool at the pipe’s end, then squeeze the handle until the PEX expands sufficiently to accommodate the original sanitary installation. Position the pipe over the fitting and wait fifteen seconds or so. Pull on the connection to ensure the fit is secured.
Once the fittings are secured (but before closing up the walls), it's a good idea to plug the ends of the PEX piping, and run the water under pressure, just as a way to check the whole setup is watertight.
How to Crimp a PEX Pipe

Source: Canva
Carrying out a PEX connection isn’t complex, provided you know how to go about it. Here is how to about it in six steps.
You will need:
Tube cutter (crimping tool)
Crimping ring
Go/no-go gauge to crimp a PEX joint
Step 1: Make a clean cut
Use a tube cutter to cut through the pipe at the correct length. The cut must be clean, any roughness or kinks could lead to leaks.
Step 2: Pick out a ring
Choose between two types of copper crimping rings based on the setup you’re looking to carry out: ASTM F1807—for metal insert fittings—or ASTM F2159, for plastic insert fittings.
Step 3: Position the crimping ring
Glide the 2-inch or so crimping ring onto the PEX pipe.
Step 4: Insert the fitting
Insert the connector (plastic/metal) in the pipe where the pipe and fitting are joined (distance will vary from one material to another and one manufacturer to another).
Step 5: Compress the ring with a crimping tool
To crimp the ring, close the crimping pliers’ jaw around the ring's mid-section, maintaining a 90-degree angle to the fitting. The jaws must be completely closed around it to ensure a perfectly watertight connection.
Step 6: Check all connections
Use a go/no-go gauge to ensure all connections are done properly, which doesn’t necessarily mean all connections are extremely tight. A too-tight connection risks damaging the pipe or fitting, which is just as bad as a loose-fitting connection.
Cost of PEX Plumbing System Accessories

Source: Canva
A whole range of PEX accessories are retailed at rather affordable price points. PEX plumbing systems can also be paired with brass or copper parts to meet a variety of needs. Here is an overview of accessories retailed:
A ½-inch dark blue PEX pipe (for cold water) retails for $3 to $4 for 5 feet of length, whereas a red pipe (for hot water), sells for $3 to $4.
PEX fittings can be purchased individually ($0.70 to $6 apiece) or in 40-piece packaging.
You can choose between PEX or brass elbows.
A solid brass angle valve ($10 to $35) can be used for sinks.
A water hammer arrestor ($10 to $35) prevents water hammer caused by fast-closing valves.
Push-to-connect SharkBite couplings ($10 to $20) are used to join polybutylene, copper, and PEX pipes without soldering, clamps, fitting unions, or bonding agents.
Want to learn more about piping? Check out these articles:
Get 3 renovation quotes for your plumbing project
RenoQuotes.com can help you get quotes for your plumbing project. When you submit your project, you’ll be connected to top-rated contractors. Fill in the form on the homepage (it only takes a few minutes) and receive estimates from trusted professionals.
Dial 1-844 828-1588 to speak with one of our customer service representatives.
Looking for something else?
Related articles
The latest industry news, interviews, technologies, and resources.

Cynthia Pigeon
•28 Apr 2026
In Canada, moving the plumbing for a bathroom vanity typically costs anywhere from a few hundred to several thousand dollars, depending on accessibility, relocation distance, and finishing work required. Costs increase significantly if drains, vents, or flooring systems must be modified—especially when transitioning from a concrete slab to a wood-framed floor. Plumbing work must be carried out by a licensed professional in accordance with provincial regulations.

Editorial Team
•08 Nov 2023
Tankless water heaters warm up water on demand rather than ahead of time and storing it in a tank. Chances are that you might not have heard about this option, or are a wee bit familiar with it, so we’ll outline the pros and cons of this type of system for you.

Editorial Team
•08 Nov 2023
Are you looking to replace your water heater? While this isn't an exciting buy, it’s nonetheless an important one. Indeed, having daily access to hot water is certainly essential and our comfort greatly depends on it.

Amanda Harvey
•03 Nov 2025
It has become common to preserve and experiment with concrete surfaces both inside and outside of the home. Modern homeowners are exploring the possibilities of painting concrete, offering an alternative to its more commonly known drab shades of grey.

Léa Plourde-Archer
•25 Sep 2024
In the kitchen and in the bathroom, countertops are surfaces that play a much more important role than can be imagined. Valiantly welcoming our daily actions, they are both practical and aesthetical, often being a focal point of the room's decor. Countertops are offered in a wide array of colours and materials. Prices vary widely, providing options that fit all tastes and budgets.