Popcorn Ceiling Removal: A Step-by-Step Guide for Canadian Homes
By Editorial Team
Updated on October 29, 2026
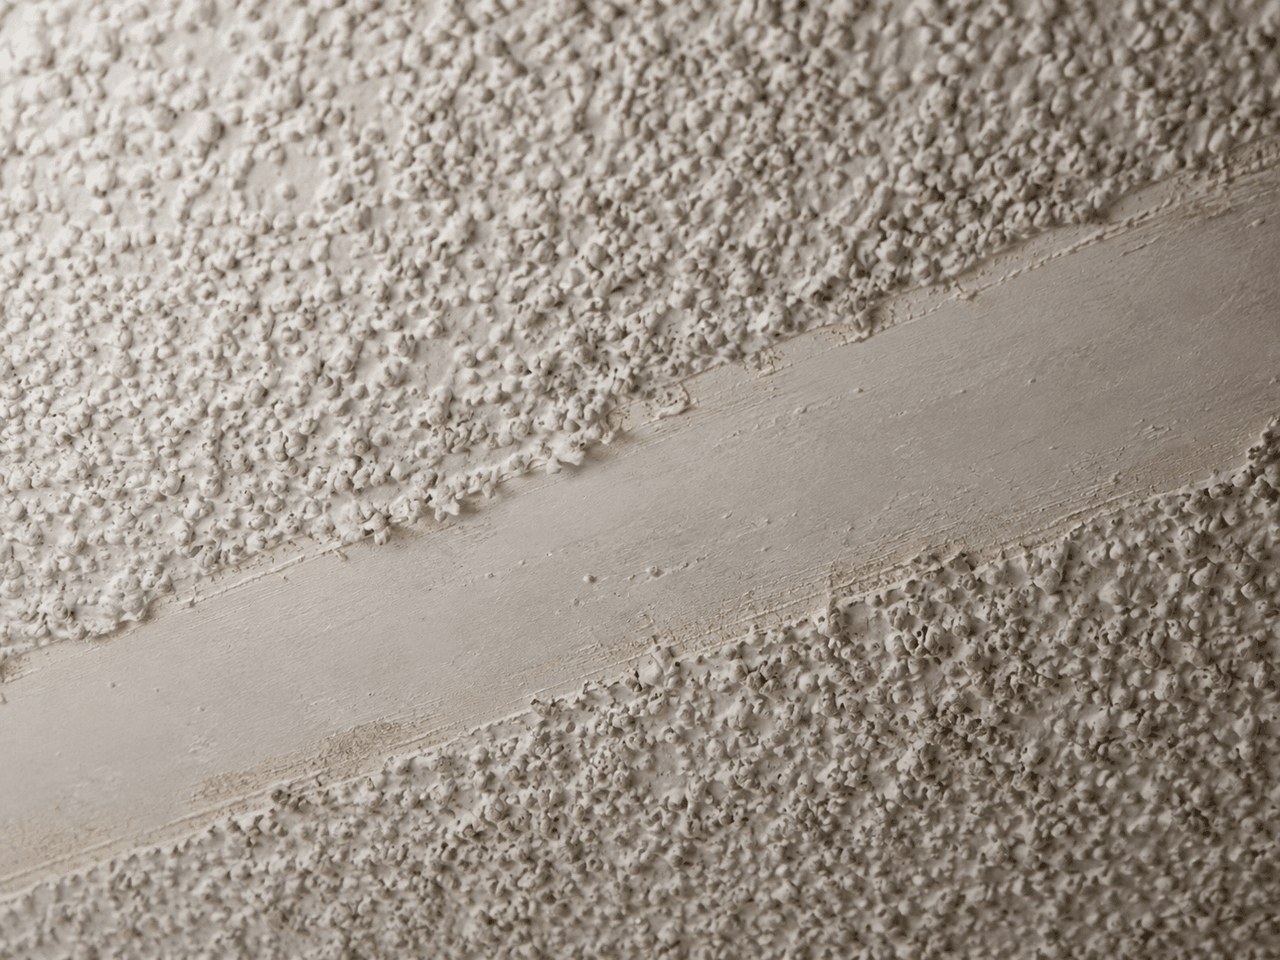
Popcorn ceiling removal is a manageable DIY job only after the texture tests negative for asbestos, and any Canadian home built before 1990 should be tested first. Hiring a professional typically costs $3 to $7 per square foot across Canada, and $6 to $10 per square foot in the Greater Toronto Area once skim coating and painting are included.
This guide explains how to test for asbestos, how to remove popcorn texture with the wet scrape method, what to do when the ceiling has been painted, and when covering it makes more sense. It also covers what removal costs in Canada and when hiring a professional is the safer choice.
Test for Asbestos Before You Touch the Ceiling
Asbestos is the single most important factor in a popcorn ceiling project. Scraping a ceiling that contains it releases fibres into the air, and no shortcut makes that safe.
Why Pre-1990 Homes Are at Risk
Asbestos was used in Canadian building materials until the late 1980s and wasn't fully banned in Canada until 2018. According to WorkSafeBC, homes built before 1990, including condos and townhouses, may contain asbestos in more than 3,000 building materials, and textured ceilings are among the most common. Breathing in the fibres can cause lung cancer, mesothelioma, and asbestosis, often 10 to 40 years after exposure.
Asbestos in good condition and left undisturbed is unlikely to release fibres. The danger begins when the material is scraped, sanded, or broken, which is exactly what popcorn ceiling removal does.
How to Test a Popcorn Ceiling
You can't tell whether a ceiling contains asbestos by looking at it. Only a lab analysis can confirm it. WorkSafeBC recommends hiring a licensed asbestos surveyor, who takes samples and sends them to a lab. Professional testing typically costs about $250 to $850, depending on the number of samples and your region.
Popcorn texture was often mixed on site, so asbestos may be present in one part of a ceiling and not another, and a single negative sample isn't conclusive. Ontario's asbestos regulation, for example, calls for at least three samples from different spots for an area under 90 m² (about 970 sq ft). If you use a home test kit, take several samples from different areas, mist each spot with water first to keep fibres from becoming airborne, wear a respirator, and seal each sample before mailing it to the lab.
Make sure to choose a lab accredited for asbestos analysis, such as through CALA (the Canadian Association for Laboratory Accreditation) or NVLAP, and prefer one in Canada to avoid shipping samples across the border.
What to Do if the Ceiling Contains Asbestos
If the test comes back positive, don't scrape, sand, or drill into the ceiling. You have two safe options:
Leave it alone: An intact, undamaged ceiling can stay in place.
Hire a qualified abatement contractor: A professional can remove the texture under containment, or cover it safely, since even driving screws through asbestos texture can release fibres. Abatement typically adds $8 to $20 per square foot, before refinishing.
Provincial rules for asbestos work vary. In BC, asbestos abatement contractors must be licensed by WorkSafeBC and listed in its public registry since January 1, 2024, and their workers must be trained and certified.
How to Remove a Popcorn Ceiling Yourself
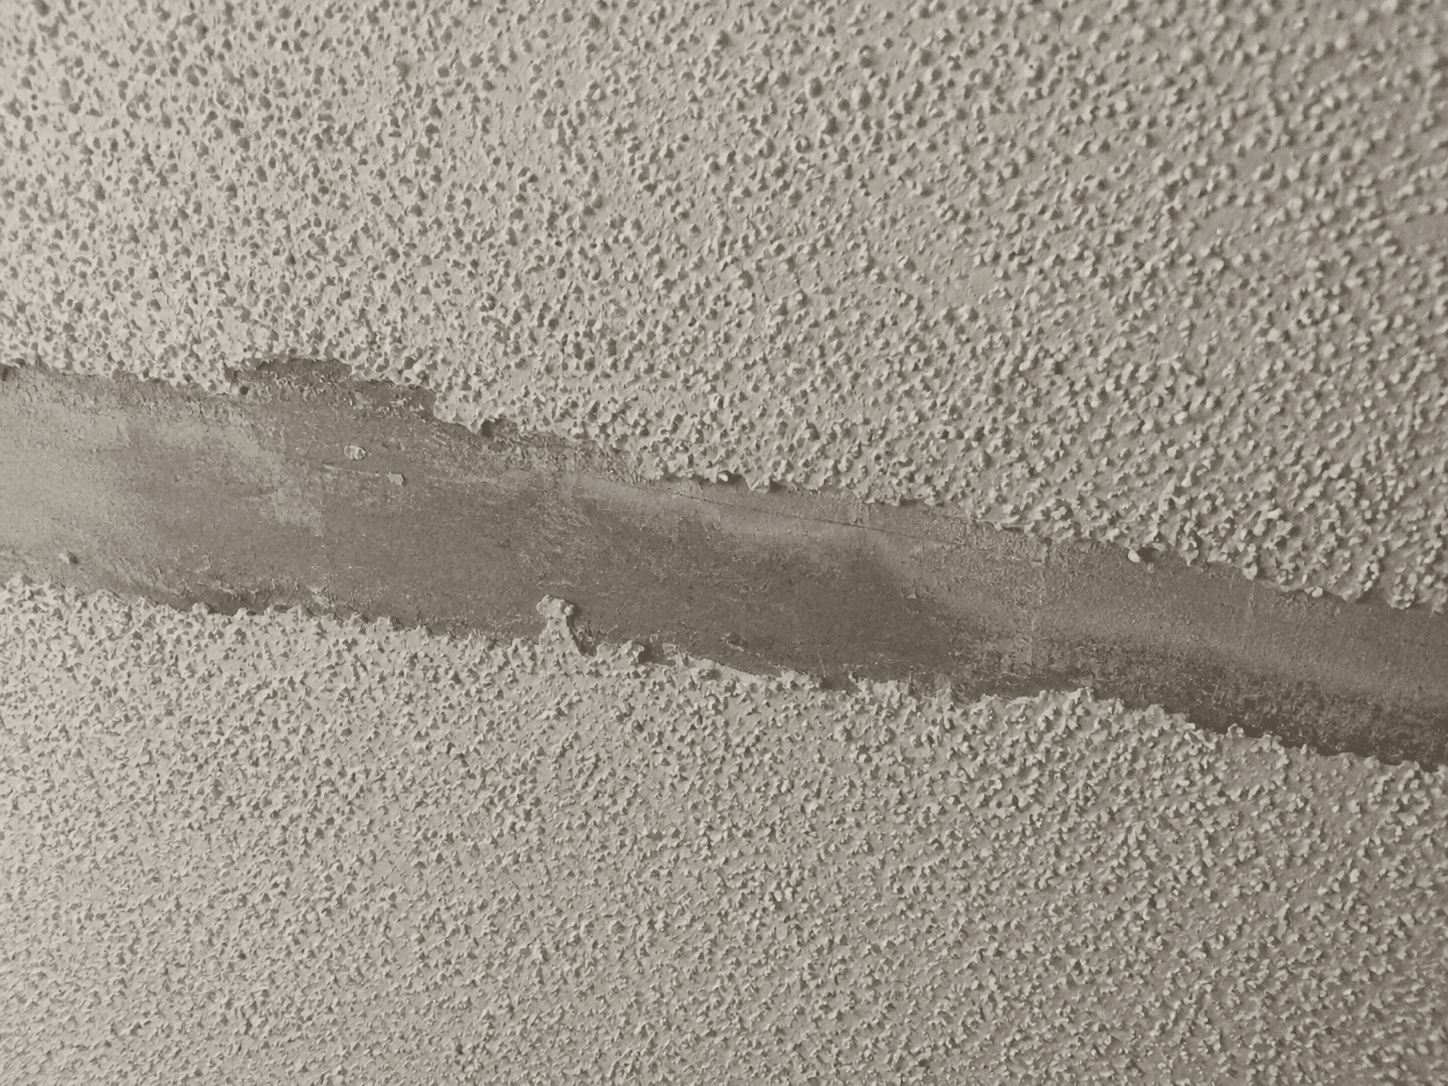
Source: Reno Quotes
Once the ceiling tests negative for asbestos (and for lead, if it's painted in an older home), wet scraping is the standard DIY method. Water softens the texture so it comes off with less dust and less damage to the drywall underneath.
Tools and Materials
Item | Purpose |
Garden sprayer or spray bottle | Mists water onto the ceiling |
Wide scraper (10 to 12 inches) | Removes texture in large passes |
Putty knife | Scrapes corners and around fixtures |
Plastic sheeting and painter's tape | Protects floors and walls |
Canvas drop cloth | Absorbs water dripping onto the plastic |
Respirator, safety goggles, and gloves | Protect your lungs, eyes, and hands |
Stable ladder or scaffold | Gives safe access to the ceiling |
HEPA vacuum and heavy-duty garbage bags | Handle cleanup without blowing fine dust back into the room |
Joint compound and sanding blocks | Repair gouges after scraping |
Step 1: Clear and Protect the Room
Remove as much furniture, bedding, and window covering as you can, and take down ceiling fans and light fixtures. Turn off the power to any fixtures at the breaker before you start. Cover the floor with plastic sheeting taped to the walls, then add a canvas drop cloth on top to absorb water and keep the floor from becoming slippery.
Step 2: Mist a Small Section
Lightly mist a section of about 4 to 6 feet with water, adding a few drops of dish soap to help it soak in. Use a light mist: too much water can soak the drywall and damage it. Wait about 15 minutes, then test with your scraper. If the texture doesn't come off easily, mist again and wait another 15 minutes.
Step 3: Scrape in Small Sections
Hold the scraper at a low angle and work in small sections, keeping the next section moist as you go. Start by scraping a strip around the edges of the ceiling, then work inward. Use the putty knife for corners and around fixtures, and avoid digging the blade into the drywall, since gouging creates more repair work later.
If the drywall paper or joint tape starts to lift, the ceiling is too wet. Let it dry slightly before continuing.
Step 4: Clean Up and Repair the Surface
Once the texture is off, wipe the ceiling with a lightly dampened cloth to remove dust, and roll up the plastic sheeting with the debris inside. Use a HEPA vacuum for remaining dust: a standard shop vac blows fine particles back into the air. Let the ceiling dry completely, then fill gouges with joint compound and sand them smooth.
Step 5: Prime and Paint
Apply a drywall primer before painting, since bare drywall and fresh joint compound absorb paint unevenly. A flat ceiling paint hides minor imperfections better than one with more sheen.
Wet Scraping, Dry Scraping, and Other Removal Methods
Wet scraping is the most common approach, but it isn't the only one. Here's how the main methods compare:
Method | How it works | Best for | Drawbacks |
Wet scrape | Mist, wait, then scrape | Unpainted texture that tests negative for asbestos | Messy, and water can damage the drywall if overused |
Dry scrape | Scrape without water | Small areas where water could cause damage | Much harder and creates more dust |
Chemical stripper | Apply a stripper, then scrape | Painted texture | Extra cost and more ventilation needed |
Cover with drywall | Screw new drywall over the texture | Badly damaged texture, or asbestos ceilings when installed by a qualified contractor | Lowers the ceiling slightly and requires drywall finishing skills |
Skim coat | Apply joint compound over the texture | Painted or lightly textured ceilings | Labour-intensive to get a smooth finish |
What if the popcorn ceiling has been painted?
Paint seals the texture, so water can't penetrate it, and scraping becomes much harder. Painted popcorn often comes off unevenly, leaving a two-toned ceiling where paint and texture have separated in some areas but not others.
Professionals charge more for painted texture for the same reason: in Toronto, unpainted removal costs about $3 to $4 per square foot, compared with $6 to $8 for painted popcorn. For a DIY project, a chemical stripper may help the water get through, but on a ceiling with several coats of paint, skim coating or covering it is usually less work than scraping. Popcorn sprayed directly onto concrete, common in condo towers, is also usually skim coated rather than scraped.
How much does popcorn ceiling removal cost in Canada?
Popcorn ceiling removal costs about $3 to $7 per square foot on average in Canada, according to HomeStars. The final price depends mostly on the level of finish, whether the texture has been painted, and whether asbestos is present.
Cost by Service
Service | Typical cost |
|---|---|
Scraping only, without finishing | $2 to $6 per sq ft |
Removal, skim coat, sanding, primer, and paint | $6 to $10 per sq ft |
Painted popcorn removal | $6 to $8 per sq ft |
Asbestos testing | $250 to $850 |
$8 to $20 per sq ft, before refinishing |
Regional Price Examples
Region | Project | Typical cost |
Toronto and the GTA | Single room, full finish | $1,995 and up |
Toronto and the GTA | Whole house, full finish | $7,000 to $13,000 and up |
Toronto and the GTA | 1,500 sq ft house, unpainted texture | $4,000 to $6,000 |
Metro Vancouver | Removal, skim coat, and repaint | $6 to $12 and up per sq ft |
Metro Vancouver | One-bedroom condo, removal, skim coat, and repaint | $6,000 to $9,500 |
DIY vs. Professional Cost
Doing it yourself costs mainly the tools and materials: a sprayer, scrapers, plastic sheeting, protective equipment, joint compound, primer, and paint. The trade-off is time and finish quality. Scraping is only the first step, and getting a ceiling smooth enough to paint often takes more skill than removing the texture.
When to Hire a Professional
Signs You Should Hire a Pro
Your home was built before 1990: The ceiling should be professionally tested, and abated by a qualified contractor if it contains asbestos.
The texture has been painted: Painted popcorn takes far more effort and often needs skim coating.
The ceilings are high or vaulted: Working on scaffolding over a wet floor is risky.
You want a perfectly smooth finish: A smooth ceiling under strong light requires drywall finishing skills most homeowners don't have.
You have several rooms or a whole house: Professionals work faster and bring dust containment equipment.
What a Professional Quote Should Include
A good quote spells out asbestos testing, containment and protection of the home, the removal method, the level of finish (scraping only, skim coat, or a perfectly smooth finish), primer and paint, and cleanup. Many contractors also charge a minimum for small rooms, since setup and cleanup take the same time regardless of size.
Prices for the same ceiling can vary widely from one contractor to another, mostly because of what's included in the finish. Comparing several detailed quotes is the best way to get a smooth ceiling at a fair price.
Covering a Popcorn Ceiling Instead of Removing It
Covering the ceiling avoids scraping, which makes it a good option when the texture has been painted many times or the ceiling is badly damaged. If the texture contains asbestos, covering it is still a job for a qualified contractor, since fastening anything through it can release fibres.
Drywall Over the Texture
New drywall can be screwed through the popcorn texture into the ceiling joists. Use 1/2-inch sag-resistant ceiling board rather than thinner sheets, which can sag between joists. Locate the joists first, then tape and mud the seams and finish the new surface like any drywall ceiling. The result is a new, smooth ceiling, though it requires drywall finishing skills and lowers the ceiling slightly.
Ceiling Planks or Tiles
Planking, paneling, or ceiling tiles can be installed over the existing ceiling for a different look. They hide the texture without the dust of scraping or the finishing work of drywall.
Skim Coating Over the Texture
A skim coat of joint compound can cover the texture and create a smooth surface. In Vancouver, professionals typically charge $8 to $12 or more per square foot for skim coating, and it's often the preferred option for painted popcorn or concrete ceilings.
What to Expect Under the Popcorn Texture
Popcorn texture was popular partly because it hides surface imperfections. Once it's gone, the ceiling underneath is rarely ready to paint.
Common Imperfections After Removal
Builders often left ceilings rough before spraying the texture, so expect visible seams, joint tape, patches, and pockmarks. Scraping can also leave gouges, especially if the texture was dry or the scraper was held at a steep angle. Most ceilings need at least some joint compound and sanding before primer and paint.
Why Lighting Reveals Every Flaw
Direct natural light, especially from a window close to the ceiling, shines across the surface and exaggerates every bump and dip. If a room gets strong side light, a full skim coat is often needed for a truly smooth result. If you'd rather not chase perfection, a light knockdown texture hides imperfections while still looking more modern than popcorn.
A Safe Popcorn Ceiling Removal Starts With a Test
Popcorn ceiling removal is a realistic DIY project when the texture tests negative for asbestos: mist small sections, let the water soak in, scrape gently, then repair, prime, and paint. In any Canadian home built before 1990, testing comes first, and a positive result means leaving the ceiling intact or hiring a qualified contractor to remove or cover it.
Painted texture, high ceilings, and the finishing work needed for a smooth result are where most DIY projects get difficult. Professional removal typically costs $3 to $7 per square foot in Canada, and more for a full finish in major cities.
Popcorn Ceiling Removal FAQ
What is the easiest way to remove popcorn from a ceiling?
The wet scrape method is the easiest for unpainted texture. Lightly mist a small section with water, wait about 15 minutes, then scrape it off with a wide scraper, working section by section.
Is it worth removing a popcorn ceiling?
For many homeowners, yes: a smooth ceiling looks more modern and brightens a room. Since a full-finish job can cost $6 to $10 per square foot in major cities, compare that cost with covering the ceiling or leaving it in place.
Can popcorn ceilings be smoothed?
Yes. You can scrape the texture off and skim coat the ceiling, or apply a skim coat of joint compound directly over the texture, which works well for painted popcorn.
How can I tell if my popcorn ceiling has asbestos in it?
You can't tell by looking at it. A lab analysis of several samples is the only way to know, and any Canadian home built before 1990 should be tested before the ceiling is disturbed.
How long does popcorn ceiling removal take?
A professional crew typically completes removal, skim coating, and repainting in a condo in 2 to 4 working days. A DIY project usually takes longer, especially when repairs and drying time between coats are included.
Looking for something else?
Related articles
The latest industry news, interviews, technologies, and resources.

Léa Plourde-Archer
•29 Oct 2026
Proper attic insulation is essential for improving your home's comfort and reducing heating and cooling costs. Across Canada, where temperatures can vary significantly throughout the year, choosing the right insulation can make a considerable difference in your energy consumption.
Editorial Team
•02 Dec 2024
Dreaming of a cozy, fireside corner for the winter, but one without the drawbacks of fuel oil or wood? Electric fireplaces have made your dream a reality. Normand Hamel, Poêles et Foyers Rosemont, gave us a snapshot into his thoughts on the matter:

Editorial Team
•25 Sep 2024
Ceramic tile flooring has a slew of advantages. Not only is it a resilient and long-lasting material, but it also requires minimal maintenance and is likely to increase the value of your home.
Editorial Team
•09 Sep 2024
Choosing an efficient heating solution shouldn’t be taken lightly. Prior research is super important to ensure you’re choosing an appliance that meets your home’s heating requirements while maintaining reasonable energy expenses. Are you looking for an effective heating solution, yet uncertain about the ideal choice? Check out our guide to gain insight into the various devices, features, and price ranges.

Editorial Team
•11 Oct 2024
Lacking in the idea department when it comes to choosing tiles for your tiny bathroom? If you manage to do it right, it could look a lot more spacious than it actually is. How can you go about choosing the perfect, size-appropriate tile for a bathroom? What colours and patterns can make a room appear bigger? Every decision must be guided by the room’s square footage to maximize comfort and aesthetics.