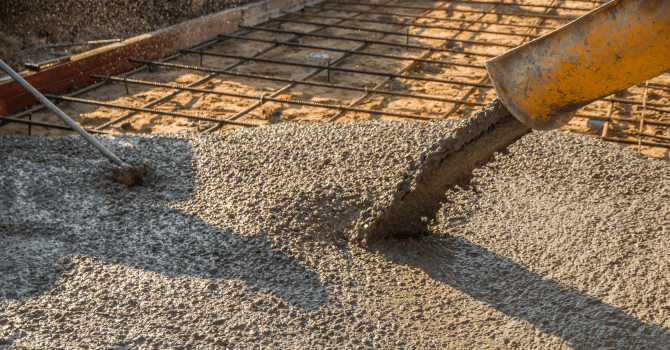
Whether for interior or exterior work, knowing how to pour a concrete slab is vital for anyone wanting to carry out major home renovations. This process can be a bit tricky, especially since you have to follow certain steps to a T, otherwise, the slab could crack prematurely.
Note that, to lay a concrete slab, you don’t need a concrete mixer, you can mix it manually. However, don't hesitate to call in a professional who'll be able to master both techniques to guarantee high-quality work.
Planning to pour a concrete slab on your property and wondering how to go about it? RenoQuotes.com sums up the process in 5 easy steps!
The 5 Fundamentals of Pouring a Concrete Slab
1. Prepare the yard for the concrete

Source: Canva
First, you'll need to clear the area where you want to pour the concrete. To ensure your slab will stand the test of time, the ground on which it's poured must be solid and stable. Therefore, make sure to remove anything that could hinder the concrete from properly setting, such as shrubs, grass, or pebbles. You should also make sure that the ground is completely exposed.
Next, measure the area and mark out the spot where the concrete will be poured. This step is done by staking each corner of the designated area and then connecting each picket with a string line.
2. Dig the ground

Source: Canva
The second step in creating your concrete slab is to dig up the ground on which it'll lay. If you need to dig a relatively small area, you can do so using a shovel. However, if you're planning on excavating a larger piece of land, you'll need to get ahold of the right equipment first. But, keep in mind that in order to dig out a relatively deep section, you'll need to pour a layer of gravel into the excavated area before pouring the concrete.
Generally, if you plan on laying a wire mesh to reinforce your slab, it is recommended that you add a roughly 8- to 10-cm-thick layer of gravel. You'll also need to gauge the depth of your mesh and to that, consider the concrete layer that’ll be subsequently poured atop. Basically, a concrete slab of 15 cm in depth is best, so once you’ve made the necessary calculations, you'll know how deep to dig.
Are you looking for experts to pour a concrete slab?
Fill out our form to receive quotes from certified contractors!
3. Set the concrete slab’s formwork
Source: Canva
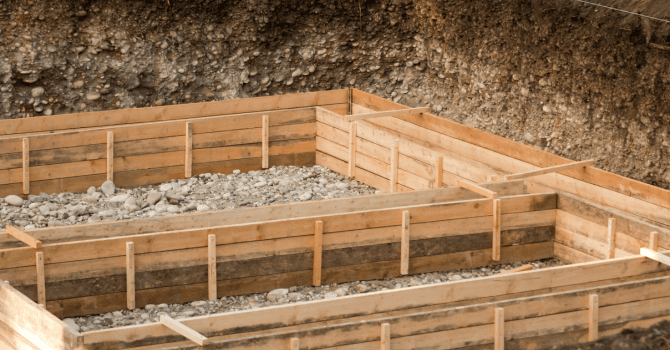
The formwork is neither more nor less than the lining that defines the slab and holds the concrete in place until it's completely dry. Typically, the formwork is made of wood. It's fastened with nails, which are hammered into place around the area that’ll be cast. This formwork will also serve as a reference when pouring your concrete thereafter.
As for the formwork itself, a few things should be verified: the corners of your formwork should meet at right angles and the wooden planks used should be at least 27 mm thick so that they can withstand the pressure generated by the concrete when poured. The planks should also be level with the surface of the concrete slab.
In the event that your concrete slab won't be covered by anything, you'll have to consider rainwater runoff. Therefore, the formwork will have to have a slight slope to allow water to run off. In the same way, it'll be important to think about temperature fluctuations, which cause concrete to swell. Therefore, to prevent the concrete slab from expanding, it's best to install expansion joints, and these should be aligned on the same level as the formwork.
4. Lay down a wire mesh
Source: Canva
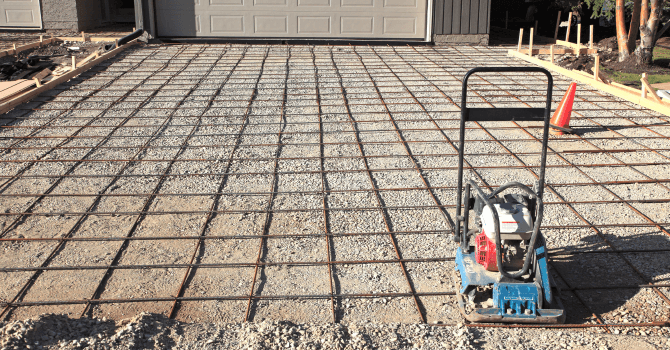
If your structure is designed to be load-bearing, you'll definitely have to reinforce your concrete with wire mesh or iron. If your structure isn't going to be load-bearing, then you can skip this step. Check with a contractor to be sure of the proper procedure. As for the mesh, it should be elevated. In most cases, there should be a clearance of at least 3 cm between the formwork and the mesh.
Note that the mesh is designed to prevent cracks from forming. And, it also reduces the chances of the concrete expanding. The wire mesh is laid down in a way to ensure that the concrete is kept in place in every direction, given that it'll considerably support the weight of the slab and, in turn, reinforce it. If you want to know how to repair a crack in your concrete foundation, check out our article: How to Repair Cracked Foundation Walls.
5. Prep and pour the concrete
Source: Canva
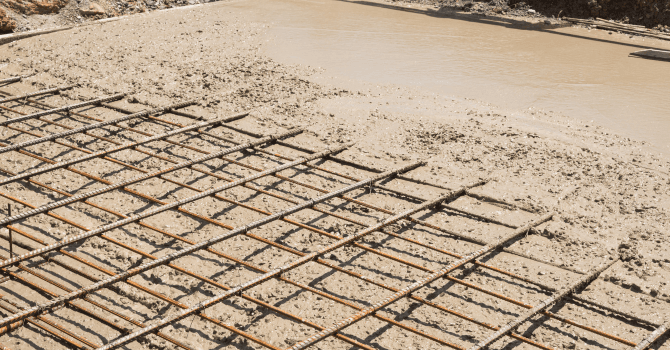
Concrete is made from a combination of cement, sand, and aggregates. Good quality concrete should contain one part cement, two parts sand, and three parts aggregates. Once added, mix a half-part of water to bind all these elements together.
You can mix your concrete either in a wheelbarrow or in a concrete mixer, assuming you have access to one. When pouring your concrete into the centre of your marked area, spread it with a rake. We then recommend that you level the concrete with a large 2-metre straightedge by dragging it across the formwork planks.
Then continue pouring and levelling the concrete as you go. Once the concrete is poured and levelled, smooth it out with a concrete float, making sure to do so in circular motions.
Wait at least 24 hours before walking on your slab. Before applying any kind of coating, you'll most likely have to wait several months. Also, don't forget about maintenance, as regular care will help maintain your slab over the years. To restore the surface every now and then, use water and a concrete-specific soap for surfaces. This’ll help restore its lustre.
You can also add colour to your concrete slab to match your home and the surrounding landscape. Note that the dye should be mixed in at the same time as the water is added.
Get 3 quotes for your concrete slab project
RenoQuotes.com can help you get quotes to pour a concrete slab. By submitting your project, we’ll put you in contact with top-rated contractors. Fill in the form on the homepage (it only takes a few minutes), and you will get estimates from trusted professionals.
Dial 1-844 828-1588 to speak with one of our customer service representatives.
Looking for something else?
Related articles
The latest industry news, interviews, technologies, and resources.

Amanda Harvey
•08 Nov 2023
Home renovation projects require plenty of research, careful planning, and detailed steps. Applying for a building permit is just one of the required necessities. Building permits cannot be overlooked, and depending on where you’re living, the forms, fees and documentation needed will vary. We’re here to offer a way to help you navigate fees for building permits in the city of Toronto.

Cynthia Pigeon
•05 Dec 2025
Are your floors no longer up to par? Time does take its toll on hardwood floors, oftentimes resulting in a dull finish and scratches that are difficult to hide.

Cynthia Pigeon
•08 Nov 2023
Are you looking to revamp your furniture or completely redesign a room? Repainting is often the least expensive way to give your furniture a bit of a spruce.

Cynthia Pigeon
•28 May 2024
Are you currently in the midst of planning your dream home but find yourself uncertain about the optimal ceiling heights? Look no further! In this comprehensive guide, we'll provide you with the essential information you need to make informed decisions regarding ceiling heights in your new abode.

Editorial Team
•05 Dec 2023
The dining room is the gathering place of the home and according to the definition associated with these words, must be convivial and accessible. Some use their dining room every day while others reserve it for special occasions. In either case, this room should be adapted to the needs and tastes of the occupants.