Window Well Installation: Why is it necessary and how to do it?
By Editorial Team
Updated on April 1, 2026

Water is a home’s number one enemy, so when the sill of a basement window is level with or just slightly higher than the lawn, the proximity of the ground can expose window components to soil moisture. This exposes your home to the harmful effects of the outdoors by increasing the risk of water infiltration.
A basement window requires additional protection to prevent premature damage. So when the window is low or located below ground level, it is strongly recommended to install a window well (also known as a light well).
Get Your Project Started Today
Submit your details and receive three free quotes from trusted contractors.
What is a window well? And what are the specifics of this type of installation? Read our article to learn more about it.
What is a window well and why should you install one?

Source : PBG construction inc
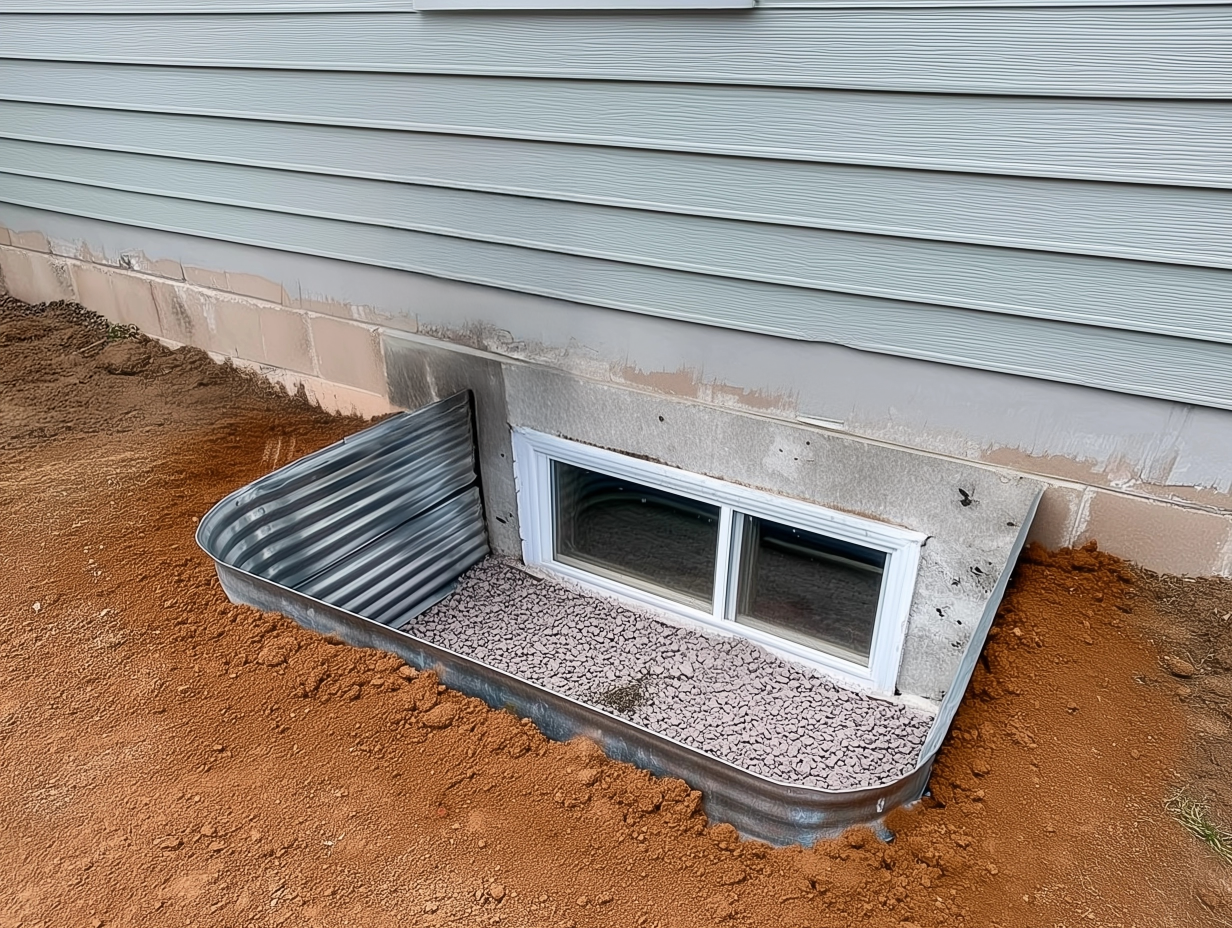
A window well is a protective barrier made of steel, stone, concrete, or wood that is attached to the foundation and serves to hold back the soil. This installation forms a light well designed to lower the ground level in front of a basement window, without affecting the grade of the surrounding area.
This helps prevent water infiltration through the window, which is why it’s important to leave at least 8 inches of clearance between the finished ground and the bottom of the window. You can also add a mesh cover to your window well to protect people and animals from falling in. Additionally, this cover helps reduce the buildup of leaves and debris inside the cavity.
A window well is essential to prevent water or moisture from collecting near a window that’s at or below ground level. It acts as a barrier to prevent any source of moisture that could lead to the deterioration of your home’s materials. Water infiltration increases the risk of mould, whose spores can cause respiratory issues in living beings.
A Proper Guide on How to Install a Window Well
Source : RenoQuotes
In addition to the requirements set by Quebec’s Construction Code, there are some best practices to follow if you plan to dig and install your own window well. Here are the tools you’ll need:
A shovel and a drill
A masonry bit
A ratchet wrench
Lag bolts
Washers and anchors
A flexible, non-perforated drainage pipe
A window well
Crushed stone
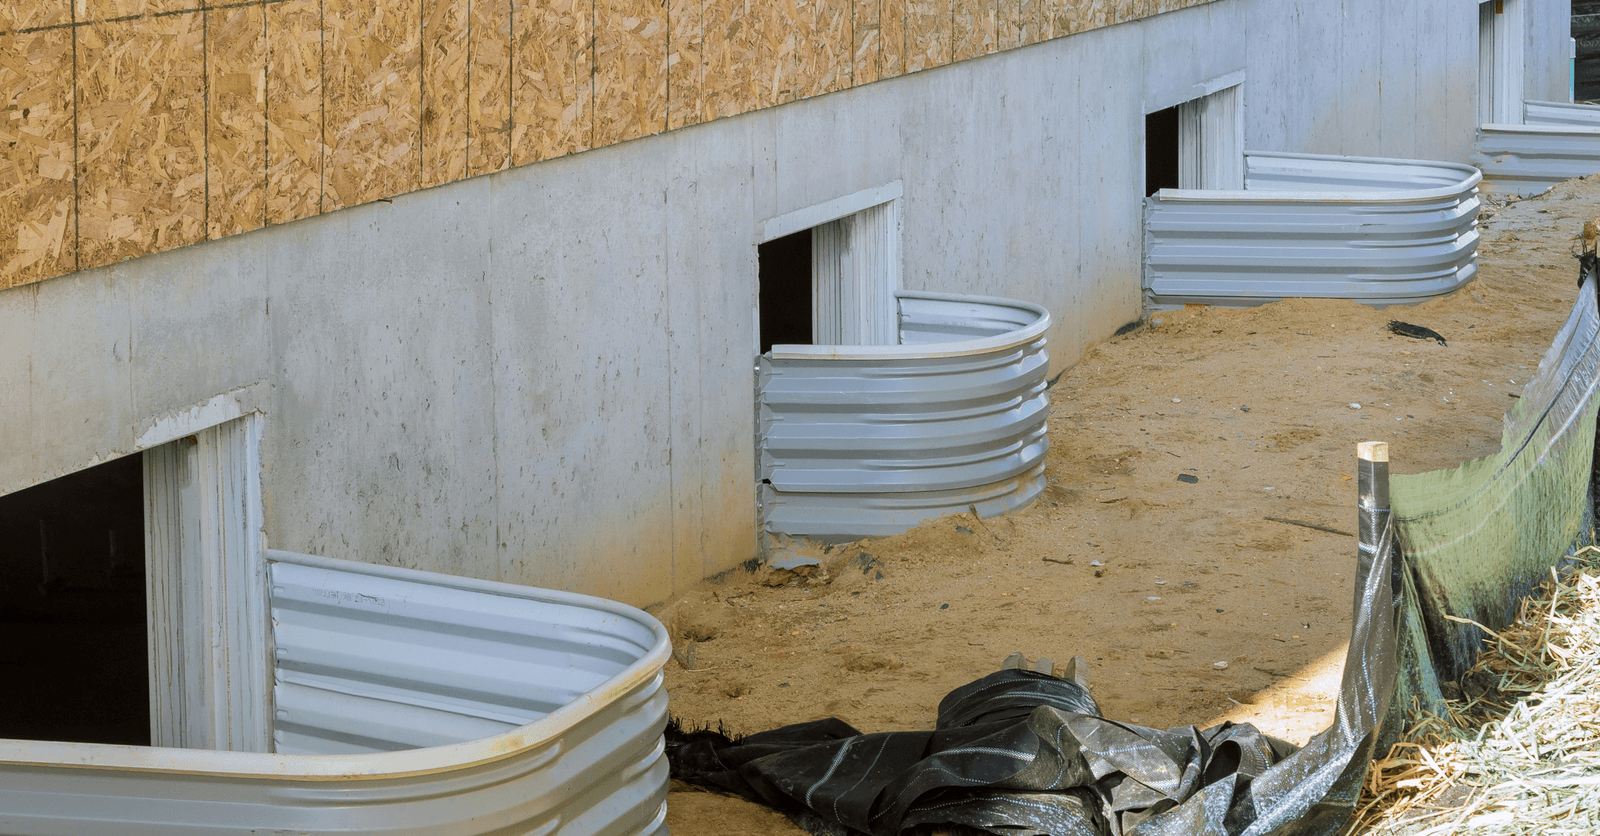
The first step—often the hardest—is to dig around the window to a depth of 10 to 14 inches below the bottom of the window. However, you must consider the window’s size to determine the exact depth to dig.
There should be a clearance of 8 inches on each side of the window. If the soil in the area is not granular or does not allow proper drainage, you may need to dig a pit for water drainage before installing the drainage pipe.
The window well must be installed above the finished ground level. It also needs to be centred with respect to the window. Then, lean the well against the wall and mark the holes for drilling.
Once the holes are deep enough in the concrete, insert the anchors before bolting the window well in place. The final step is to fill the bottom with crushed stone up to 6 inches below the window base. Add soil outside the well to create a slope for drainage.
After installation, make sure the interior of the well is level and that its edge isn’t protruding too much—this helps avoid tripping hazards. Finally, remember that your window well needs upkeep: remove leaves and any other debris that may collect inside.
Regulations to Follow When Putting in a Window Well
Following a 2015 update to Quebec’s Construction Code, any bedroom window that opens into a window well must be at least 760 mm above the ground (compared to 550 mm previously). This also applies to any window that opens to the outside.
Keep in mind that some municipalities may require even more clearance, so it’s best to check local regulations to avoid any surprises. These requirements are meant to provide enough clearance for an average-sized person to pass through if needed.
Basement window well drainage: how to install a drain?
Source: Canva
Since your window well will be made from the same material as your backfill, you’ll need to consider this during installation. If the backfill is not made from granular material, the bottom of the well must be properly drained.
To do this, install a vertical pipe at least 6 inches in diameter that runs underground down to the foundation drain at footing level. If the bottom of the well is less than 6 feet from the footing, it’s best to consult a professional to avoid damaging the foundation during freeze-thaw cycles.
Looking for more information about doors and windows? Check out our Guide to Renovating Doors and Windows.
FAQ About Window Wells
When should you install a window well for your basement?
A window well is necessary when basement windows are located below ground level. It prevents water and debris from collecting around the window and ensures proper lighting and ventilation. It’s also essential for meeting safety standards for emergency exit windows.
How should window wells be positioned?
Window wells should be placed around basement windows and slightly sloped outward to allow for proper water drainage. Make sure they’re installed at least 6 inches above the ground level to prevent infiltration.
How do you install a window well cover?
To install a cover, first measure your window well and select a compatible model. Place the cover over the well, making sure it fully covers the surface. Secure it with screws or fasteners to keep it in place, and ensure it can still be removed easily for maintenance or access.
How much does it cost to install a window well drain?
Installing a vertical drain pipe directs water toward the foundation drain and should be paired with an aggregate backfill at the bottom of the window well to support proper drainage. The cost typically ranges from $100 to $300.
Can I dig and install my own window well?
Yes, you can. Here are the steps to follow:
Dig a trench around the window, reaching the base of the foundation.
Install a drainage system on the bottom of the trench to drain water.
Fit the window well against the foundation and make sure it’s level.
Secure the window well to the foundation with fasteners or screws.
Backfill the trench with compacted soil, allowing for a slight slope to facilitate water flow.
Test the drainage by pouring water around the window well, checking to see if the water flows away from the foundation.
Looking for something else?
Related articles
The latest industry news, interviews, technologies, and resources.

Léa Plourde-Archer
•07 Nov 2024
At first glance, the role of a general contractor can seem vague. Acting as a conductor of sorts for home renovation projects, general contractors are responsible for ensuring the successful completion of the project, making sure that the whole process runs smoothly.

Karine Dutemple
•08 Nov 2023
The exterior of a home has much more than an aesthetic function. Although its impact on the appearance of a property and its façade is considerable, other factors come into play when replacing it. Indeed, it is essential to choose a siding that also has soundproofing and insulating properties.

Cynthia Pigeon
•31 Mar 2025
Knowing when and how to remove snow from your roof can be tricky, as several factors influence snow accumulation and weight. An excessive load can put your home's structure at risk, but clearing snow too early or too often can also cause unnecessary damage.

Cynthia Pigeon
•08 Oct 2025
Are you looking for a rewarding and worthwhile job? Looking to start a new career and are still debating as to which trade would suit you best? Why not opt for electrical power line installation? Do you know less than nothing about the trade but are still jumping in with both feet? Well, check out this article to learn more about it!

Editorial Team
•18 Mar 2026
Are you thinking about painting the outside of your house and wondering how much it would cost you? What factors are likely to affect overall costs, and how should you calculate your budget? This article will guide you through the different aspects of your project, from average prices based on the size of your house to additional factors that may affect the overall cost. We’ll also take a closer look at the types of paint to choose from, the necessary tools and equipment, and additional fees, such as permit acquisition and tool or equipment rental.