Chronicles of a Home Renovation Project: Starting Things Out
By Léa Plourde-Archer
Updated on November 8, 2023
August 25th, 2011, we finally got the keys to our coveted condo. This condo is located in an old building in the Rosemont district (Montreal) and was built in 1926. It's a far cry from the modern condo developments where you can choose the finishes and that were built less than two years ago.
These old buildings still offer several advantages, including an architectural charm that is difficult to reproduce, as it is not necessarily profitable according to the real estate developers who currently dominate the market.
It was also one of the elements of this architectural design that first caught our attention: a gorgeous built-in glass cabinet. The wardrobe, the high ceilings, the wooden floors and the large windows were very convincing and we quickly decided we were going to like this place.
Being young and naive, we signed the papers and a few weeks later the apartment was ours!
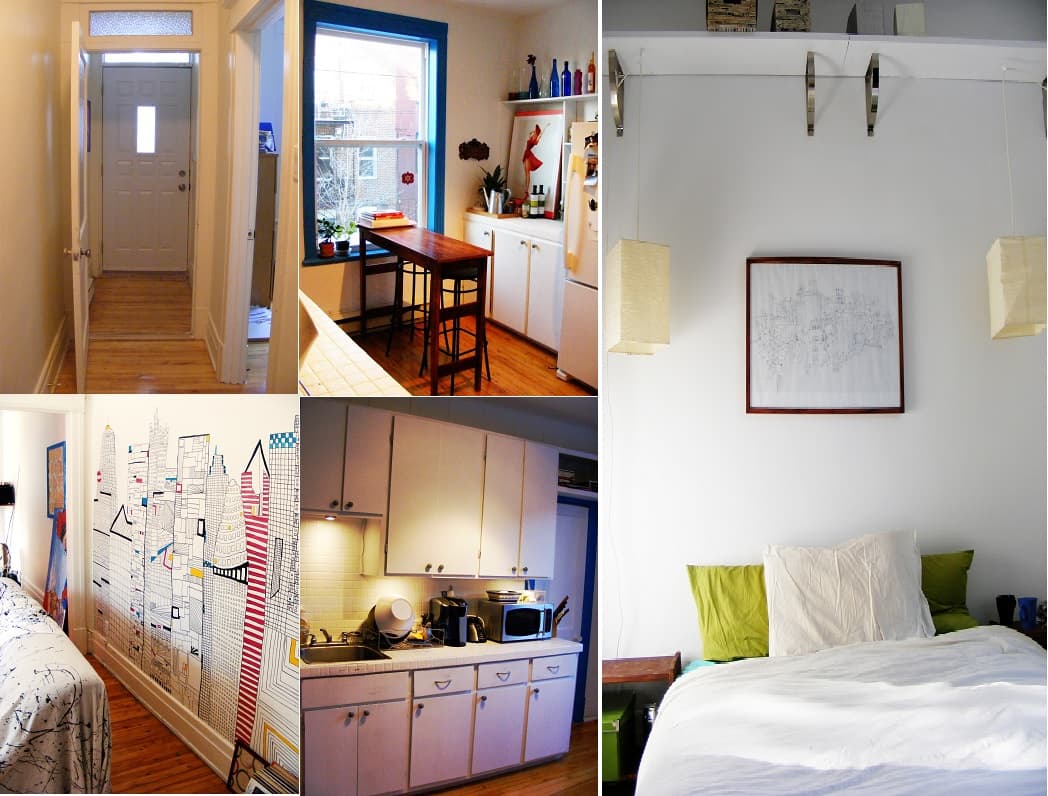
A few images of our condo in 2012, with DIY decor
Why carry out the work now?
In the following years, we didn't have enough money to carry out any renovations. Therefore, we stuck to a few DIY projects (removing a wall, sticking floor tiles by hand, painting a mural, changing the door handles in the kitchen) to make this place to our liking.
With the help of a neighbour, we also replaced the countertop, as the people who had renovated the condo before we bought it had the odd idea of painting the tiles. Therefore, the surface was very hard to clean and quite worn out. For a few hundred dollars, we replaced the old tiles with new ones that are easier to clean.
Finally, about three years ago, we redid the floors in the kitchen and dining room.
Nowadays, we are about to renew our mortgage. Our financial situation is more stable and we can finally set aside funds to carry out a large-scale transformation project.
Contractors should start working in January, but to make sure things move along, we launched the process a few weeks ago.
Dear readers, we are going to carry on with this series throughout the work in order to share the different steps of the project, from start to finish. This first article sets the table and presents the first steps we have already taken to move the process forward.
What renovation projects are we planning to include?
When we bought this place, we were in our early twenties. Our lifestyle and financial situation were very different back then. We furnished and laid out the condo along the way, always on the lookout for affordable materials and decoratives accessories.
Almost ten years later, our lives have changed quite a bit. If everything goes well, we will soon have kids, so this home has to become much safer and more efficiently designed.
To achieve this, we are going to carry out a drastic transformation of most of the rooms in the condo. Here is a general view of the current room layout plan:

And here is a look at the plan created by the interior designer:

As you can see, there are important differences between the two layouts! Some rooms like the living room and the second bedroom are moved elsewhere, whilst others are made bigger. Such is the case with the bathroom, as the current layout is too small to host a washer/dryer.
We could live with a tiny European washing machine when we were young but with kids, a "normal" sized appliance will be necessary. We will recuperate the storage space that is located in the kitchen. In any case, this closet is not optimized at the moment and we mostly use it to store objects that are seldom used. It will be easy to move them elsewhere.
We will also make the small main bedroom much bigger by creating a double room with an opening towards the first room. This space will become a creative workshop that doubles as a walk-in closet. Right now, we are lacking in storage, so this room will be very useful, especially so we can finally put all our clothes in the same place! Right now, our clothing is stored in 4 different places, which is highly impractical on a daily basis.
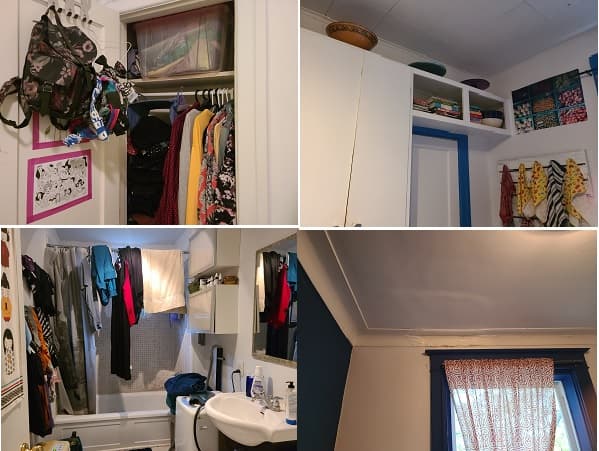
A few examples of issues with the current layout (1- the small closets, 2- high storage that is not accessible, 3- not being able to have a dryer, 4- a few bumps in the wall)
Here is a non-exhaustive list of the work we are planning to carry out:
IN GENERAL (RENOS THAT WILL BE CARRIED OUT IN MORE THAN ONE ROOM)
Baseboards at the bottom of the wall: remove the wiring and possibly remove the mouldings
Installing a wall-mounted heat pump
Sand and varnish all the wooden floors (2 rooms, walk-in, hallways)
Repaint all the walls in white (and make small repairs on the walls)
Ventilation in the kitchen (hood range) and bathroom + toilet
Redo the electricity and add new electric baseboards + new wall outlets
Install the water heater in the crawl space
Ceilings in kitchen and hallway - change them (at the moment, they are covered in tiles, put a solid ceiling, maybe with built-in lighting)
Pass two ethernet cables (one towards the walk-in and another towards the living room)
ROOM BY ROOM
Entrance
Remove the second door and the wall structure
Workshop/Walk-in
Repair a wall (damaged)
Sand and varnish the floor
Bedroom
Create an opening between the bedroom and the walk-in
Sand and varnish the floor
Change the door
New bedroom (kids)
Remove the wall (with built-in storage) to make the room bigger
Build a wall (right now, it is open, see plan)
Install doors (sliding and french)
Hallway
Remove part of the wall structure where the door is between the bedroom hallway and the bathroom hallway
Toilet
Built new
The toilet is already in the right axe for installation
Add a tiny sink
New floor
Bathroom
Follow the plan except for the door that we will bring to the same level as that of the toilet
New floor
Ventilation
Window to be closed in (see plan) if possible
Install washer/dryer (see if we need to add drain, dryer exhaust)
Kitchen
Redo the whole kitchen including the floors, the ceiling, the backsplash
Install IKEA kitchen (precise plan not made by designers)
The hood range must be connected to outside the home (not done right now)
Create opening (either 48 inches or a full wall if not loading bearing)
Move the electric panel to put it on the other side of the wall
Quartz countertop or similar (open to suggestions)
New ceramic floor (terrazzo style, probably big tiles)
Install new backsplash
Plumbing for the sink will have to be moved to the other wall (that will be connected to the living room)
Living room
Installer nouvelle fenêtre sur le mur du fond
Install new window on the back wall
Redo part of the ceiling (remove the tile part)
A few finishing touches
Building other pieces of furniture (walk-in closet, hallway storage)
Lighting in hallway and entrance
What have we done so far to move forward with the renovation project?
We started talking about this project a few months ago. At first, we thought about buying a house instead of staying here. However, with the real estate market being how it is, buying a home in Montreal, especially in the Rosemont area, is not very accessible.
Knowing that children can very well spend their first years in an apartment, we decided to renew our mortgage here and to transform the rooms to better suit our needs.

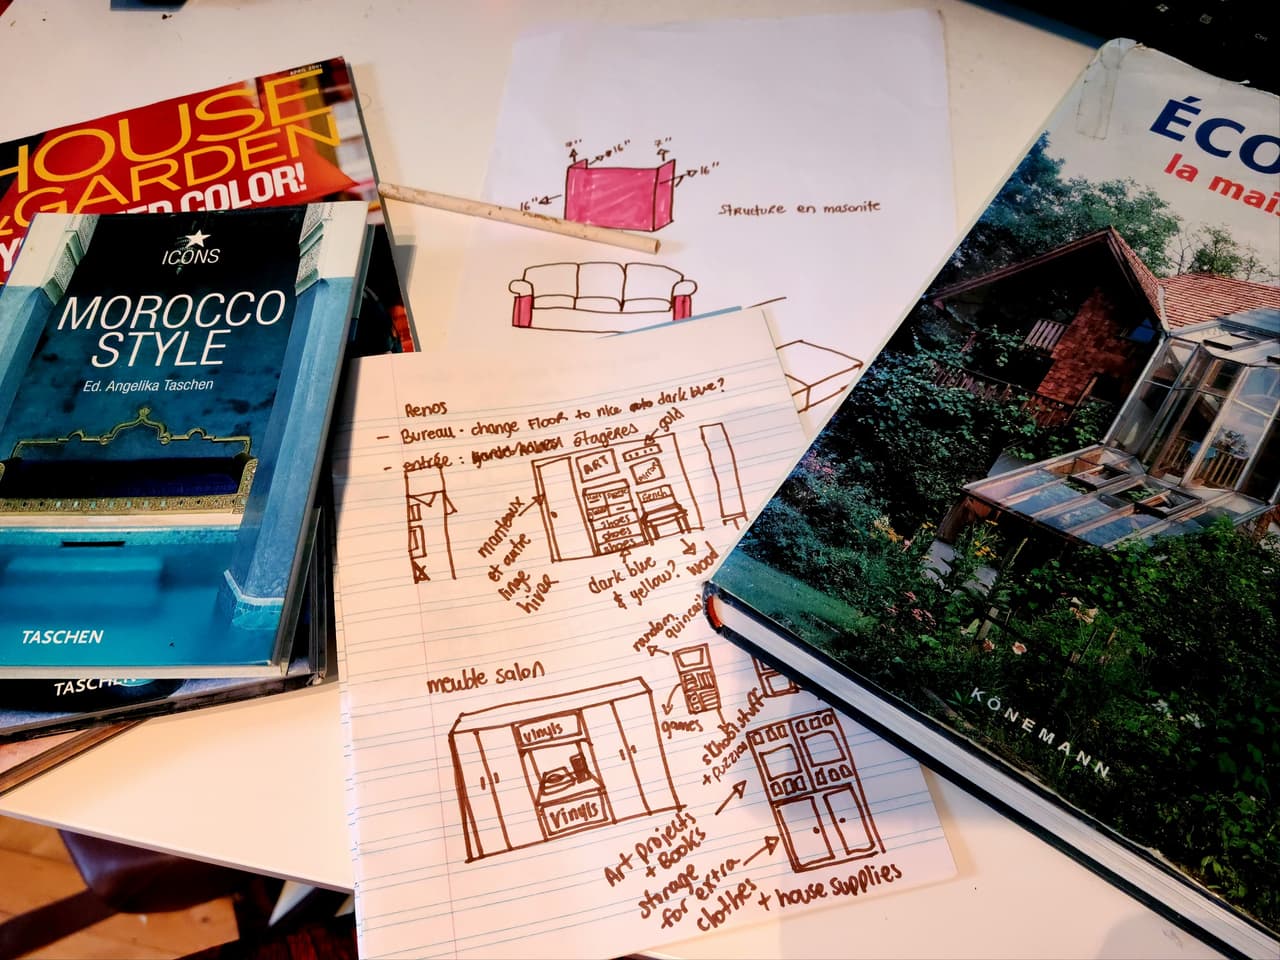
Our renovation plan created with The Sims
Early on, we had fun creating plans using the game The Sims, in order to evaluate how doable our project was in terms of layout. Next, I headed to Pinterest to gather a few ideas.
Next, we decided to hire an interior designer in order to benefit from the expertise of a person who is not in his first housing transformation project! As I said before, I plan to cover this topic in more depth in an article, but please know that we are very happy to have worked with her.
Without her, we would probably have wasted a lot of time and money in addition to following a plan that didn't make much sense. While taking into account our desires and preferences, she was able to create a plan that departed quite dramatically from our first ideas, but which was much more practical and enjoyable in the end.
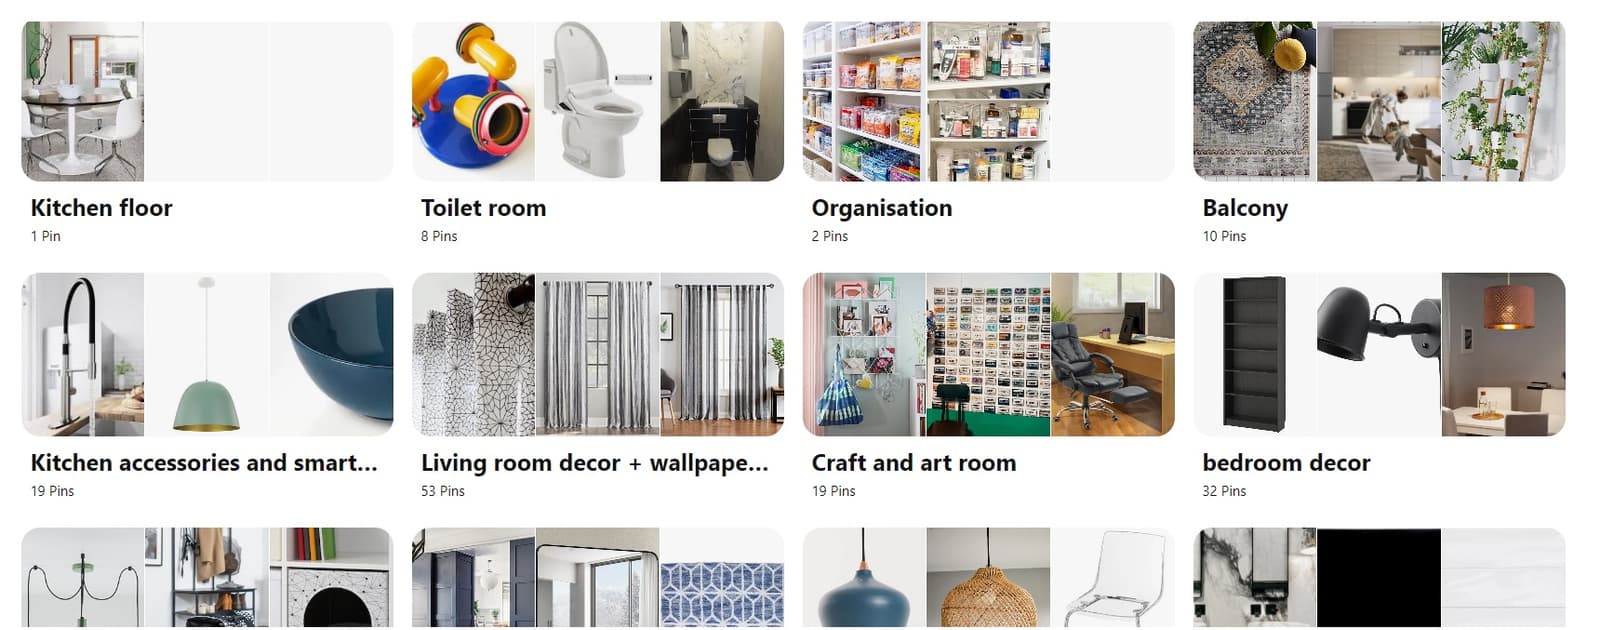
A few images from our Pinterest account
Buying the first materials and decorative elements
Because I was so eager to launch the project, I started imagining the decor and wanting to buy certain objects and materials without waiting. I bought carpets, a duvet cover, storage boxes and other random knick-knacks for our decor.
I must admit that I may have done this a bit too quickly! In the meantime, we have changed the layout of the rooms and even the colours we have chosen for the decor. Some objects didn't match these new concepts at all, so I had to try to find a new place for them. It is now too late to send them back to the store where I bought them.
A word of advice: calm your enthusiasm when it comes to making purchases for a renovation project that will begin in a few months! Things have time to change, and you could waste money. Since large-scale renovations can get expensive, find ways to save where possible!
First impressions about meeting contractors
We've started meeting with contractors, so over the next few weeks, we will be able to compare the quotes we receive. The first meeting went very well. The contractor was friendly, open to our ideas and seemed experienced. In the upcoming weeks, we will meet with other contractors to compare quotes.
This is the end of our first article in a series that will have us sharing the steps of a renovation project. In the next article, we will talk about the role of an interior designer.
If you haven't read the other articles in this series, click here.
Get quotes for your home renovation project
RenoQuotes.com can help you get quotes for your home renovation project. If you submit your project to us, we’ll put you in contact with top-rated contractors. Fill in the form on the homepage (it only takes a few minutes), and you will receive quotes from companies that are specialized in home renovations.
Dial 1-844 828-1588 to speak with one of our customer service representatives.
Looking for something else?
Related articles
The latest industry news, interviews, technologies, and resources.

Editorial Team
•08 Nov 2023
Working from home might feel alienating, but with today's modern technologies, more and more people are adopting this lifestyle choice. Whatever your reason for working from home, it doesn't have to be a bore. There are plenty of ways to breathe new life and get creative with your home office space.

Léa Plourde-Archer
•08 Nov 2023
What is radon ingress? How do you know if your house is affected by this type of problem and if so, what can you do about it?

Editorial Team
•08 Jan 2025
Industrial-style kitchens have been making the rounds for close to five years now. More popular than ever, their charm is no longer limited to city-centre lofts or condos, and are now also prominently featured in rural and suburban homes. Such kitchens are both cozy and authentic, functional and robust. Suffice it to say: there’s a little something for everyone.
Editorial Team
•31 Mar 2025
Are you considering elastomeric membrane roofing for your flat roof, but unsure about its benefits and potential drawbacks? In this article, we answer important questions like: What are the costs and lifespan of elastomeric membrane roofing? How does it compare to other materials, and how is it installed?

Amanda Harvey
•31 Mar 2025
Unanticipated noises in the wrong place at the wrong time can be jarring, stressful, and annoying. The best way to deal with it is soundproofing at the source.