
Have you just had an amazing summer vacation with your family aboard your recreational vehicle, loading up on memories? Well then, a quick inspection of your RV's roof might be in order.
The roof of a motorhome, which is left exposed to cold, heat, humidity, and other elements, may wear out and give way to its eternal nemesis: water. Since you surely don't want to end up with an RV with a rotten ceiling and walls, before you next plan to go on vacation, restoring the roof's waterproofing and liquid coating should be at the top of your to-do list.
Although on wheels, a motorhome isn't so different from a house: its frame is made of wood too. Considering all the potential points of entry located on an RV (skylight(s), plumbing, air conditioner, etc.), it's definitely not exempt from water infiltration. As the saying goes: Where there's wood and water, there's mould.
Naturally, a well-maintained roof can last for years, whether it's made of aluminum, rubber, TPO, or fibreglass. However, weather changes can cause the sealant to dry out and the seams to crack prematurely. Therefore, it's probably best to inspect this exposed area twice yearly and, if necessary, make any repairs using the appropriate products.
This is where a liquid-rubber coating can come in handy.

Source: Siggy Nowak - Pixabay
What’s a Liquid-Rubber Coating?
Such roof coatings are said to be liquid-applied roofing systems because they’re a liquid-based coating. They’re suitable for a variety of roofs (not only that of RVs) and adhere to several substrates such as brick, concrete, wood, PVC, and more.
This coating, applied with a roller just like paint, will cure and form a kind of rubber-like texture, which will then ensure that the roof is leak-proof. Also, it’s seamless and doesn't crack to prevent any water from seeping in.
This liquid coating is available in several colours and is easily applied. Ideally, it should be used at the beginning of the summer and before winter. It’ll provide added protection if it’s coupled with waterproofing strips placed around the roof's protruding features.
Most products available on the market here are manufactured in Canada. Therefore, they’re designed to withstand harsh weather conditions and extreme temperature variations. As a result, the products have a durability of about 15 years (don't neglect touch-ups and twice-yearly inspections). The finish will leave your RV looking shiny and brand new, while also protecting the roof from rust and minimizing air conditioning costs by sealing the entire surface.
Just to give you a ballpark figure, expect to pay something along the lines of $450 to $1,000 to obtain the necessary cleaning product prior to applying the coating, for caulking, and finally, for the liquid coating (NoxSilicone-55, Rexoseal, or any other well-known brand).
Are you looking for experts for your roofing project?
Fill in this form to be connected with top-rated contractors!

Source: bmacmolly - Pixabay
How to Apply a Liquid Roof Coating on an RV
First and foremost, to ensure a smooth and flawless result, either hire a professional or consult with an expert at your local motorhome dealership regarding your project. If you're more of a DIY person, clear 2 full days in your schedule to perform the inspection, make the necessary repairs and apply several coats of the liquid coating.
Monitor the weather! Rainfall will prevent you from applying the coating, while a hot day may end up being harmful to your health as a result of the sun beating down on an aluminum surface. Also, if the heat causes the roof to surpass 60 degrees, then the liquid coating shouldn't be applied.
Given that time, pollutants, and weather will have damaged your roof, the aluminum will be coated with slate, the rubber stained with limescale, the joints need replacing, and the liquid coating spread out evenly... there's really no need to tell you that wearing protective overalls, or used clothing, is best.
Furthermore, although your roof is sturdy, in actuality, it's relatively thin. Therefore, make sure to take necessary precautions when walking atop the roof and inspect the bottom of your footwear to ensure that nothing punctures nor damages the covering.
As for tools, you'll need a plastic scraper, rags, paint roller, and roller tray, along with the necessary cleaning products.
Thoroughly inspect the condition of all roof joints. If they're peeling, or chipping, appear flimsy, or if you find a gap, use the scraper to remove the joint coating to then replace it. If you experience resistance when attempting to remove the joint coating, use a heat gun to loosen up the product.
If additional repairs are required, remove the roof coating and replace the damaged structural wood. Otherwise, you're simply delaying further and bigger problems, which will come at a greater cost.
Disinfect the surface with a mould remover, then strip off all the caulking to prepare the surface for the new coating. Lastly, clean the roof with a degreaser designed specifically for the coating used, and allow it to dry completely. Ensure that all dirt, oil, etc. are removed, otherwise, your liquid coating won't properly adhere and your efforts will have been in vain.
Then, apply the liquid, leak-proof coating. Generally, the manufacturer suggests 2 to 3 coats. If you have any leftover coating, definitely go for a fourth! Once dry, use UV-resistant caulking, which adheres to aluminum, vinyl, and metal to go around the protruding parts of the roof and screw heads.
Now, your RV is waterproof and ready to hit the roads, as good as new!
Cover image source: Pexels - Pixabay
Get 3 quotes for your RV roofing project
RenoQuotes.com will put you in contact with 3 reliable contractors for your RV roof renovation project. Fill in the form on our homepage (it only takes a few minutes), and you will receive quotes from trusted professionals.
Dial 1-844 828-1588 to speak with one of our customer service representatives.
Looking for something else?
Related articles
The latest industry news, interviews, technologies, and resources.

Cynthia Pigeon
•13 Nov 2024
Nowadays, sheet metal is an alternative to asphalt shingles, which are used on sloped roofs. While the tendency is to limit the use of corrugated steel to garden sheds, garages, and other storage-type structures, it would be foolish to dismiss this type of roofing for your home.
Editorial Team
•13 Sep 2024
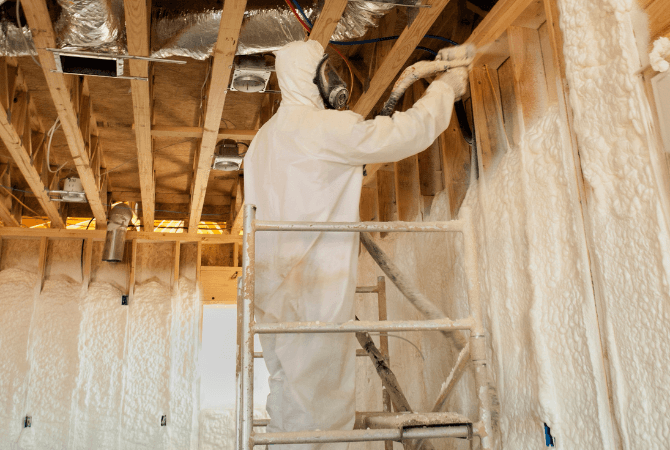
Foam insulation is a valuable product, especially since it’s lightweight and easy to install. It’s also an effective way to insulate walls and floors in your home. However little known, polyurethane foam is an amazing product that can very likely be a solution to many a problem. Since it’s particularly adhesive and effectively insulates, every year, this product enables Canadians to shield their residences from the harsh winter cold.

Cynthia Pigeon
•12 Jun 2026
Starting a new construction project or a major renovation in Quebec is often one of the biggest investments of a lifetime. Before the first shovel hits the ground or the first wall comes down, drawing up blueprints is one of the most important steps. Blueprints are not just drawings: they form the technical, legal, and aesthetic foundation of your future living space.

Editorial Team
•31 Mar 2025
Are you a homeowner with an oil-fueled heating system? Note that replacing this type of heating system comes highly recommended. If it’s money that’s standing in your way, rest assured, there are financial assistance programs designed to help you achieve your goal.

Editorial Team
•25 Sep 2024
Ceramic tile flooring has a slew of advantages. Not only is it a resilient and long-lasting material, but it also requires minimal maintenance and is likely to increase the value of your home.