Land and Soil Remediation: What Are the Key Project Steps?
By Editorial Team
Updated on July 25, 2025

Looking to undertake a land remediation project? Chances are, you have some questions regarding this sort of project, which entails a rigorous process.
This article details land and soil remediation procedures. What steps should you follow? How can you make sure your project unfolds as per environmental standards? This guide has all the information you need to carry out this sort of undertaking successfully.
How Does Soil Remediation Work? Step-by-Step Guide

Phase 1 - Environmental site assessment
The first step of a remediation project is identifying the potential risks associated with the contaminated land. Experts will head to the land site; they’ll also turn to aerial photographs of the land site, including geological and hydrogeological maps. To gather as much information about the land site in question, they’ll also submit an information request to the responsible parties or concerned authorities.
Doing so provides information about the land's history along with the types of businesses or buildings (factory, garage, or other) that have stood on said land for years prior.
By default, consulting land registration titles with the Land Registry can provide additional information regarding the land in question and operations carried out on it.
Note that while obtaining as much information as possible about a land site, experts will also seek out Fire Insurance Plans. On top of locating fire hydrants, these documents, which were formerly intended for insurance companies, provide information on building insurance and nearby high-risk installations. Although document production ceased in 1975, reports still provide valuable information regarding commercial operations that took place prior to said date on the concerned piece of land.
Naturally, commercial activities that are still carried out on-site will also be taken into consideration. Bear in mind that interviews should be done with land owners or tenants to ascertain all information that’s likely to predict the probability of soil contaminants.
Phase 2 - Environmental characterization
At this stage, the presence of soil contaminants will be confirmed or ruled out. To do this, experts must first locate underground infrastructures and collect soil samples, including surface water or groundwater.
These samples will be analyzed in a laboratory and the resulting data used to determine the exact type of pollutants found in the soil. Subsequently, recommendations will be made based on the contaminants identified and land specificities.
Now that the contaminants found in the soil or water have been identified, assessing the extent of the problem and carrying out what’s referred to as a soil "sampling pattern" will be paramount.
The square footage of the contaminated area will be determined, along with its depth and volume. At this stage, the site will be drilled in strategic areas.
Phase 3 - Contaminated site remediation
If a high concentration of contaminants is detected (exceeding the standards established by the Ministry of the Environment, Conservation and Parks), soil remediation will be mandatory. There are two techniques available: ex-situ and in-situ soil remediation.
With the former technique, remediation measures consist of removing any polluted soil or contaminated water. As for in-situ remediation, this method is designed to treat the soil without dismantling infrastructure or excavating the affected soil. Instead, soil remediation is done with a direct injection of a biological treatment or chemical oxidation. As a result of the product’s reaction to the contaminant, the latter will be destroyed and later transformed into salt, water, or carbon dioxide.
In-Situ or Ex-Situ: How to Determine Which Method Is Best to Remediate Bad Soil
To determine which method to use, one must consider a few parameters:
Nature of contamination: Organic or inorganic/soluble or insoluble
Location of contamination: Near the surface or deeper underground
Estimated land cleanup time
Soil composition (clay, sand, or silt)
Current land use (vacant, exploited, or built on)
How Much Does a Soil Remediation Project Cost in Canada?

The cost of remediating hydrocarbon-contaminated soil is between $35–$55 per ton, including removal and secure disposal at an appropriate treatment centre (hazardous waste site).
For heavy metal-contaminated soils, costs soar to over $200 per ton for removal and treatment using specialized equipment in a dedicated centre.
However, prior to decontaminating, determining whether said strip of land is actually contaminated is of utmost importance. This step is called land characterization, which costs between $1,000–$5,000.
Typically, the need for an assessment of the sort is identified upon the sale of a property, when a report by the appraisal firm handling the sale indicates an environmental risk, such as the land being near a service station.
Why Go Through a Soil Decontamination Process?
Land decontamination is a crucial step for ensuring the safety, health, and viability of any construction or landscaping project. Contaminated land can present a slew of significant environmental and health risks, affecting not only homeowners but the surrounding ecosystem. By undertaking soil remediation efforts, you’ll be sure that your land is devoid of harmful substances. Moreover, clean and healthy land increases the value of your property and paves the way to safe, sustainable future developments.
Want to learn more about land and soil remediation? Check out our article Contaminated Soils: 3 Reasons to Soil Test.
Looking for something else?
Related articles
The latest industry news, interviews, technologies, and resources.

Editorial Team
•11 May 2026
Who wouldn’t want to be able to use their pool, year-round, even during those really cold winter days? The only way to do so is to set up a swimming pool water heater. A wood-fired pool heater is an efficient way to warm up your pool water at a low cost. Here’s everything you need to know about this type of pool heater and the products retailed.

Léa Plourde-Archer
•08 Nov 2023
August 25th, 2011, we finally got the keys to our coveted condo. This condo is located in an old building in the Rosemont district (Montreal) and was built in 1926. It's a far cry from the modern condo developments where you can choose the finishes and that were built less than two years ago.
Editorial Team
•08 Nov 2023
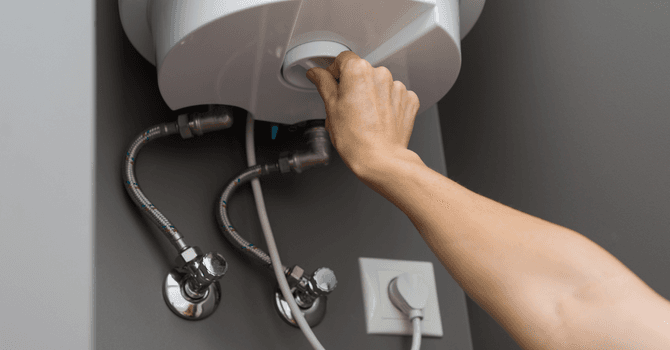
A standard water heater takes up a lot of space in a home since it has a hot water tank that supplies warm water needed for dishes, showers, sinks, and any other household needs. Also, the tank may run out periodically when the demand for hot water exceeds the tank’s water storage capacity.

Amanda Harvey
•29 May 2026
Home renovation projects require plenty of research, careful planning, and detailed steps. Applying for a building permit is just one of the required necessities. Building permits cannot be overlooked, and depending on where you’re living, the forms, fees and documentation needed will vary. We’re here to offer a way to help you navigate fees for building permits in the city of Toronto.

Editorial Team
•07 Apr 2025
In this first episode of Between Bricks and Binders, we welcome Marie-France, founder of Les Filles de la Construction. She shares her journey from a first-time renovator to building a network that empowers homeowners with the right knowledge and tools for their renovation and construction projects. We discuss how to choose the right contractor, avoid costly mistakes, and navigate the complexities of a renovation with confidence. A must-listen for anyone planning a home project!