Have you noticed the presence of traces of humidity in your crawl space? You're right to wince because a buildup of moisture is never good news.
Now, turn that frown upside down, because several solutions are available for you to remedy this situation. Without further ado, here they are!
Crawl Space Moisture Problem: 4 Quick Fixes
What causes moisture build-up?
It’s likely you’ve heard of the ventilation problems inherent to crawl spaces, one of the main reasons why the construction of this type of space under the house has become less and less popular. This is due to the fact that a large number of crawl spaces don’t have adequate ventilation. As a result, the moisture, which escapes from the ground in the form of water vapour and condenses, cannot be removed.
In addition, let's not forget to point out that a crawl space doesn’t offer as tight protection against water infiltration as a concrete foundation. Therefore, the risks involved are likely to be more pressing and difficult to remedy, thus contributing to an increase in the humidity level inside the crawl space.
What should you do with damp or mouldy materials?
If certain materials show signs of mould or feel damp, whenever possible, it’s recommended that you get rid of them. Obviously, it’ll be difficult to do this for the frame of your home. If the materials can be saved, remove all traces of mould from the wood, as there are several products on the market intended for this purpose. Be aware that the majority of the products available are over-the-counter and very easy to use. Just apply it to the surface of the wood, let it dry and wipe the surface with a damp cloth.
If the materials have rotted and cannot be recovered, call on the expertise of a professional to find out the steps to take to replace them, as well as more information on the costs associated with the work required to do so.
1- Install a vapour barrier
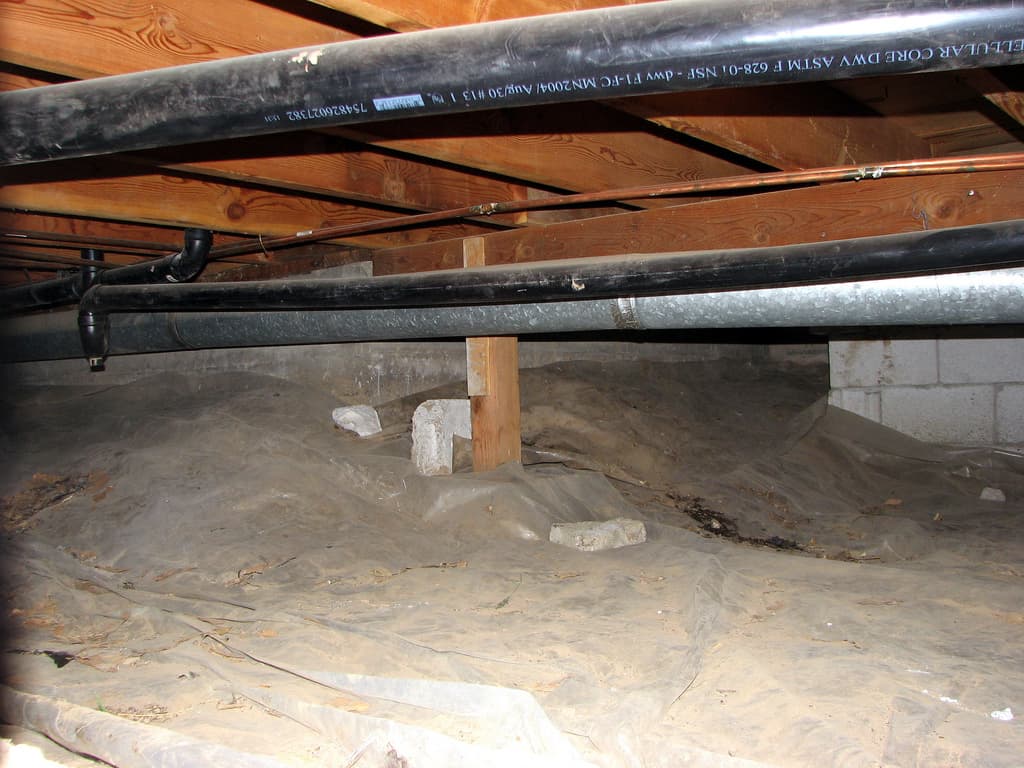
The first step in solving this annoying problem is to lay a polyethylene film on the floor, which will be able to contain any moisture that is emanating from the floor. For this installation to be effective, ensure that the vapour barrier rises to the base of the foundation. Then, make sure to seal each joint with adhesive tape suitable for attaching a vapour barrier (Tuck Tape or other similar tapes).
Another note is to make sure that any pipes passing through the crawl space aren’t leaking. Otherwise, water could collect here and there on the surface of the polyethylene and cause mould growth. Since its effectiveness as an insulation material is well established, a polyethylene vapour barrier will prevent your crawl space and all the involved materials from deteriorating as a result of moisture build-up.

Photo: Flickr
2- Insulate the foundation and the rim joist
In the event that the vapour barrier on its own isn’t sufficient to remedy this humidity problem in your crawl space, we’d recommend hiring a contractor to insulate your foundation walls. The application of sprayed urethane foam in the walls as well as in the rim joist (referring to the wooden element that surrounds the exterior surface of your floor) is recommended. For foundation walls, the layer thickness should be 2 inches, while a 3-inch thickness is required for the rim joist.
To carry out this insulation process, it’s recommended that you have 2 x 4 boards installed on each of the vapour barrier edges so that the barrier is able to rest on the board. Then, secure the vapour barrier to the wood. When the spray urethane foam is applied to the walls, it’ll also cover the 2x4 edging, thus sealing the space between the plank and the wall.
3- Insulate the floor
In cases where the vapour barrier installation and the measures previously mentioned aren’t sufficient to solve your humidity problem, note that insulating the floor is a good alternative. As explained by Écohabitation, the recommended step is to install a vapour barrier on the surface of the floor directly above the crawl space (this isn’t necessary if your floor is made of an impermeable material).
Next, you’ll need to install batt insulation between each of the joists and ensure that it remains in place using mesh or similar support. If you choose this method, be sure to insulate your water lines. As these no longer receive heat from the upper floor, it’s possible that they’ll freeze.

Photo: Flickr
4- Install a bathroom fan
Another solution to try is installing a bathroom fan in the crawl space, to be used throughout the year except in summer. The purpose of this fan is to control humidity and dry out the space, and to do so it’ll need to run for 20 minutes each hour. As a result, a programmable fan is essential.
Using a crawl space as a storage area
If you want to take advantage of the space offered by your crawl space to store various objects, know that it’s possible to pour a concrete slab. To do this, you need to lay styrofoam panels directly on your polyethylene vapour barrier. Then, all you have to do is pour the concrete, smooth it out and wait for the surface to dry.
Are you looking for information about the price of a crawl space excavation? Read our article on this subject!
Get 3 quotes for your crawl space renovation project
RenoQuotes.com can help you get quotes for your crawl space renovation project. If you submit your project, we’ll put you in contact with the best-qualified contractors in our network. Fill out the form on the homepage (it only takes a few minutes), and you will receive quotes from home renovation and insulation specialists.
Dial 1-844 828-1588 to speak with one of our customer service representatives.
Looking for something else?
Related articles
The latest industry news, interviews, technologies, and resources.

Editorial Team
•04 Mar 2026
Summer is the busiest time for renovations, and without proper planning, it can quickly become stressful. Time constraints, limited contractor availability, and high demand for materials can turn an exciting project into a source of worry. The key to a smooth summer renovation is planning early and booking your contractor before schedules fill up.

Editorial Team
•08 Nov 2023
Regardless of the scale or size of a home renovation project, before getting started, it’s common to ask yourself how much you’re actually capable of doing. Of course, you’re going to come with your own set of skills and previous renovation experience and thus, you’ll know how much you can do. But have you ever thought about the legal repercussions of renovation projects?

Équipe éditoriale
•09 Jun 2025
No surprise here, interior sliding barn doors are gaining traction with interior designers and homeowners alike. Surely, their functional and stylish nature, suited to any home, regardless of the décor, has something to do with it. Whether it's a single or double barn door, there's no doubt about it, they add a rustic touch to the overall aesthetic without overwhelming the space in question. And, they're retailed in a variety of designs and sizes, tailored to conceal and reveal with an effortless motion.

Editorial Team
•08 Nov 2023
Vermiculite, the insulation that every homeowner who bought a home built before 1990 dreads finding, has made headlines many times for all the wrong reasons.

Léa Plourde-Archer
•08 Nov 2023
Of course, it should come as no surprise that wood is a popular flooring material. Hardwood is classic beneath our feet and used alongside an abundance of home decor styles.