One can easily think that residential roofs only need to remain leak-proof to be immune to the elements and guarantee the best home protection.
The truth is that your roof, and your attic in particular, have to be ventilated with fresh air to properly function. Roof baffles help improve attic ventilation, reduce your utility bills, increase your roof's lifespan, and much more.
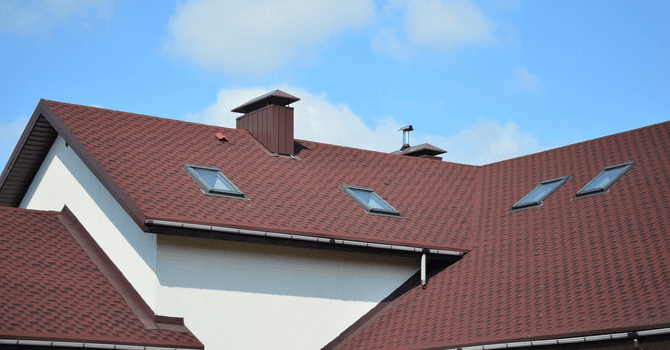
Definition & Types of Roof Baffles
Source : Canva
Adequate ventilation derives from roof vents, which in turn enable air to flow in and out of the attic. Fresh, exterior air then seeps into the attic by way of the soffit or gable vents and exits through the ridge vent or the rafters.
This removes stagnant, moisture-laden air and allows for fresh, dry air to fill the space. Without baffles, soffit vents can become obstructed by roof insulation, thereby limiting the roof’s ventilation system from drawing in air.
On the market, the most popular models are:
Waterproof insulation stop;
Snow splitter;
Air intake vent with a storm-proof baffle.
Roof Baffle: Functions & Advantages
When installing an attic baffle, you can then benefit from the following advantages:
Reduced utility bills: During the summer, if there’s no air circulation, warm, stagnant air will build up beneath the roof, thereby heating your ceilings, and this warm air will also seep into various rooms of your home. Thus, your air conditioning system works double time and consumes more energy.
Prolonged durability of your roofing structure: If your roof overheats, the underlayment as well as the shingles will dry out and crack way earlier than they should, which will eventually lead to costly repairs.
Limited ice-related damages: When build-ups of snow and ice on rooftops begin to melt, the liquid will flow into the soffit. This can lead to damage to your roof and gutters. Good ventilation facilitated by baffles helps maintain a more consistent temperature throughout the attic, thus reducing the risk of ice build-up.
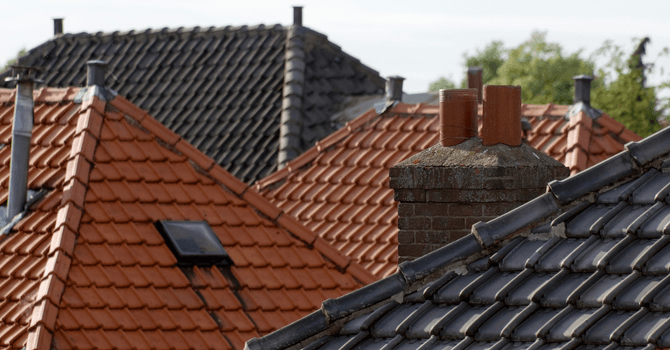
Roof Snow Splitter

Source : Canva
If you reside in an area where heavy snowfalls are a commonality, or if you have a metal rooftop, your chimney is at risk of serious damage. As a matter of fact, when snow glides off a roof, it causes major (irreparable, even) damage. A snow splitter essentially serves to protect your chimney and flashing by deflecting snow and ice away and around your chimney. It’s actually named a snow splitter for a reason: it literally cuts snow like a knife.
We all know how expensive repairing some of these damages (holes, water leaks, loose pipes, etc.) can be, some even leading to serious financial hardships. Therefore, putting in a roof baffle proves to be an easy, foolproof preventative measure. Given its easy installation and light weight, it’s a minimal-effort endeavour on your part, and one which will adequately protect your roof.
How to Install a Snow Splitter
Made from heavy gauge galvanized steel (quite thick), said unit can be mounted directly above the chimney.
The first step consists of assembling your snow splitter. The snow splitter is sold disassembled; needless to say, you’ll need to slide the triangular pieces together.
For optimal results, mount your snow splitter to your rooftop by lining up its mid-section with the chimney pipe. Also, maintain a 5- to an 8-cm gap between the chimney and the snow splitter.
Then, secure your snow splitter to your rooftop with the appropriate screws – these will also be provided by the manufacturer. Before tightening the screws, apply a layer of silicone (joint sealant) beneath each tab in order to seal every screw hole on the roof’s surface.
Waterproof Insulation Stop
This type of baffle, intended for residential building projects requiring additional space for concrete work, provides a channel for proper airflow through the roof's soffit ventilation strip.
With this insulation stop, you can maximize your roof's durability and render it leak-proof. This unit features holes and markings that allow it to be easily folded, so that fresh air can flow in and out of the attic. And when combined with blow-in insulation or fibreglass insulation boards, your monthly heating and air conditioning bill will drop.
Roof Air Intake Vent with a Storm-Proof Baffle

Source : (Joenomias) Menno de Jong - Pixabay
A baffle with a storm-proof air intake vent is a rectangular vent designed for buildings requiring a fire-safe construction to minimize the risk of fires spreading in the attic. It’ll give you peace of mind and you’ll save time and money.
These baffles are available in 3 colours (grey, black, and brown) and they’re mostly found in:
Areas with row houses, meaning very close to one another;
Where soffits are either not functional or nonexistent;
If there are literal firewalls in the attic which prevent fresh air from entering the attic and properly ventilating the space.
The best thing about this type of baffle is that it gives homeowners the freedom of strategically placing them on the rooftop. Thus, the roof will be immune to heat and condensation buildup that could deteriorate parts of the building and render the respective component warranties null and void.
How to Install an Air Intake Vent with Storm-Proof Baffle
If you want to install this type of roof baffle, here’s our installation guide, with step-by-step instructions to make things easier for you:
Make a rough outline of the unit's underside, including the opening (cardboard, plywood, or any thin material). Place the pattern in such a way that the opening is between the beams, above the insulation, and a few feet from the edge of the roof. Then, mark and cut out an opening in the centre of the pattern.
Remove any metal pieces on your roof resulting from the cutout which you made in step 1, leading to the roof’s edge.
Apply a layer of bitumen under the flashing and to the top portion of the flashing’s collar.
If your roofing is new, slide the baffle under the top sheet of the roofing. Make sure it's centred over the opening that's already been cut out, and then place a smooth metal sheet at the bottom and under the flashing, around the storm-proof baffle all the way to the edge of your roof. Finish installing the roof panels.
- However, if you're working with already-applied roofing, then slide the baffle under the nearest panels of your roof (all 3 sides). Just as with new roofing, the unit should be centred with the already present cut-out from step 1. Then, place a smooth sheet under the flashing with the storm-proof air intake baffle, and under the adjacent sheets at the edge of the roof.
Last but not least, affix the collar with galvanized screws and rubber-type washers around the baffle. Then, apply a strip of sealant around the whole length of the unit to ensure it’s rendered waterproof.
Cover image source: Tan2 - Pixabay
Get 3 renovation quotes for your roofing project
RenoQuotes.com will put you in contact with 3 reliable contractors for your roofing renovation project. Fill in the form on our homepage (it only takes a few minutes), and you will receive quotes from trusted professionals.
Dial 1-844 828-1588 to speak with one of our customer service representatives.
Looking for something else?
Related articles
The latest industry news, interviews, technologies, and resources.

Amanda Harvey
•08 Nov 2023
The awning of your home provides shade throughout those long summer months while adding an element of decoration to the facade. Since an awning can add significant curb appeal, you’ll want to keep them in good working order. That’s why it’s important to know how to both maintain and repair your awning.

Amanda Harvey
•14 May 2026
If you’re making moves on the home front and are looking to renovate your current abode, you are likely searching for a contractor to take on the job. The contracting industry may have seen better days, with holes in the current economy and heightened competition, sought-after tradespersons are in high demand.

Amanda Harvey
•24 Oct 2024
Buying a new home is an exciting venture, with endless possibilities laid out in front of you. Of course, everyone has an idea of their ideal home and for most this includes the extra space that a basement encompasses. With the right basement and the assistance of a good contractor, you could host an alternative living area, game room, a home gym or a place for washer and dryer. When shopping for a house, it can be difficult to tell the condition a basement is in; so how do you figure out what to look for?

Editorial Team
•19 Mar 2026
Suffice it to say, a sweating toilet tank is never welcomed. Between puddles of pooling water on the floor, to the unpleasant feeling of condensation in the air, mould growth, and a malodorous smell, using the restroom can quickly turn into something quite dreadful. Is your toilet tank humid without fail and you’re unsure how to fix this problem? A toilet tank anti-condensation liner kit will solve the issue in no time! Check out the following to learn more about it.

Editorial Team
•02 Jul 2024
Floor drains found in basements, garages, and other areas of your home are a crucial part of water management. A clean floor drain is a must to prevent foul odours and obstructions and maintain proper drainage. This guide will detail how to clean a floor drain, what techniques to use to spot and unclog an obstructed drain, and how to regularly maintain your drainage system to ensure its proper functioning. Check out our practical tips and tricks for the best maintenance practices.