
Roofing underlayment isn’t a luxury. It’s the one element that guarantees a decent and weather-protected structural design.
Its many benefits are far from being limited to this role; roofing underlayment strengthens the structure against leaks, protects the roof from mould, and acts as a protective barrier between the wood’s resin and the covering.
What’s Roofing Underlayment?
Source: Canva
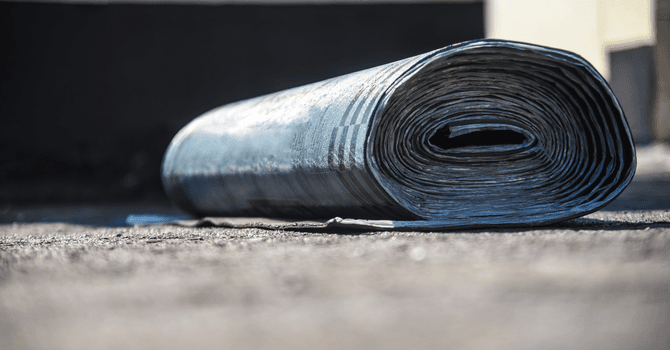
A roofing underlayment is a protective layer of roofing felt; in other words, a pressed material made of:
Cellulose fibres saturated in asphalt;
Woven polypropylene;
Woven polyethylene;
Other synthetic fibres.
This material is available as a self-adhesive membrane made from modified bitumen or SBS polymer. When made as such, the material can be used as a protective roofing layer and as a protective screed shield.
However, underlayments aren’t made for long-term exposure to nature’s elements. The more durable materials can withstand being in the open air for a maximum of 90 days, while most other models can withstand 60 days, tops. Bitumen-coated roofing underlayments are more prone to drying out and becoming increasingly permeable; the complete opposite of what’s actually desired. So, that’s why the covering must be laid within a reasonable time period.
The material used is extremely important. There are other material components available in lieu of synthetic ones, but using these can damage the roof’s framework.
The elements to avoid using for your roofing underlayment are:
Waterproof laminated paper rolls;
Felt finishes;
Other vapour barrier materials.
The above-mentioned materials won’t prevent humidity caused by freeze-thaw weathering between the underlayment and the covering.
Benefits of Roofing Underlayment
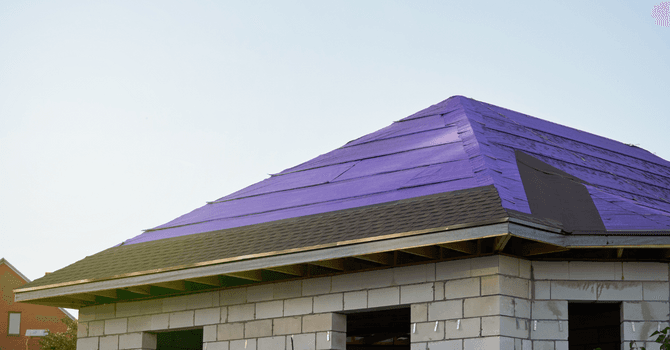
Protects the roof from adverse weather
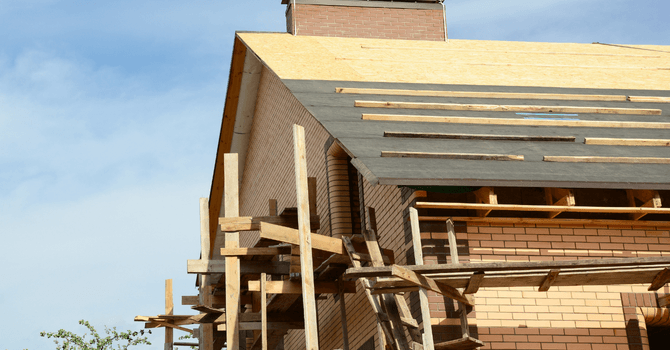
When building your house, it’s imperative that you protect your structure’s interior from adverse weather as soon as possible. Laying the roofing underlayment, which occurs after the framework is finished and the wooden covering is set, allows the structure to be weatherproofed in between the completion of the work.
The earlier the roof is rendered watertight by the underlayment, the quicker the house’s interior will dry, meaning the work can officially begin. Laying a roofing underlayment will thus also allow one to move in at an earlier stage.
Protects the roof from water and mould
The first owners of an asphalt shingled house quickly detected leaks as a direct result of insufficient waterproofing layers. The roofing underlayment counteracts the effects of this eventual problem. It also acts as a protective barrier between the structure, water leaks, and mould.
Protects the roof against chemical incompatibility
There’s a chemical incompatibility between asphalt shingles and wood resin. The roofing underlayment will act as the divider between these two layers and prevent them from coming into contact.
How to pick your roofing underlayment
Source: Canva
To really understand the answer to this question, we have to discern the two main types of underlayments: synthetic and bitumen.
Synthetic Underlayments
The polypropylene underlayment
Weighing in at 25 pounds, this polypropylene underlayment is lightweight and perfect to temporarily cover a roof, as well as protect the interior of the structure from adverse weather. This underlayment resists traction, tears, and temperatures ranging from -55°C to 110°C.
Polyolefin and polymer underlayment
This underlayment, which only weighs 21 pounds, has the added benefit of being non-slip, unlike the former. Therefore, its installation is made rather simple. However, beware of using this underlayment in Quebec. It can only withstand temperatures dipping just below -40C°, but nothing lower. In other words, it can barely ride out some of the cold fronts experienced in the province.
Woven polypropylene and polyethylene underlayments
Designed to provide greater waterproofing qualities, this membrane has several advantages:
9 times lighter than felt paper rolls;
5 times sturdier than felt paper rolls;
Non-slip;
Traction- and tear-resistant;
Temperatures tolerated: from -55°C to 110°C.
Of all the synthetic underlayments, this one appears to be the most advantageous.
Non-slip and non-woven polyolefin and woven polymer underlayments
Anti-slip and relatively lightweight, this underlayment has somewhat of a drawback: its minimal service temperature is only -43°C, versus 116°C during summertime. Therefore, it isn’t made for harsh winters.
However, it has a few advantages that render its installation rather easy:
Printed-on nailing pattern;
Flexible in low temperatures;
Pleat-free.
Bitumen Underlayments
These usually have the benefit of being resistant to high temperatures.
Elastomeric bitumen underlayment
Resists temperatures between -45°C to 115°C;
UV ray resistant;
Self-adhesive around the nails and screws.
However, it weighs 49 pounds and its uncovered lifespan is two months tops.
Tri-laminated polyethylene and elastomeric bitumen underlayment
This one’s the best underlayment for sheet metal roofing. This underlayment was designed to be self-adhesive, anti-slip, and resistant to harmful UV rays. Its sole drawback might be its maximum service temperature, which doesn’t exceed 90°C, which can oftentimes be quite plentiful for Quebec’s infrastructures. Another version of this model was designed with the same components, and it can resist maximum temperatures of 126°C.
Are you looking for experts to tackle your roofing project?
Fill out our form to receive quotes from certified contractors!
10 Tips to DIY a Roofing Underlayment Installation
Source: Canva
Once you’ve landed on the perfect roofing underlayment based on its temperature, weight, and resistance, you can install it yourself!
For practical and safety reasons, don’t work alone.
Always work from the bottom of the roof and work your way to the top.
Unfurl the paper rolls in a straight line; the paper has a tendency to slip along the roof.
Use staples to secure the roofing underlayment, to prevent it from slipping along the roof’s slope. These staples are only temporary; they’ll be removed once the roofing nails are properly affixed.
Use metal drip edges levelled with your eaves to align the edge of the underlayment and then staple it in place.
Secure the underlayment with roofing nails along the edges of the roof and everywhere it overlaps.
Allow for roughly 6 inches between every nail, and an inch between the nail and the edge of the roof. Where the underlayment overlaps, nail the roofing nails in a zigzag pattern every 12 to 15 inches.
Allow for at least 6 inches of overlap between every felt paper roll.
If your roof has a low slope (less than 33%), you’ll need to lay another layer of underlayment to protect the roof’s framework from water backflow. To prevent this from occurring, you’ll need to lay two 36-inch wide layers. The horizontal joints must overlap by at least 19 inches. At the vertical ends, the joints must overlap by at least 12 inches.
On low-sloped roofs, you can also add a waterproof self-adhesive strip on the eaves.
For a synthetic roofing underlayment, expect to pay between $65 and $140. Keep in mind that, if you need to cover a low-sloped roof, you’ll then need to double the underlayment layer, thus doubling your budget. Also, if you opt for the waterproof, self-adhesive strip, it’ll cost you roughly an additional $20, per unit.
Cover photo source: Matt Thompson – Flickr
Get 3 quotes for your roofing project
RenoQuotes.com will put you in contact with 3 reliable contractors for your roofing renovation project. Fill in the form on our homepage (it only takes a few minutes), and you will receive quotes from trusted professionals.
Dial 1-844 828-1588 to speak with one of our customer service representatives.
Looking for something else?
Related articles
The latest industry news, interviews, technologies, and resources.

Cynthia Pigeon
•18 May 2026
Since it was patented in 1930, fibreglass has become an important material in several industries. It is used in buildings and infrastructure, transportation, electricity and electronics, sports and leisure, and industrial equipment.

Editorial Team
•05 Dec 2025
Building a house is often the project of a lifetime. Who can say they never dreamed of owning a custom-built home, one in which the kitchen is perfectly sized, the bathroom is on the right floor, and every detail is executed flawlessly?

Amanda Harvey
•29 May 2026
Home renovation projects require plenty of research, careful planning, and detailed steps. Applying for a building permit is just one of the required necessities. Building permits cannot be overlooked, and depending on where you’re living, the forms, fees and documentation needed will vary. We’re here to offer a way to help you navigate fees for building permits in the city of Toronto.

Amanda Harvey
•08 Nov 2023
The awning of your home provides shade throughout those long summer months while adding an element of decoration to the facade. Since an awning can add significant curb appeal, you’ll want to keep them in good working order. That’s why it’s important to know how to both maintain and repair your awning.

Editorial Team
•11 Nov 2024
Although wood as a material is very durable, it still requires tender love and care to maintain its condition. For this reason, if you have a large amount of wood in your home, it would be important for you to understand how to care for it. More specifically, if the structural elements of your home are made from wood, then it will need regular upkeep in order to stay in shape.