
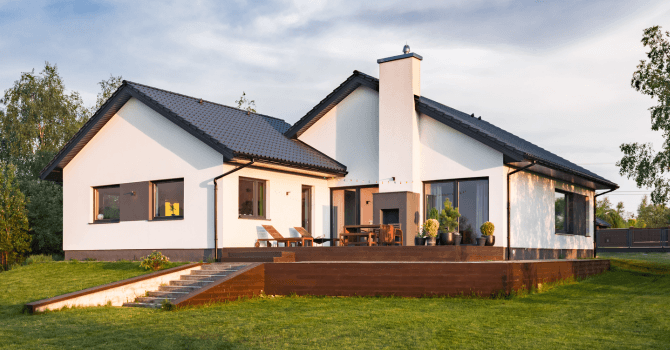
For anyone hoping to add a natural look to the facade of their home, stone veneer is an excellent exterior material that provides good insulation and increases resistance to harsh weather conditions such as rain and snow. If that is what you are considering, several easy-to-use products are available.
Get Your Project Started Today
Submit your details and receive three free quotes from trusted contractors.
Precautionary Measures for Installing Stone Veneer

Source: Canva
First and foremost, start by securing the corners, regardless if you are installing the stone veneer with adhesive mortar or screwing it down with steel fasteners. Note that it is not advisable to start laying the stone without first securing the corners.
The first step will be to carefully measure the area to be covered with stone and then convert the measurement into square feet as product instructions are in square feet.
Having familiarized yourself with the preliminary precautions before moving forward with the project, allow us to dive deeper, and survey the different installation options based on your needs and skills set.
Check out our related article about interior wall veneer. Learn about the pros and cons, available options, and their price points.
Screwed-On Stone Veneer

Source: Canva
For this type of project, you will need the following tools handy:
Measuring tape;
Level
Rubber mallet;
Electric drill;
Grinder with masonry wheel.
Most hardware stores carry stone veneers, which can be used without the need for a professional. The best way to install this material is by placing it against the intended wall, and with the help of steel fasteners, screwing the top. Some siding comes with pre-installed steel fasteners, making installation even easier. Note that stone veneer can vary in size, colour, thickness and quality.
When it comes to installing stone veneers, make sure you are level from the get-go! If you are not, the veneer will sit at an angle. And, since stone veneer is designed to create a brick-like straight effect, this demarcation will be immediately apparent.
The upside is that a screw-in stone veneer installation is less permanent than a mortar veneer, so you can start over if you realize you are not level, but it does fritter away time.
In such a case, the process is quite simple: start by establishing the base of the work, then proceed with the top and bottom openings such as doors and windows. Toward the end of the project, once you are working on the last row, you may not need a complete stone. If this occurs, measure where the stone will need to be cut with the help of a masonry blade.
Adhesive Stone Veneer

Source: Canva
For this process, you will need the following tools handy:
Mortar adhesive;
Concrete panels, depending on the wall;
Wire mesh;
Trowel;
Bucket to mix the adhesive mortar;
Measuring tape;
Sponge;
Grinder with masonry wheel.
For an adhesive installation, the stone is not glued directly to the wall in question. First, you will have to lay a concrete panel and fill the joints between the panels with fibreglass tape and adhesive mortar.
If mounted directly on drywall, avoid placing the concrete panels on top of the mortar, as this can damage the drywall. Instead, you will need to screw on a plaster base or wire mesh to which you will apply the mortar with a straight trowel and let it dry for 24 hours.
Next, you can lay the stone by troweling the adhesive mortar onto the surface of the stone and smoothing it over the area. If any mortar gets on the stone, immediately wipe it off with a dry sponge, at the risk of diluting the mortar.
This method is time-consuming and skill intensive, but the result will be seamless and permanent. So, if you are interested in this option, contact a certified masonry company as they will be able to walk you through the process.
In a Nutshell
A stone veneer installation can be easy, provided you have the right tools to proceed correctly.
The most important factor to keep in mind is to start off accurately, making sure you stay level, to avoid winding up with a poorly installed wall covering.
Adding stone veneer is a durable way to give your home a modern look, and if properly installed, it also provides good insulation.
Should you prefer to go ahead with an easy-tackle method, opt for a screw-on installation, but note that an adhesive installation greatly reduces the risk of errors.
If you are interested in knowing the medium prices per square foot of different exterior sidings, check out this article:
Looking for something else?
Related articles
The latest industry news, interviews, technologies, and resources.
Editorial Team
•26 Mar 2026
Whether for your growing family, for the arrival of a long-term house guest, or simply due to a lack of space, the reasons behind building a home addition are plentiful. Amongst the many possible solutions presented to those wishing to build a home extension, there is the home addition on screw piles.

Léa Plourde-Archer
•08 Nov 2023
Have you noticed that something just doesn’t look right on your brick wall? Has it seen better days? In the following article, RenoQuotes.com will explain how to replace a brick on your exterior brick wall.
Editorial Team
•25 Jul 2025
Stone kitchen countertops are certainly popular, but there are other alternatives to this type of material. If you're looking for the perfect match for your kitchen counter, it's understandable that you feel confused about all the options offered to you.

Editorial Team
•27 Jan 2026
Thinking about updating or installing new siding on your home? With so many materials available—ranging widely in style, durability, and cost—it can be challenging to know how much it costs to reside a house or the siding cost per square foot in Canada. This guide will break down the average cost of siding a house and the most common exterior siding choices, helping you make an informed decision.

Editorial Team
•08 Nov 2023
Painting the façade of a house can be a long and arduous process. However, if the work is carried out well, the transformation can be rather drastic! When a quality product is applied to a well-prepared surface, said painted surface will have a longer service life.