
Back in the day, dimension stock was the material of choice used to build floor systems. However, through the years, building techniques have significantly evolved to allow for innovative engineered wood products on the market, such as floor trusses. These can be shaped in various ways and are especially valued for their many advantages by building professionals.
What are floor trusses?
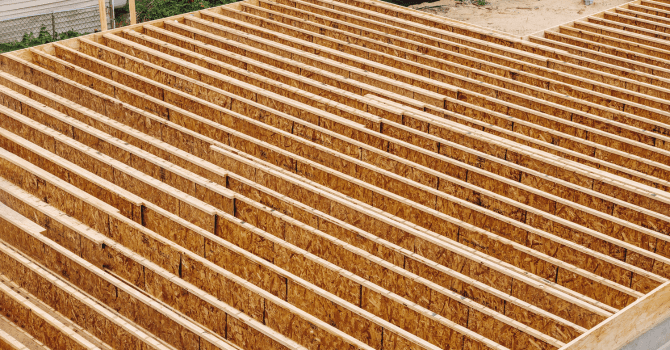
Source: Canva
Floor trusses are a product of engineered wood used as a dimension stock alternative. They’re designed to support static and dynamic loads imposed on floor systems. In other words, they’re load-bearing floor parts.
Spanning anywhere from 9 ¼" to 24" tall, trusses limit the use of beams, bearing walls, and columns. They facilitate installation and allow for a 2 ½" or 3 ½" nailing surface. Also, floor trusses are designed to ensure mechanical systems such as plumbing, electrical wiring, and heating can be routed through the width of the floor.
Trusses can be fitted on all floor levels, whether it's a ground floor, upper floor, basement floor, rooftop terrace or crawl space floor.
Although floor trusses are typically shipped individually, some manufacturers will package them in pre-assembled floor sections. They can even include plywood or oriented strand board (OSB) structural sheathing.
Types of Floor Trusses and Their Advantages

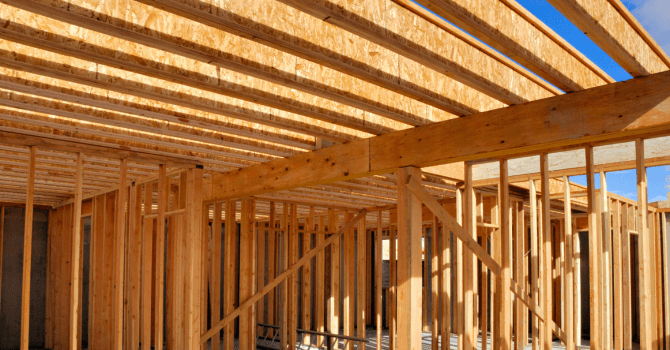
Source: Canva
There are two types of floor trusses: I-joist and open-web trusses. Both types are commonly used as part of lightweight, wood-frame floor system construction. However, each has specific characteristics and advantages that we’ll delve into in the following section.
The I-Joist
The I-Joist is made up of two parallel, finger-jointed flanges of lumber that are typically manufactured from 2x3 and 2x4 composite wood (LVL, LSL). The web is a 3/8” to 7/16” thick OSB panel that joins the two flanges. The latter are glued to the web’s width, thereby making an I-shape thanks to a patented assembly method. For clarity, the web is the vertical part of a joist.
I-joist floor trusses can be manufactured in various lengths, grades, and depths to cater to all spans. The most commonly used depths are 9 ½”, 11 7/8”, 14”, 16”, and up to 24”. As for length, it typically ranges between 12’ and 36’. However, lengths can reach 48 feet or even more sometimes.
There are many advantages to using I-joist floor trusses. In fact, this product’s large web provides a nailing and glueing surface for the structural floor sheathing. Another advantage is that its shape gives it great strength-to-weight and quality-for-price ratios. Drill holes can be made according to the manufacturer’s instructions to allow pipes and ducts through, particularly in the middle third of the span where the shear resistance is low. Another benefit that can be said of the I-joist floor truss is that it can be cut to exact specifications.
However, note that though it’s a material that offers building flexibility, floor trusses do, at times, require rim boards and face mount joist hangers. On top of that, they need blocking panels, made of I-joist sections, mid-span between the floor trusses. Its installation does require more time and is more technical than that of the open-web wood trusses.
The Open-Web Wood Trusses
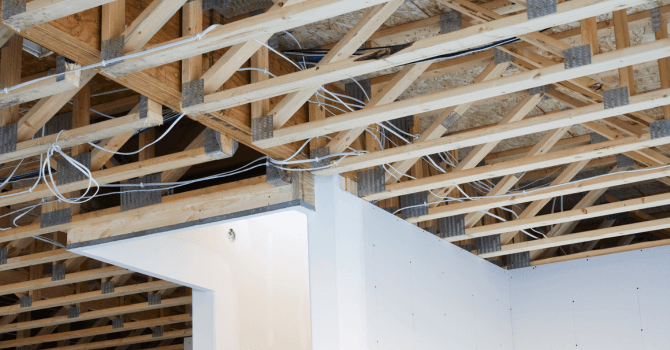
Source: Canva
Open-web wood trusses are made with two lumber flanges that are often linked with diagonal webs and available in a triangular shape that reduces the quantity of lumber required while also having interesting and precise mechanical properties. These are made with 2x3 or 2x4 chords that are laid flat to have a large nailing surface for the structural floor sheathing.
The advantage of this type of floor trusses over that of I-joists is that it allows for plenty of space for the building’s services to pass through the diagonal web openings. As a matter of fact, the trusses are made with strategically placed tunnels and openings to facilitate household plumbing, electrical wiring, or ventilation duct installations. These trusses are also available in a range of spans, depths, and lengths. They can be laid against the upper chord, which limits the number of joist hangers needed and conceals the trusses within the structure.
Most manufacturers offer various models that can be adapted on-site thanks to their web ends (end posts), which allows the builders once on-site to adjust the trusses perfectly. The open-web truss is a great alternative to more expensive, lightweight steel structures. The truss’ lightweight renders it easy to manoeuvre and install. Moreover, its installation process is rather quick compared to that of standard floor joists.
Another advantage of the open-web floor system, one can note the innovative building techniques used to enhance the strength and efficiency of the floor trusses. Also, their interior triangular structure is a considerable asset since it reinforces the floor system against long-term damage like floor squeaking or deflection.
It’s best to choose open-web floor trusses that are tailored made and done so according to the National Building Code of Canada and vibration measurement, control, and standards.
There are two types of open-web floor trusses that are most commonly used for commercial constructions: open-web metal-pin connected trusses and open-web wood joists.
What’s the maximum span of trusses?
There is a wide range of depths available on the market. Here are some of the most sought-after measurements: 241 mm (9 ½ in); 302 mm (11 7/8 in); 318 mm (12 ½ in); 356 mm (14 in); 406 mm (16 in); 457 mm (18 in); 508 mm (20 in); 559 mm (22 in); 610 mm (24 in).
Lumber floor trusses can reach spans that range between 6.1 m and 7.62 m, so 20 and 25 ft respectively. However, they can measure beyond the 9 m (30 ft) mark depending on the dimensions and type of wood used for the chords and bearing loads.
To create a truss diaphragm (solid sheet), lumber floor trusses are used with structural floor sheathing, like plywood or oriented strand board. They can be shipped individually or in pre-assembled floor sections.
How to Install Floor Trusses
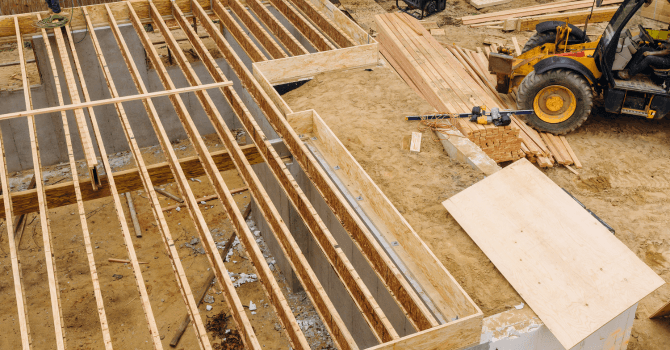
Source: Canva
Before installing your floor trusses, you absolutely must choose the right materials. Choose according to the use you want to make of your floor. We recommend favouring sturdy materials if it’s intended for a living space. However, opt for lighter materials when it concerns less frequented areas like an attic.
Here’s a bit of information to help you understand how floor trusses are installed. Note that the steps detailed below are solely for reference purposes. It's entirely dependent on your contractor to adapt them according to the specificities of your construction project site.
Step 1: Level load-bearing walls and mark off the layout of the trusses
Before doing anything, make sure that the walls supporting the joists are horizontal and level. To do so, measure all sides, both length and depth. If necessary, lay a base course to then get a horizontal, level surface. Once that’s done, allow it to dry before moving on to the next step.
Step 2: Install floor joists
Laying the floor joists is done according to a plan elaborated by computer software by taking into account the load-bearing ability of the floor trusses.
To begin, square the house’s perimeter to ensure it’s 90 degrees. Then, go forth by laying the floor joists according to the markings. Using a tape measure, determine the layout of the floor joists based on the blueprint.
Then, unfurl a layer of foam sealant to achieve a capillary break between the footing and concrete.
Now proceed by installing your joists. Make sure the hanger face mounts are well screwed into the joists as indicated on the plan.
Then, spread construction glue on the hangers to prevent cracking as the joists are affixed.
Properly screw in the joists where needed and fasten the rim joists according to the manufacturer's instructions.
Once the floor joists are secured, stabilize them by fastening pieces of lumber between them. For longer areas, some construction requires steel beams.
A few installation recommendations
Avoid cutting, grooving, or drilling into open-web lumber joist chords and connectors. Aside from the adjustable end post that can be cut on-site to then obtain the desired joist length.
Avoid loading the joists beyond the structural design loads, even if only temporarily. Make sure concentrated loads are applied where needed and according to the blueprint. Follow the installation details provided for double joists to ensure there’s an equal load distribution between the two.
Remember to secure the brace trusses to prevent the floor from tipping or moving sideways.
The building contractor must be sure that the non-load-bearing walls aren't transferring loads from the upper floors.
The trusses shouldn't be left in areas that are permanently exposed to the elements. They should be stored in a dry environment.
Floor Truss Pricing Examples
Source: Canva
The cost of building a floor truss system varies depending on the type of truss chosen, as well as its composition. That said, it’s best to inquire with manufacturers to be sure of the exact cost of the material suited to your needs. Here are a few examples of different brands of joists available on the Eastern seaboard:
TRIFORCE: This brand specializes in timber open joists (open-web design), which are made according to the National Building Code of Canada in terms of vibration and sound transfer performance and fire resistance. The TRIFORCE open joist is a high-end product that offers excellent floor system performance.
Vulcraft joists: These are made with steel according to the latest edition of the CAN/CSA S-16 standard. Whether it’s a standard, composite, or girder joist, this brand has a complete line of joists that’s a sure value added to your structure.
Lanoix et Jeanson’s trimmable wooden joists: These are ideal if you want a sturdy floor, devoid of creaking. They have the added benefit of making the system installation easier.
Get 3 renovation quotes for your flooring project
RenoQuotes.com can help you get quotes for your flooring project. By submitting your project, we’ll put you in contact with top-rated contractors. Fill in the form on the homepage (it only takes a few minutes), and you will get estimates from trusted professionals.
Dial 1-844 828-1588 to speak with one of our customer service representatives.
Looking for something else?
Related articles
The latest industry news, interviews, technologies, and resources.

Editorial Team
•05 Jun 2026
Tiles are crafted with different materials. Having a clear understanding of said materials means choosing aesthetic and hard-wearing wall and floor coverings. Here are 6 of the most used types of tiles, whether indoors or outdoors.
Editorial Team
•13 Aug 2024
Do you find yourself looking down on your vinyl floor, figuratively and literally, and wondering why it looks so worn out? If so, your first thought might be to head straight to the nearest hardware store to buy new flooring. While vinyl isn’t an especially costly material, letting it wear instead of restoring it would be such a waste.

Editorial Team
•08 Nov 2023
A few months ago, we shared an article about the 8 unique ways you can divide your space. Among the examples, some featured vertical wood slats which basically form a panel that doesn't block sunlight, and that's meant to divide your space. This effect can be created using a variety of materials, from wood to metal.

Editorial Team
•08 Nov 2023
A renovation project can quickly lead to astronomical spending. If we do not monitor the amounts that tend to accumulate, we can quickly end up exceeding the original budget.

Editorial Team
•26 Apr 2024
Foul smells, poorly draining water, loud and strange pipe noises, overflowing content… Septic tanks rely on a system that’s more susceptible to damage than a municipal sewer network, so you have to be mindful of how waste is disposed of and pay special attention to the slightest warning sign that there might be an issue with the system.