A lot of homeowners still opt for the application of oil on their floor, whether it’s in the kitchen, the bedroom or the living room. Given its ability to bring out the grain of the wood and to let is natural charm shine trough, an oiled floor is certainly a must.
Get Your Project Started Today
Submit your details and receive three free quotes from trusted contractors.
However, to be able to get the best out of it, you still have to be able to maintain and preserve it over the years. This is why we've decided to cover this subject in an article.
The maintenance of an oiled floor
How to preserve the appearance of an oiled floor

Apart from the aforementioned advice, it should be mentioned that the preservation of oiled floors requires to take a few precautions. First of all, avoid cleaning your oiled floor with a lot of water, as it could penetrate inside the floor, causing it to warp.
Following this, avoid using degreasing products, waxes or all-purpose cleaners on your floor, because they can permanently damage its finish.
Thirdly, be careful with anything that might scratch or mark the floor. Among them, think about high heels, chair legs or the claws of pets. Take steps to prevent them from being a problem by keeping your high-heel shoes for outdoor use, installing small cushions under the legs of your chairs and trimming your pet's claws.
Lastly, keep in mind that you need to be especially careful with little rocks or sand particles, which can be brought inside your home when you return from the outside. Rubbing these small particles on the floor can have an abrasive effect and severely damage your floor.
The application of a new coat of oil for the maintenance of your floor

If you recently applied oil on your floor, a first precaution is necessary: you should not use a cleaning product on it and avoid spilling any type of liquid. Not following these recommendations may cause the floor to warp or may lead to the apparition of stains. In either case, the damage will be considerable and probably irreversible.
Following this warning, we have to start by outlining the fact that to guarantee the proper maintenance of your floor, it will be necessary to apply another coat of oil as soon as signs of wear appear on its surface. It is generally recommended to reapply a layer of oil every 3 or 5 years.
If you have a dyed floor, start by taking a look at its colour. If it's not consistent, you will have to fix the situation. Begin by softly sanding the affected sections. Following that, apply a coloured oil on them. Before moving forward with your project, let your floor dry for 24 hours.
As a bit of advice and whenever possible, remind yourself that it’s always better to remain true to the same brand used during the first application. Indeed, you should know that the composition of the different products on the market is variable from one product to another, which could lead to adverse effects.
Finally, you can start the application of this new layer of oil, which will act to ensure the preservation of your floor. Start this process by sanding your floor, making sure to focus on busier areas such as corridors.

Once this step is completed, clean the areas with a product that is specifically-designed for oiled floors. Before you start applying the oil, make sure the temperature is adequate. Indeed, applying oil during very hot weather is not recommended. An ambient temperature (around 20 degrees) is ideal.
To apply oil, use a soft cloth or an applicator designed for this purpose. Treat only one section at a time and make sure to always spread the oil in the same direction as the strips of wood so that the result is consistent. Keep in mind that it’s important to apply two thin layers of oil to get the best result possible. Finally, let everything dry for 24 hours before walking on your floor.
Do you have little stains on your oiled floor?
If you spot little stains on the surface of your floor, use a slightly damp mop and rub vigorously. In doing so, your floor will regain a nice look and you will only have to apply a restoration product to make the lustre of your floor even.
Looking for something else?
Related articles
The latest industry news, interviews, technologies, and resources.

Cynthia Pigeon
•08 Nov 2023
Are you thinking about purchasing an air exchanger to improve the comfort level in your home? If you want to get the most out of this device, installation is key.
Editorial Team
•03 Dec 2024
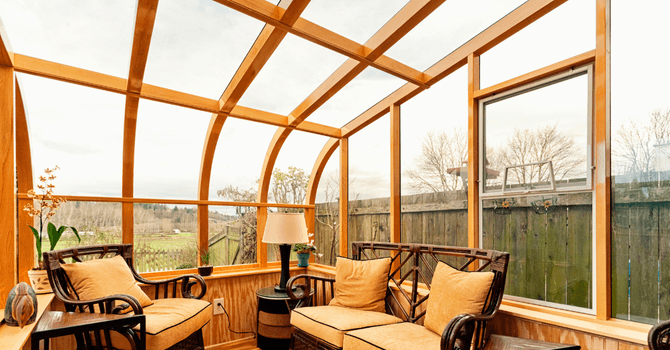
A sunroom is an area that’s conducive to rest and relaxation. However, don’t read too much into the name, it can very well be used beneficially either during the summertime or wintertime, day or night. On top of increasing the resale value of your house, a sunroom means adding an enclosed space on your property to prolong those beautiful, warm days.

Editorial Team
•24 Sep 2024
Aluminum welding is considered one of the most dangerous metalworking trades. This line of work mandates expert technique and constant safety measure awareness. The hazards inherent to the trade can have disastrous effects on the health and safety of workers. Consequently, this article will focus on the various dangers faced by aluminum welders and outline essential safety measures to minimize these risks.

Léa Plourde-Archer
•08 Nov 2023
If you’re looking to spend more time in the great outdoors this season, adding a deck to your backyard is a great way to give you, your loved ones and your family a further incentive to do so. Between talking, reading, eating, drinking and enjoying quality time together, there isn’t a better way than by building a beautiful deck outside your home.

Editorial Team
•08 Nov 2023
Many couples, families and even those living alone struggle to keep a small bathroom organized, with all moving parts under control. The standard bathroom found in most households is snug, barely fitting a sink, shower and vanity comfortably. Maintaining all these fixtures plus a sense of aesthetic appeal can be a serious challenge. On top of these aspects, there's ergonomics. Luckily, we live in a modern world where designers have taken the time to come up with various solutions to these traditionally small spaces.