
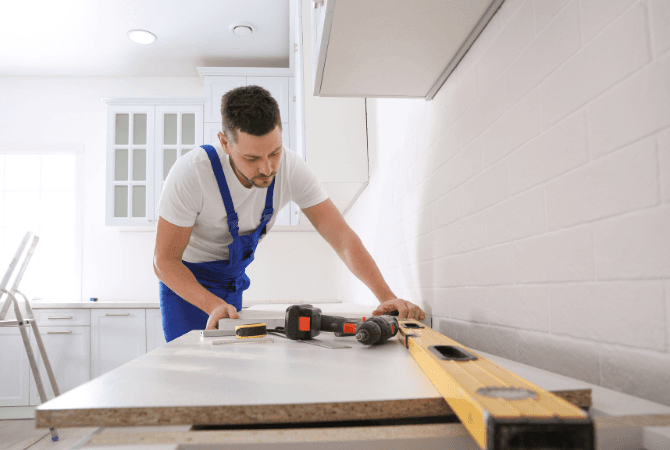
Your kitchen cabinets are one of the first things people notice in your kitchen. If they are outdated, splintering, or are just in bad shape in general, they will be even more noticeable to you and your guests.
This is why keeping your kitchen cabinets in top shape and looking like new should definitely be a priority. We’ll talk you through the steps of installing both the new wall and base kitchen cabinets.
Installing kitchen cabinets
Taking the appropriate measurements
Before proceeding with any major step, the first thing you’ll need to do is to take the measurements of the space where the cabinets will go. Once this is done, using a ruler, pencil and a level, draw a horizontal line that will represent the lowest point of the cabinets. Of course, it is recommended that you now use a stud finder because you will use those studs to give support to the weight of your new cabinets.

Adding weight support
Since supporting the weight of the cabinets is crucial, you need to secure a ledger board to the wall. Using the line you drew as a guide, screw the ledger board where you have marked the wall studs.
It's important to remember that when you’re installing the cabinets, especially the wall cabinets, that the doors and knobs have been removed in order to make them lighter and in turn easier to put up. It would also be wise to drill holes in the wall cabinets that correspond to the location of the wall studs as this will help you to position them more easily.
Installing your new kitchen cabinets
Now you will begin the process of installing the cabinets. While still on the ground, try to attach multiple cabinets together, with at least two joined together. This step is done because it will help make the installation go faster since you won’t necessarily have to install them unit by unit. Of course, you need to make sure at this point that the cabinets are plumb and that they’re sitting evenly. Keep in mind that the ledger board is not only for weight support but also serves as a guide while the cabinets sit along its top border.
Now that the wall cabinets are attached and you’ve assured that they are plumb, you can lift them into place, resting on the ledger board. Once again you must make sure that the cabinets are plumb and now level with the ledger board. At this point, you can secure the cabinets to the wall studs you demarcated earlier.
Once the cabinets have been attached, you should again check to see that they are still plumb and level. While it can be painstaking, this process needs to be repeated for all wall cabinets so you guarantee that the look is uniform throughout. When you have installed all the wall cabinets, you can proceed to reattach the doors and knobs. The last step of this process is to remove the ledger board and if there are any visible pencil markings, to wipe them away.

Setting up the base cabinets
The process for installing your base cabinets is somewhat similar but you won’t need the added support of a ledger board. You should, of course, begin by taking the appropriate measurements based on the amount of space you have and make sure to mark where the cabinet height will be and that it is perfectly level. You will also be securing the base cabinets to the wall studs to locating them on the lower half of the wall is a very important step.
Since base cabinets are level with the floor, dry-fitting the cabinet against the wall will easily give you an idea of whether they are truly level or if you will need to shim underneath. The last step is to drill through the back of the cabinet to attach it to the wall studs, using screws to help secure it into place and making sure the cabinet is consistently level. Like wall cabinets, this process will need to be repeated until all base cabinets are properly installed.
As you can see, the process of installing kitchen cabinets is one that takes time and lots of patience, especially if you want to guarantee that the job looks pristine once work is completed. This is why it's absolutely important to hire a licensed contractor that can take care of the job from beginning to end. With the skills of a contractor, you can rest assured that the work will be carried out properly and leave you with an exquisite set of cabinets in your kitchen.
Would you like to have an idea of the cost of your next kitchen renovation project? Try our cost estimator!
Get 3 renovation quotes for your kitchen cabinet updating project
RenoQuotes.com can help you get quotes for your cabinet installation. If you submit your project to us, we’ll put you in contact with top-rated contractors. Fill in the form on the homepage (it only takes a few minutes), and you will get estimates from trusted professionals.
Dial 1-844 828-1588 to speak with one of our customer service representatives
Looking for something else?
Related articles
The latest industry news, interviews, technologies, and resources.

Christine Simard
•11 May 2026
Your kitchen and dining room are places for gatherings and festivities. Whether with family or with your partner, whether your kitchen is small or large, you need to have a space that is both practical and efficient in order to give you the possibility to prepare all your meals.

Editorial Team
•19 Aug 2025
It was in 1923 that cellular concrete, developed by Swedish architect and researcher J.A. Eriksson, first appeared. Albeit it isn’t ground-breaking technology, it’s still considered innovative as it has contributed to building extremely energy-efficient, modern-day single-detached homes.
Editorial Team
•08 Nov 2023
Looking to change your kitchen countertop? To achieve the desired result, thoroughly follow a series of well-defined steps. Without further ado, here's how to install your kitchen countertop just like a professional.
Cynthia Pigeon
•28 Apr 2026
When you think of it, a garage is a room in itself. It allows one to increase the surface area of a house, park a car, and also store furniture safely. You can design your DIY space in it, or even transform it into a year-round living space. No matter its purpose, properly insulating it will ensure that your home's heating and air conditioning systems aren't compromised. Good insulation will also limit any noise pollution.

Editorial Team
•24 Mar 2025
Anyone who lives in an environment that doesn't suit their needs when it comes to mobility or comfort will be subject to a great deal of frustration. To ensure a comfortable and pleasant living environment for an individual with reduced mobility, here's a look at the renovations to take on.