How to Level a Floor Before Installing New Flooring
By Editorial Team
Updated on November 11, 2026
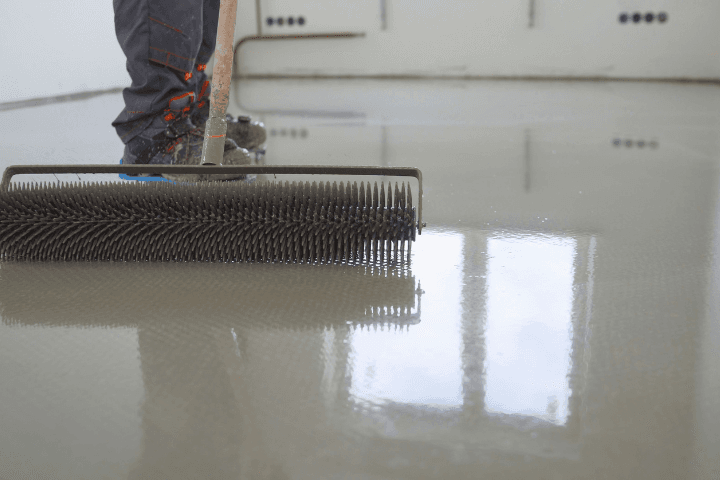
To level a floor, start by finding the high and low spots, then choose a method that suits your subfloor: self-leveling compound on concrete, a plywood overlay or shims on a wooden subfloor, or grinding down high spots. How flat the floor needs to be depends on the flooring you plan to install, from tile and laminate to vinyl plank and hardwood.
This guide covers how flat a floor needs to be, how to assess an uneven floor, which leveling method to use, how to apply self-leveling compound step by step, and how to deal with basements, deep dips, and problems with existing flooring. It also covers what floor leveling costs and when to hire a professional.
How flat does your floor need to be?
Source: Shutterstock
Flooring manufacturers and the tile industry measure flatness over a set distance, usually with a long straight edge. A floor needs to be flat, not perfectly level: a floor that slopes slightly and evenly across a room can still accept laminate, vinyl, or tile. True levelness matters mainly in wet areas that need drainage and for some built-in cabinets and appliances.
Flooring | Typical maximum variation |
Tile with all edges under 15 inches | 1/4 inch in 10 feet |
Large-format tile (any edge 15 inches or longer) | 1/8 inch in 10 feet |
Laminate and vinyl plank | Usually 3/16 inch in 10 feet, or 1/8 inch in 6 feet |
Glued or floating hardwood | 3/16 inch in 10 feet, or 1/8 inch in 6 feet |
Large, heavy tiles need the flattest base, since they can't flex over dips, and an uneven floor causes lippage, hollow spots, and cracking. Always check the flatness requirement in your flooring manufacturer's installation instructions.
Assess the Floor First
Before choosing a leveling method, find the high and low spots and measure how severe the unevenness is. Lay a long straight edge or spirit level across the floor in several directions, and measure the gaps underneath with a tape or ruler. A laser level gives a faster picture of slopes across a whole room.
Check the structure too. On a wooden subfloor, bouncing or sagging can point to weak joists or wooden supports. On concrete, look for cracks and signs of moisture. Leveling compound and patching products fix surface dips, not structural problems, so those need to be addressed first.
Choose the Right Leveling Method
Concrete Floors
On concrete floors in basements, garages, and ground floors, self-leveling compound is the most common solution. It flows across the surface, fills low areas, and creates a flat, smooth base for laminate, tile, or other flooring.
Wooden Subfloors
On wooden subfloors, the options depend on the problem. For small low areas, use a floor patching product compatible with wood. For more severe dips, a plywood overlay screwed down over the existing floorboards creates a new flat surface, and shims under the subfloor or plywood sheets of increasing thickness can build up a sloping area. Self-leveling compound can also be used on a wooden subfloor if it's rigid and stable; many manufacturers then require a reinforcement mesh or lath fastened to the floor, along with the primer.
Grinding Down High Spots
When a few high spots cause most of the unevenness, take them down instead of filling around them. On concrete, use a concrete grinder; on a wooden subfloor, a belt sander or power planer can flatten swollen panel edges or crowned joists. This reduces the amount of compound needed and preserves ceiling height, which matters in basements.
Tools and Materials
Measuring tools: A long straight edge, spirit level or laser level, and measuring tapes and rulers.
Cleaning tools: Brooms and vacuums to remove debris, dust, and loose particles.
Leveling products: Self-leveling compound, fillers, or patching compounds, plus the primer recommended by the manufacturer.
Mixing and spreading tools: A drill with a mixing attachment, buckets, a long-handled trowel or spreader, and a spiked roller.
Panels: Exterior-grade plywood to flatten a wooden subfloor; cement board, used only as an underlayment for tile, doesn't level a floor, since it follows the shape of the subfloor beneath it.
Protective equipment: Gloves, goggles, and a mask, since cement powder irritates the skin, eyes, and lungs.
How to Apply Self-Leveling Compound
Choose the Right Product
Most self-leveling compounds are polymer-modified cement products that work on several surfaces. Gypsum-based (calcium sulphate) products suit some flooring and radiant floors but are sensitive to moisture, so avoid them on a damp basement slab. Epoxy products are mainly used in commercial and industrial settings. Self-leveling compound, also called self-leveling underlayment, shouldn't be confused with self-consolidating concrete, a different structural product.
Step 1: Prepare the Surface
Remove old floor coverings and residues, adhesives, and any loose material. Clean away debris, dust, and impurities, which prevent proper adhesion. Fill cracks, holes, and gaps where compound could leak, and on a plywood subfloor, seal the joints so the compound doesn't flow into the space below.
Step 2: Prime
Apply the primer recommended by the manufacturer for your surface. Primer improves adhesion and keeps a porous surface from drawing water out of the compound too quickly.
Step 3: Contain and Mix
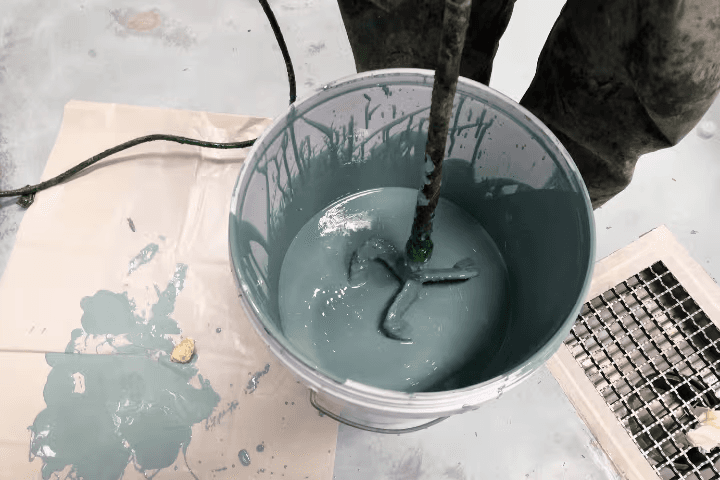
Install foam strips or forms along the walls and at doorways, so the compound doesn't flow into adjacent rooms. Mix the compound with a drill and mixing attachment, following the manufacturer's mixing ratios to get the correct consistency: a mix that's too thick won't flow, and one that's too thin is weaker.
Step 4: Pour and Spread
Pour the compound and spread it with a long-handled trowel or spreader, working in small sections and moving quickly, since compound has a short working time. Use a spiked roller immediately after pouring to remove trapped air and blend the sections together; once the compound starts to set, the roller leaves marks. Help from one or two people makes the job much easier. Work the compound into tight areas, such as under the toe kick of cabinets, before it starts to set.
Step 5: Respect Thickness and Drying Time
Depending on the product, bagged compound is usually applied up to about 1/2 inch thick on its own, sometimes more. For deeper fills, add aggregate as directed by the manufacturer or use a deep-fill product. Follow the manufacturer's instructions for drying time, then check the surface with a straight edge for imperfections before installing flooring.
Leveling a Basement Floor or Deep Dips
Basement Slabs and Moisture
Basement slabs often have high moisture. Many leveling compounds aren't suitable for areas with prolonged moisture exposure, and gypsum-based products in particular should be avoided on a damp slab. Check the slab's moisture before you start, and if water is coming through the foundation, fix that problem first.
Deep Dips and Large Height Differences
When a dip is deeper than a compound's maximum thickness, use aggregate, a deep-fill product, or lightweight self-leveling concrete. Some manufacturers also offer systems with high-density rigid foam panels to fill part of the depth, but the layer poured over them must meet the manufacturer's minimum thickness, often with reinforcement, so this is best left to a professional.
Sagging Joists
If a wooden floor dips because the joists sag, the structure must be fixed first: reinforce or sister the joists, or add supports, then install a new plywood subfloor. Leveling products can't correct a structural problem, and they add weight: self-leveling compound weighs about 2 3/4 pounds per square foot at 1/4 inch thick (about 13.4 kg/m² at 6 mm), so a deep pour on weak joists can make the sag worse.
Fixing Problems with Existing Flooring
Uneven Laminate
Laminate laid over dips, slopes, or high points, or over incorrectly laid underlay, often shows gaps between the planks, bouncing or creaking, and eventually warping. A floor gap fixer tool can close small gaps, and a laminate floor repair kit can fill minor chips. If the problem comes from an uneven subfloor, though, the planks have to be lifted, the floor leveled, and the laminate reinstalled.
Cracking or Hollow Tiles
Tiles laid on an uneven floor can have air gaps underneath, which sound hollow and lead to cracking, chipping, or breaking under pressure. Bumps and gaps between tiles also point to an uneven base. Damaged tiles have to be removed, the floor leveled, and new tiles set on a stable base.
Leveling Without Clearing the Room
Self-leveling compound needs an empty, clean floor, so furniture must come out, and the old flooring usually has to be removed. Cabinets can generally stay in place: remove the decorative toe kicks and baseboards first, install foam strips against the cabinet base, just as along the walls, and reinstall the trim over the finished floor. Keep in mind that raising the floor can trap built-in appliances, such as a dishwasher, under the countertop, so check the clearance first. For a small area, a patching compound applied to the low spots can avoid emptying the whole room.
How much does floor leveling cost?
In Quebec, for example, having a professional pour self-leveling compound or apply a patching compound typically costs $2 to $6 per square foot, product included. For a DIY project, a 22.7 kg (50 lb) bag of self-leveling compound costs about $40 at a home improvement store. The price depends mostly on the depth to fill, the area, surface preparation, and the product, and structural repairs to joists or subfloors cost extra.
When to Hire a Professional
Jobs Best Left to a Pro
Self-leveling compound on a small area is a manageable DIY project. For a large room, a damp basement, a deep dip, or a structural problem, a flooring or concrete contractor chooses the right product, prepares the surface properly, and pours an even surface in one go. In Quebec, check the contractor's RBQ licence; elsewhere, check any local licensing requirements. In every province, confirm the contractor has liability insurance and workers' compensation coverage: CNESST in Quebec, WSIB in Ontario, or WorkSafeBC in British Columbia.
What the Quote Should Include
A good quote specifies the area, the average depth to fill, the product, surface preparation and primer, drying time, and when the flooring can be installed. Comparing a few quotes is the best way to find the right method at a fair price.
A Flat Floor Starts with a Good Assessment
Leveling a floor starts with measuring the high and low spots and choosing the right method for your subfloor: self-leveling compound on concrete, plywood or shims on wood, or grinding down high spots. Basements and deep dips call for specific solutions, such as lightweight self-leveling concrete or, with a manufacturer's system, rigid foam panels.
The flooring you choose also sets the target: large-format tile needs the flattest base, while laminate, vinyl plank, and hardwood allow slightly more variation. For a large area or a basement, a professional ensures a flat surface that's ready for the new floor.
Floor Leveling FAQ
How do you level a concrete floor?
Clean the slab, fill cracks, and apply a primer, then pour a self-leveling compound and spread it immediately with a gauge rake or spreader so it covers the floor evenly. For large height differences, grind down the high spots or use lightweight self-leveling concrete.
Can you use self-leveling compound on a wooden subfloor?
Yes, if the subfloor is rigid and stable. Seal the plywood joints so the compound doesn't leak, and follow the manufacturer's requirements, which often include a reinforcement mesh and a specific primer.
How thick can self-leveling compound be poured?
Depending on the product, bagged compound is usually applied up to about 1/2 inch on its own, sometimes more. For deeper fills, add aggregate as directed by the manufacturer, use a deep-fill product or lightweight concrete, or fill part of the depth with rigid foam panels using a manufacturer's system.
How flat does a floor need to be for laminate?
Most laminate manufacturers require the floor to be flat within 3/16 inch in 10 feet, or 1/8 inch in 6 feet. Check your product's installation instructions.
How flat does a floor need to be for tile?
Tile with all edges under 15 inches needs a floor flat within 1/4 inch in 10 feet. Large-format tile, with any edge 15 inches or longer, needs 1/8 inch in 10 feet.
Looking for something else?
Related articles
The latest industry news, interviews, technologies, and resources.
Editorial Team
•06 Jan 2024
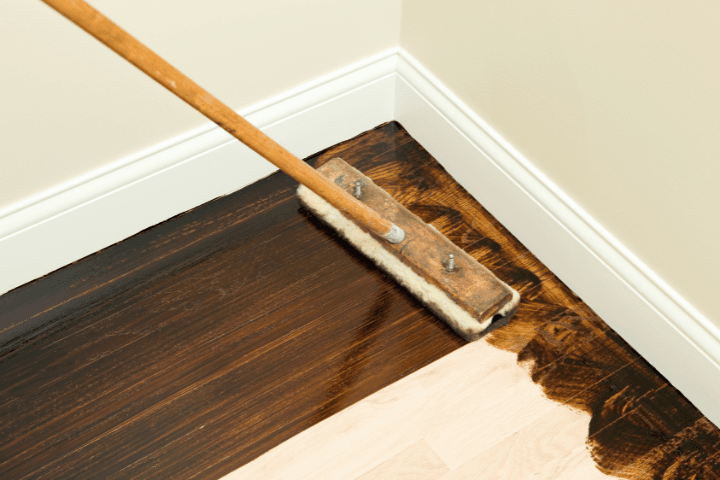
Hardwood floors aren’t all that complicated to stain provided you adhere to a proper set of guidelines and a few pointers, sparing you a complete redo, or worse, having to replace your entire flooring.
Léa Plourde-Archer
•23 Sep 2026
One of the great advantages of wood flooring is its durability. That being said, signs of wear and tear are inevitable, especially in high-traffic areas of the home. When a wood floor shows significant signs of deterioration, you must choose between repairing or replacing it.
Amanda Harvey
•08 Nov 2023
Rain gutters aren’t the most glamorous part of your home's exterior. They work hard to collect and carry rainwater away from the roof of your home but most homeowners pay little mind to these important structures. Gutters, also known as eavestroughs, work to keep basements or crawl spaces from collecting water. Therefore, they’re crucial in maintaining the structure and both the interior and exterior surfaces of your home.
Editorial Team
•30 Oct 2026
Floating flooring is a popular choice among Canadian homeowners for its affordability, straightforward installation and wide range of finishes. However, not all flooring options are created equal. Some are better suited to low-traffic rooms, while others offer greater durability and a more realistic wood-like look.

Editorial Team
•23 Feb 2026
A construction estimator is the person who turns an idea or a set of plans into credible numbers. Their job is to forecast the real cost of a project—materials, labour, subcontracting, logistics, and risk—so a client, contractor, or financial institution can make an informed decision.