Steps to Building an Inground Pool | Renovation Quotes
By Editorial Team
Updated on July 27, 2026
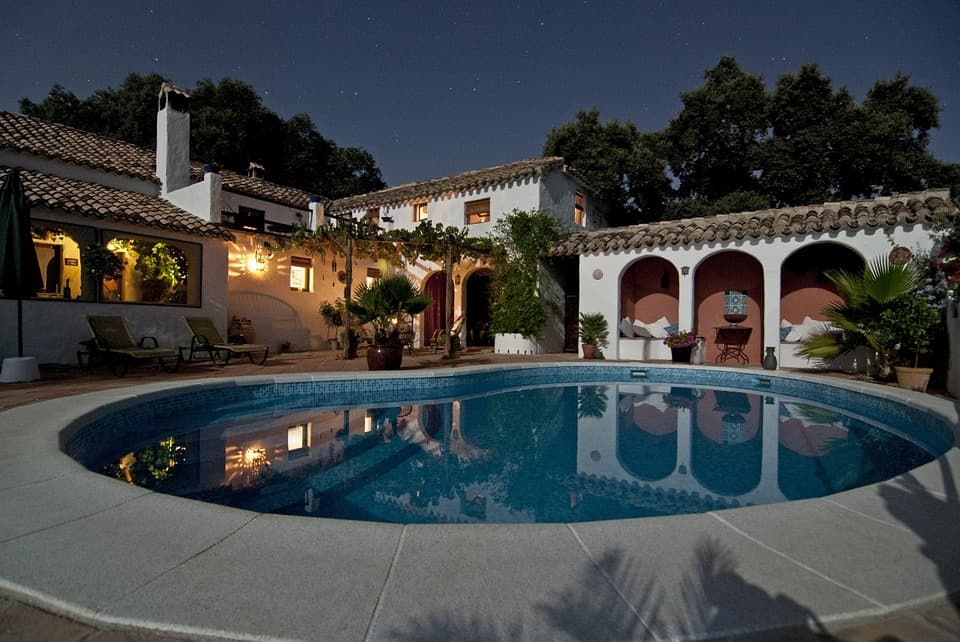
While the summer heat is much appreciated throughout Canada, that doesn’t make it easy to bear. Have you ever dreamed of lounging by the pool while the sun is at its hottest? Does the idea of spending your summer weekend entertaining around a pool sound enticing? Imagine taking a cool dip or swimming a few laps to help alleviate the intense summer heat!
These are some reasons why having a pool is a great excuse to open up your yard and make room for memories to come. Knowing how much a pool can transform your home, we’ve compiled this informative guide to give you the necessary steps to follow in building your dream backyard oasis!

Photo: Flickr
First off, it's essential to define the basics starting with the type of pool you choose. All excavation, structural work, and project timelines will be determined by your choice of pool. Moreover, size, shape, and construction materials are key factors that directly impact overall installation costs.
While some minor backyard upgrades can be done yourself, building an inground pool is a complex structural project. We strongly recommend working with licensed professionals (such as RBQ-certified contractors in Quebec) to ensure proper excavation, electrical safety, and long-term structural integrity.
While pre-fabricated models that sit above the ground are popular, inground pools remain a premier choice for homeowners looking to maximize outdoor aesthetics and custom features. Inground pools are typically constructed from three primary materials: concrete (gunite), vinyl liner, or pre-moulded fibreglass—all of which offer exceptional durability when installed correctly.
Compared to above-ground models, inground pools offer far more flexibility in depth, shape, and custom entertainment space. However, keep in mind that local municipal codes and provincial safety laws require all inground pools to be fully enclosed by a safety fence at least 1.2 metres high with auto-locking gates, alongside proper winter drainage layers to protect the structure against freezing Canadian subsoils.
Tracing the pool's contours
Once you have finalized your design, selected your materials, and received municipal permit approval, the first physical step on-site is tracing the pool's contours. Whether you choose a classic rectangular layout or a freeform kidney shape, your contractor will measure and mark the exact dimensions directly onto your lawn using stakes and spray paint.
Before any lines are drawn or ground is broken, your contractor must locate all buried infrastructure by contacting provincial utility location services. This step is essential to identify underground gas, water, telecommunications, and electrical lines, preventing dangerous and costly accidents during excavation.
This tracing stage is your final opportunity to visually assess how the pool fits into your yard. However, keep in mind that any adjustments to the pool's position or size must strictly comply with your municipal permit—including minimum property line setbacks and required space for Quebec's mandatory 1.2-metre pool safety fence and equipment clearances.

Photo: Flickr
The landscaping
Once tracing and planning are complete, heavy machinery moves in to begin excavation. Digging the basin establishes the final depth, shape, and footprint of your pool. To ensure smooth installation, contractors over-excavate the area by about two to three feet around the perimeter. This extra workspace is crucial for assembling wall panels, routing plumbing lines, installing bottom drains, and setting up electrical conduits.
While it might seem convenient to reuse the excavated dirt to backfill around the pool structure, professional builders strongly advise against it. Native soil—especially clay-heavy soil—retains moisture and expands significantly during Canadian freeze-thaw cycles, exerting immense pressure on pool walls and causing surrounding patios to settle unevenly.
Instead, the perimeter must be backfilled with clean crushed stone or clear gravel. Crushed stone provides excellent drainage, self-compacts to prevent future shifting, and protects your pool structure and plumbing from winter frost heave. Excess excavated soil should be hauled off-site or repurposed elsewhere in your yard for high-level grading and landscaping.
Drainage for your pool
When water is present, it is important to install a system of drains to help remove surplus water that can lead to flooding and significant damage. This is essentially what kind of drainage needs to be employed to guarantee you will avoid having a flooded yard. The drain can be located alongside or in the foundation of the basin to divert water that could put extra pressure on the walls of your pool. If your land sits over a water table, on clay soil or a slope, installing proper drainage will prove an indispensable investment!
The structure
With excavation and drainage complete, assembly of the pool's structural walls and floor begins. The construction technique depends entirely on the type of pool selected:
Vinyl Liner Pools: Contractors assemble interlocking steel or resin wall panels along the perimeter, secured into place with a poured concrete footing. The pool bottom is then hand-shaped using a smooth vermiculite-and-cement slurry before the vinyl liner is vacuum-fitted over the frame.
Fibreglass Pools: A factory-manufactured, single-piece fibreglass shell is hoisted onto the property via crane and set directly onto a meticulously leveled bed of clear crushed gravel.
Concrete (Gunite) Pools: Crew members tie a continuous grid of steel rebar throughout the basin, followed by spraying a high-strength concrete mixture to build a custom, monolithic shell.
Regardless of the material chosen, securing watertight seals around all submerged pool components—such as main drains, skimmers, return jets, and underwater lighting—is a critical final step. Installers use heavy-duty rubber gaskets, faceplates, and specialized sealant compounds to prevent hidden leaks beneath the deck, ensuring the structure withstands both water pressure and harsh winter freeze-thaw cycles.
The pipes
Piping and filtration form the operational heart of your pool. A high-capacity filtration system—typically utilizing sand, cartridge, or glass media—is essential for circulating water, filtering out micro-debris, and evenly distributing sanitizing chemicals. Spending time and money to select a reliable filtration setup protects long-term water clarity and swimmer safety.
When connecting the piping network, rigid PVC pipes are routed underground through trenches from the pool’s skimmers, main drains, and return jets to a designated outdoor equipment pad or mechanical shed. Under Quebec's Residential Swimming Pool Safety Regulation, filtration equipment, pumps, and water heaters must be installed at least 1 metre (3.3 feet) away from the pool wall or safety fence (unless housed within a lockable structure) to prevent children from using the machinery as a climbing step over the enclosure.
Finally, because Canadian winter freezing can easily crack water-filled pipes, underground plumbing lines must be sloped properly towards the equipment pad and thoroughly blown out with air and plugged during autumn winterization.
Backfilling
Once all underground plumbing lines are pressure-tested and municipal electrical inspections are complete, the project shifts to backfilling the over-excavated gap surrounding your pool shell.
While using the original excavated soil might seem cost-effective, professional pool builders strongly advise against backfilling with dirt. Native soil—especially clay-heavy soil common in Canada—retains groundwater and expands dramatically during winter freeze-thaw cycles. This lateral frost pressure can shift plumbing lines, bow pool walls, and cause surrounding concrete decks or paver patios to settle unevenly over time.
Instead, the perimeter must be filled with 3/4 inch clean, crushed stone (clear gravel). Crushed stone self-compacts, provides superior structural support, and allows groundwater to flow freely toward your perimeter French drain. Before dumping backfill material, double-check that all submerged fittings are sealed, all underground electrical bonding is verified, and plumbing lines are secured in place.
The coating
Applying the interior finish is the milestone step that transforms your excavation site into a stunning, functional pool. The application process and choice of finish depend entirely on the structural material of your pool:
Vinyl Liner Pools: The vinyl liner acts as both the decorative finish and the primary waterproof barrier. Installers carefully stretch the custom-cut vinyl sheet across the walls and floor base, using a commercial vacuum seal to smooth out air bubbles before immediately filling the pool with water to anchor the liner in place.
Fibreglass Pools: Fibreglass pools do not require any on-site coating. The smooth, non-porous gelcoat finish is applied and cured in the factory during manufacturing, making it ready to hold water as soon as the shell is installed and backfilled.
Concrete Pools: For concrete structures, workers apply a specialized waterproof plaster, quartz, or glass-aggregate finish directly over the concrete shell. In Canadian climates, full-tile pool interiors are generally avoided because winter freeze-thaw cycles can cause tile to crack and pop off. Instead, frost-resistant ceramic or glass tile is typically applied only along the waterline, protecting the top edge against scum lines and ice expansion.
Once the interior finish or liner is properly installed, the pool must be filled with water immediately to maintain equalized pressure against the surrounding walls and floor.
Filling the pool
Filling your pool requires careful timing to protect the structure:
Vinyl & Concrete: Must be filled immediately so water pressure smooths the liner and properly cures fresh plaster.
Fibreglass: Filled simultaneously with the exterior stone backfill to equalize structural pressure on the walls.
To avoid running a garden hose for days, hire a bulk water delivery truck. Once filled to mid-skimmer level, prime the pump, start the filtration system, and balance the water chemistry (pH, alkalinity, sanitizer) before your first swim.
Looking for something else?
Related articles
The latest industry news, interviews, technologies, and resources.

Editorial Team
•05 Nov 2024
For many, one of the most challenging aspects of a home improvement project is finding the right contractor to carry out the job. Avoid making a deal with the first available Joe with the sole purpose of saving both money and time, given that it could lead to problems down the line. If you’re wondering how to hire the right person, you’ve come to the right place!

Editorial Team
•26 Jun 2025
From the windows of an airplane, the series of little blue dots lining the asphalted suburban streets remind the passengers that they’re flying over beautiful residential neighbourhoods. Even if our hot season only lasts a fraction of the year, many people do not hesitate to cede a big part of their land to the installation of a swimming pool. After you have made this decision, all you have to do is divide your yard accordingly.

Editorial Team
•08 Nov 2023
Moving into the first month of the year, we’re looking at our interiors with a new and critical eye. As a result of the pandemic, many have had to restructure their lives to comply with restrictions, and are thus spending a significant amount of time in their interior spaces.

Karine Dutemple
•08 Nov 2023
Like many of us, you've probably spent a lot of time relaxing in your living room. Comfortably seated on your couch, you may be unhappy with what you are seeing when you look around the room. You are then hit with the sudden need to find new ideas to redecorate this much-loved relaxation spot.
Editorial Team
•07 May 2026
Finding an efficient heating solution is crucial when temperatures start dropping and the cold front is settling in our homes. Electric baseboard heaters have already won over 40% of all Quebec households, and there are plenty of reasons for such a heating system’s popularity.