Are you looking for a contractor?

Submit our quick form and get quotes now!

Are you looking for a contractor?

Submit our quick form and get quotes now!

Table of Contents

Roof

4 min read

Everything You Need to Know About Drip Edges

By: Karine Dutemple

Roof

4 min read

Everything You Need to Know About Drip Edges

By: Karine Dutemple

RoofExterior renovationsEverything You Need to Know About Drip Edges

When it comes to the different components of a roof, most are familiar with and recognize the importance of fascias, soffits, or flashings, but what about drip edges?

Despite being relatively unheard of, they play an important part in protecting the roof and shingles. Learn everything you need to know about them down below.


What's a drip edge and what's its purpose?
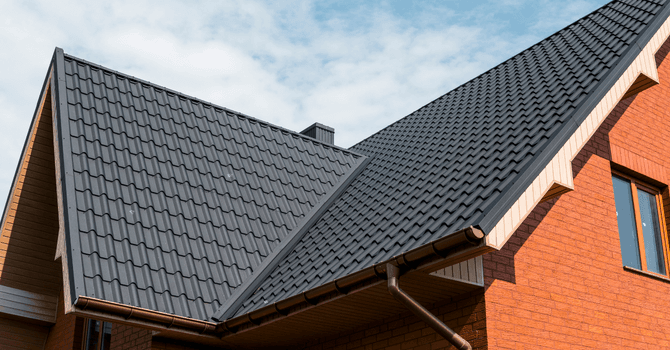
toiture_Tout savoir sur le larmier de toiture_Soumission Rénovation

Source: Canva

Basically, a drip edge is a metal flashing (usually L-shaped) that's installed on the edges of a roof. Also known as “drip edge flashing” or “D-metal,” it's used to keep water away from the edge of the eaves and channel it toward the gutter. Otherwise, the roof water would flow between the fascia and gutter and ultimately back up under the shingles.

Besides this function, the roof drip edge also prevents the side effects of strong winds in the event of adverse weather conditions. It goes without saying that during such circumstances, the wind blows the water on the roof in every direction. As a result, rainwater will most likely flow down the roof with greater difficulty.

This is when the drip edge will come into play: As soon as water hits its edge, it'll automatically follow the roof’s slope instead of spreading across the rooftop. However, for the drip edge to fulfill its purpose, its lower flange must be between 2 to 4 inches and placed away from the roof.


Are drip edges mandatory?

Should you look over the edge of your roof, you might not even notice the drip edge. In fact, a lot of houses that aren't newly built are devoid of drip edges. Even if according to most building codes across North America, it's a mandatory component, it isn't always an added feature. 

All the while, it's important to note that adding drip edges is strongly recommended by experienced roofers and roofing shingle manufacturers. 


Get 3 free quotes for your project!

Submit a project and get 3 free quotes!

Manufacturing Materials

façade de maison_Tout savoir sur le larmier de toiture_Soumission Rénovation

Source: Canva

As we've already mentioned in this article, roof drip edges are most often metal sheets. However, they can also be made of plastic, vinyl, or fibreglass. 

However, it's preferable to use plastic drip edges for doors or windows, and metal ones for your roofing due to their substantial durability and resistance. It's also worth noting that one should opt for corrosion-proof or galvanized models. 

Specifically, metal drip edges can be made of copper, galvanized steel, or aluminum. To help you make the right decision when it comes to choosing the material, note that it's often preferable to opt for galvanized steel or copper drip edges as the aluminum ones tend to be less resistant than the previously mentioned models, even though they're not as susceptible to rust.

Should you choose a copper drip edge, for it to be wholly effective, it should be at least 0.69 mm thick. On the other hand, if you land on galvanized steel drip edges, opt for a 24 gauge.

Looking for specialists for your roof renovation project?

Fill in the form to be connected with top-rated contractors!


The Three Available Drip Edge Profiles 

Source: Canva

Moving on to the different profiles available now that we've thoroughly examined the different types of materials used to make drip edges. Three are at your disposal (types C, D & F), see below:

  • Type C: This is the classic L-shaped model, bent at a 90-degree angle. It has a lower flange at the bottom.
  • Type D: This model is shaped like a “T” and has a lower flange at the bottom. This type is especially preferred for its capacity to keep water away from the fascia. 
  • Type F: This model differs from the other two due to its longer leading edge. This feature makes it a sensible choice when installing over existing shingles.

Besides the three previously mentioned models, it's still worth noting that there's a fourth type of drip edge: the J-shaped one. However, this one isn't as prevalent when it comes to its use on roofs as it's more adapted for window and door use. 

Should you be needing more information regarding your roof renovations, check out the following articles: 

Are you looking to get a cost estimate for your roofing project? Try out our cost calculator

Get 3 renovation quotes for your roofing project

RenoQuotes.com will put you in contact with 3 reliable contractors for your roof renovation project. Fill in the form on our homepage (it only takes a few minutes), and you will receive quotes from trusted professionals.

Dial 1-844 828-1588 to speak with one of our customer service representatives.


Last modified 2023-03-17

List of sources


Get 3 free quotes for your project!

Submit a project and get 3 free quotes!

Looking for something else?


Table of contents


Get 3 free quotes for your project!

Submit a project and get 3 free quotes!

Are you a contractor?

Join our network and receive real leads!

Download the price guide for renovations

We will send you the guide by email

Did this article meet your expectations?


Related articles

The latest industry news, interviews, technologies, and resources.

5 min read

SoumissionRenovation.ca 18 Oct 2022

Everything to Know About Roof Vent Caps

While thermal insulation is a top priority for most homeowners, proper roof ventilation is also critical to keeping your roofing system in tip-top shape. A roof vent cap is key to achieving this goal. In this article, we'll delve into the essential information one must know concerning these vent caps, including the importance of their function, the different models available, features, and more. If you want to know which cap is best suited to your needs, keep perusing this article so you don't miss anything. Why Add a Roof Vent Cap? Source : Canva Roof vent caps are easy to install and provide optimum air circulation. As a result, your roof is always kept dry during the colder winter months and cool during hot summer days. A vent cap is perfect to release exhaust air from kitchen range hoods, bathroom fans, and clothes dryers. The damper mechanism opens to allow exhaust air to flow out and then closes automatically. This airtight barrier will also help you reduce your energy bills. The damper usually has a deflector combined with a unique design. These two elements prevent it from flapping and also funnels rainfall sideways. This mechanism also prevents insects and rodents from gaining access to your attic, unlike some roof vents. As such, if you want to keep clean air in and moisture out, reduce your energy consumption, and have a long-lasting roof, we highly suggest installing a roof vent cap. Roof Vent Cap Models & Features Source : Canva The roof vent cap you choose to install will have a significant impact on the overall ventilation and efficiency of your roofing system. To help you narrow down which model will best suit your needs, we thought it would be a good idea to highlight some of the most popular vent caps: VMAX-CT-6 Roof Exhaust Vent Cap The VMAX-CT-6 vent cap is considered by roofing professionals in Quebec as one of the best air exhaust solutions you can possibly install on your roof. It can be mounted on bathroom fans, dryers, kitchen range hoods, air exchangers, etc. Its unique design prevents the cap from flapping and any air backflow; the air discharged is directed upwards to prevent odours from permeating the roof’s surface and to provide a better air distribution within the environment. Features: 6 inches in diameter; 7 ¾ inches high and 7 ¼ inches wide; Can be installed on a roof pitch between 2/12 to 15/12; Made with structural-grade galvanized steel (can be custom-made with aluminum); Anti-gust system resistant to infiltration; Built-in galvanized security screen mesh; Cured polyester powder paint that protects against UV rays and corrosion (5-year warranty); Options: black, grey, brown, and limited special paint colour options for an additional fee; Limited lifetime warranty against manufacturing defects. Vmax-CT-10 Roof Exhaust Cap Like the above-mentioned roof vent cap, this model's also favoured by roofing professionals.It also offers the same advantages. In addition, the Vmax-CT-10 roof exhaust cap is distinguished by these features: A 10-inch (in diametre) round pipe; 3 ¼ inch X 10-inch rectangular exhaust pipes; A height of 7 ¾ inches and a width of 11 ¼ inches; Can be installed on a roof with a pitch that varies between 2/12 and 15/12. Gooseneck Exhaust Vent With or Without Collar Source: Henry & Co. - Unsplash This roof exhaust vent model is ideal to pull air from bathroom fans and dryers. It can be mounted on a sloped, shingled rooftop. Due to its deflector and exterior grill, it effectively reduces backdrafts, and prevents infiltrations, birds’ nests, and anything else that could be detrimental to its function (rodents, insects, etc.). Its basic features and advantages are listed below: Seamless and leak-free; Ideal for 4-, 5-, or 6-inch ducts; Resistant to impacts and below 40°C weather; CSA approved; Features a 35-year warranty; Made of UV- and corrosion-resistant polypropylene. Are you looking for experts to tackle your roofing project? Fill out our form to receive quotes from certified contractors! VMAX-CT-4 Roof Exhaust Vent Cap Like the CT-10 roof exhaust vent cap, this one, the CT-4, is made of galvanized steel and allows for good air circulation, protecting your roof from strong gusts of wind, rodents, UV rays, corrosion, and much more. It can be installed on bathroom fans, dryers, air exchangers, and any other exit. Basic features: 4-inch in diameter; 7 ¾ inches high and 5 ¼ inches wide; Can be installed on roofs with a pitch between 2/12 and 15/12; Anti-gust and anti-infiltration system; Standard colours (black, grey, brown); Same features as the VMAX-CT-6 exhaust vent cap. VMAX-CT-AD-12 Roof Exhaust Vent Cap This cap was developed to provide, given its size, better manoeuvring when installing the ducts, especially in restricted spaces. As such, its height also allows it to easily resist adverse weather conditions and snow build-up, and spares it from being entirely covered. Also, its unique concept allows for the exact net of airflow to enter and exit your roof’s system without restrictions, thus eliminating backflow pressure. Here are this cap's characteristics: Best suited for ducts that are between 3 and 6 inches in diameter; Can be installed on flat and sloped roofs; The insulated damper mechanism significantly reduces noise levels; As for the rest, it has the same basic functions as the previously-mentioned vent caps. VMAX-CTM Roof Exhaust Vent Cap Source: Jason Shivers - Pixabay With this model of vent cap, you can combine multiple mechanical exhaust units within the same connection, which limits the number of holes in your roofing. Much like the VMAX-CT-AD-12 vent cap, this model allows for an exact net of airflow to enter and exit, which prevents backflow pressure. Also, it was designed to reduce noise levels, and its characteristics are very much the same as the previously-mentioned models. The price of a roof exhaust vent cap varies based on several factors, most notably the cap itself, based on its manufacturing material, type of finish, and its dimensions. Expect to pay anywhere from $50 to $150 per unit. Cover photo source: Blake Wheeler - Unsplash

6 min read

SoumissionRenovation.ca 18 Oct 2022

Roofing Underlayment: An Essential Material

Roofing underlayment isn’t a luxury. It’s the one element that guarantees a decent and weather-protected structural design. Its many benefits are far from being limited to this role; roofing underlayment strengthens the structure against leaks, protects the roof from mould, and acts as a protective barrier between the wood’s resin and the covering. What’s Roofing Underlayment? Source: Canva A roofing underlayment is a protective layer of roofing felt; in other words, a pressed material made of: Cellulose fibres saturated in asphalt; Woven polypropylene; Woven polyethylene; Other synthetic fibres. This material is available as a self-adhesive membrane made from modified bitumen or SBS polymer. When made as such, the material can be used as a protective roofing layer and as a protective screed shield. However, underlayments aren’t made for long-term exposure to nature’s elements. The more durable materials can withstand being in the open air for a maximum of 90 days, while most other models can withstand 60 days, tops. Bitumen-coated roofing underlayments are more prone to drying out and becoming increasingly permeable; the complete opposite of what’s actually desired. So, that’s why the covering must be laid within a reasonable time period. The material used is extremely important. There are other material components available in lieu of synthetic ones, but using these can damage the roof’s framework. The elements to avoid using for your roofing underlayment are: Waterproof laminated paper rolls; Felt finishes; Other vapour barrier materials. The above-mentioned materials won’t prevent humidity caused by freeze-thaw weathering between the underlayment and the covering. Benefits of Roofing Underlayment Protects the roof from adverse weather When building your house, it’s imperative that you protect your structure’s interior from adverse weather as soon as possible. Laying the roofing underlayment, which occurs after the framework is finished and the wooden covering is set, allows the structure to be weatherproofed in between the completion of the work. The earlier the roof is rendered watertight by the underlayment, the quicker the house’s interior will dry, meaning the work can officially begin. Laying a roofing underlayment will thus also allow one to move in at an earlier stage. Protects the roof from water and mould The first owners of an asphalt shingled house quickly detected leaks as a direct result of insufficient waterproofing layers. The roofing underlayment counteracts the effects of this eventual problem. It also acts as a protective barrier between the structure, water leaks, and mould. Protects the roof against chemical incompatibility There’s a chemical incompatibility between asphalt shingles and wood resin. The roofing underlayment will act as the divider between these two layers and prevent them from coming into contact. How to pick your roofing underlayment Source: Canva To really understand the answer to this question, we have to discern the two main types of underlayments: synthetic and bitumen. Synthetic Underlayments The polypropylene underlayment Weighing in at 25 pounds, this polypropylene underlayment is lightweight and perfect to temporarily cover a roof, as well as protect the interior of the structure from adverse weather. This underlayment resists traction, tears, and temperatures ranging from -55°C to 110°C. Polyolefin and polymer underlayment This underlayment, which only weighs 21 pounds, has the added benefit of being non-slip, unlike the former. Therefore, its installation is made rather simple. However, beware of using this underlayment in Quebec. It can only withstand temperatures dipping just below -40C°, but nothing lower. In other words, it can barely ride out some of the cold fronts experienced in the province. Woven polypropylene and polyethylene underlayments Designed to provide greater waterproofing qualities, this membrane has several advantages: 9 times lighter than felt paper rolls; 5 times sturdier than felt paper rolls; Non-slip; Traction- and tear-resistant; Temperatures tolerated: from -55°C to 110°C. Of all the synthetic underlayments, this one appears to be the most advantageous. Non-slip and non-woven polyolefin and woven polymer underlayments Anti-slip and relatively lightweight, this underlayment has somewhat of a drawback: its minimal service temperature is only -43°C, versus 116°C during summertime. Therefore, it isn’t made for harsh winters. However, it has a few advantages that render its installation rather easy: Printed-on nailing pattern; Flexible in low temperatures; Pleat-free. Bitumen Underlayments These usually have the benefit of being resistant to high temperatures. Elastomeric bitumen underlayment Resists temperatures between -45°C to 115°C; UV ray resistant; Self-adhesive around the nails and screws. However, it weighs 49 pounds and its uncovered lifespan is two months tops. Tri-laminated polyethylene and elastomeric bitumen underlayment This one’s the best underlayment for sheet metal roofing. This underlayment was designed to be self-adhesive, anti-slip, and resistant to harmful UV rays. Its sole drawback might be its maximum service temperature, which doesn’t exceed 90°C, which can oftentimes be quite plentiful for Quebec’s infrastructures. Another version of this model was designed with the same components, and it can resist maximum temperatures of 126°C. Are you looking for experts to tackle your roofing project? Fill out our form to receive quotes from certified contractors! 10 Tips to DIY a Roofing Underlayment Installation Source: Canva Once you’ve landed on the perfect roofing underlayment based on its temperature, weight, and resistance, you can install it yourself! For practical and safety reasons, don’t work alone. Always work from the bottom of the roof and work your way to the top. Unfurl the paper rolls in a straight line; the paper has a tendency to slip along the roof. Use staples to secure the roofing underlayment, to prevent it from slipping along the roof’s slope. These staples are only temporary; they’ll be removed once the roofing nails are properly affixed. Use metal drip edges levelled with your eaves to align the edge of the underlayment and then staple it in place. Secure the underlayment with roofing nails along the edges of the roof and everywhere it overlaps. Allow for roughly 6 inches between every nail, and an inch between the nail and the edge of the roof. Where the underlayment overlaps, nail the roofing nails in a zigzag pattern every 12 to 15 inches. Allow for at least 6 inches of overlap between every felt paper roll. If your roof has a low slope (less than 33%), you’ll need to lay another layer of underlayment to protect the roof’s framework from water backflow. To prevent this from occurring, you’ll need to lay two 36-inch wide layers. The horizontal joints must overlap by at least 19 inches. At the vertical ends, the joints must overlap by at least 12 inches. On low-sloped roofs, you can also add a waterproof self-adhesive strip on the eaves. For a synthetic roofing underlayment, expect to pay between $65 and $140. Keep in mind that, if you need to cover a low-sloped roof, you’ll then need to double the underlayment layer, thus doubling your budget. Also, if you opt for the waterproof, self-adhesive strip, it’ll cost you roughly an additional $20, per unit. Cover photo source: Matt Thompson – Flickr

5 min read

SoumissionRenovation.ca 04 Apr 2023

What to Know About Sheet Metal and Corrugated Metal

Formerly restricted to commercial, agricultural, and industrial buildings, sheet metal or corrugated metal has, as of late, made its way to the residential sector. On top of having great durability, such roofing material offers a wide range of possibilities in terms of innovative architectural designs. Are you looking to have sheet metal or corrugated metal roofing installed and want more information on the matter? Read on to learn what there’s to know. Metal Sheet - Corrugated Metal Source: Canva Sheet metal is an age-old material made from hot or cold rolled galvanized steel. It consists of sheets of metal that average about 30 years of service life. It’s available in two versions: sheet metal and corrugated metal. This material is increasingly sought-after in modern architecture and in eco-friendly construction projects, not to mention energy-efficient renovations. Corrugated metal is used as roofing material for buildings such as hangars, chicken coops, industrial or agricultural structures, garages, gazebos, verandas, wall-mounted pergolas, etc. Sheet metal is typically finer and lighter than corrugated metal. It’s perfect for façades since it’s very resistant and aesthetic. Sheet metal is smooth and flat, and can also serve as a protective flat roof coating. Corrugated metal is thicker and more resistant, and is mainly used to coat sloped roofs. Why should you choose corrugated metal roofing? Sheet metal or corrugated metal has numerous advantages. It’s very resistant to adverse weather conditions (snow, sleet, rain) and has a reputation for being quite durable through time. Sheet metal doesn’t corrode, it’s immune to insects and isn’t flammable. On top of being especially impervious to leaks, corrugated metal is known for being quite sturdy, which allows it to withstand the weight of several individuals. Moreover, it’s a lightweight material that can be shaped in various ways to adapt to a roof’s structure. Maintenance is relatively easy compared to, for example, shingles. When it comes to maintenance, simply coat the sheet metal if the corrosion has set in or the finish starts wearing off. Another benefit of sheet metal is that it’s generally partly made of recycled plastic materials and its inert nature is such that it doesn't emit any toxic fumes. However, just like any material, corrugated metal has a few downsides. It offers rather mediocre soundproofing and thermal insulation, and when rain or sleet bounces off the coating during a storm, it can be a nuisance to some. Moreover, this type of roofing isn’t recommended in regions subject to frequent strong winds. While it’s available in a wide range of colours, roofing made of sheets of metal is often criticized for its unappealing appearance. Are you looking for experts for your roofing project? Fill in our form to be connected with top-rated contractors! What are the different types of sheet metal? Source: Canva Sheet metal or corrugated metal is available in various materials, each with unique specificities: Fibre cement sheet Fibre cement sheet is a material that’s both light and resistant. It can be used as roofing or exterior wall cladding. It’s available in different colours. Simulated metal tile Source: Canva It’s a galvanized steel panel that mimics the look of tiles. It’s most often used to replace fibre cement roofing or when transforming a structure into a secondary living space. Galvanized steel or painted sheet metal Galvanized steel or painted sheet metal is a product that’s often used as construction material. It’s a very lightweight, easy-to-install material that offers great resistance. PVC coated metal PVC-coated metal is a very resistant and versatile material. This material is especially lightweight and easy to manoeuvre and can be used for roofing, cladding, and flooring. It’s available at affordable pricing and is compatible with all types of frameworks. Fibreglass flat sheet Source: Canva Fibreglass flat sheet is an especially rust-resistant form of sheet metal. Besides roofing and cladding, it can be used as flooring. It’s very resistant to heat and adverse weather conditions and offers excellent thermal insulation and soundproofing. Polycarbonate corrugated panel The polycarbonate corrugated panel is a very resistant material that’s ideal for roofing and cladding. Unlike sheet metal, it has excellent thermal insulation and soundproofing properties, and it can be quickly and easily installed. With a translucent finish, it’s renowned for its excellent resistance to blows and temperature changes. Copper roofing panel This material is quite rare and expensive, yet it suits all roof shapes due to its great malleability. Sheet metal is smoother and has a cleaner aesthetic, while corrugated metal is rougher and offers better adherence. Stainless steel metal roofing Stainless steel metal roofing is a very popular material since it’s very resistant to corrosion and rust. Similarly to the copper roofing panel, its price range is also quite steep. How much does metal roofing installation cost? Source: Canva The cost of installing new sheet metal roofing can vary depending on numerous factors such as the location of your property, the state of the roof, its structure, size, as well as the type of material used. For example, the cost of coating a large roof can be as much as $31 per square foot. Therefore, for a structure with a roof measuring roughly 2,000 square feet, one will have to budget $30,000 to $36,000 total for new roofing. On top of installation costs, one will also have to take into account roof maintenance- and repair-related costs over the years.

7 min read

SoumissionRenovation.ca 26 Oct 2022

Everything to Know About the Roof Ridge

A leaky roof is a serious problem that should be addressed without fail. Yet, one of the most overlooked aspects of roof repairs or construction is actually the most vital element, and you’ve probably never heard of it: the roof ridge cap (or roof ridge). This essential piece of the roofing structure must be chosen, installed, and maintained with care to prevent any moisture damage to the roofing system. Also, whether you have a steel, zinc, or sheet metal roof, you'll need a ridge cap to ensure that rainwater is properly drained and your roof is leak-proof. In this article, you’ll learn everything you need to know about the roof ridge, namely the most common types of ridge caps and their respective advantages, how to install cap shingles, and a lot more useful information. So, if you want to know more about the roof ridge, keep scrolling to the end so you don’t miss anything! Definition of a Roof Ridge Source : Canva The ridge is the highest point of a roof’s structure. More precisely, it’s where two roof slopes or rafters meet to form the triangular peak of the structure. As a matter of fact, if you take a second to check out your roof, the ridge will be the horizontal line running along the length of the rooftop, from one end to the other. It can run the entire length of the roof or can be divvied up, depending on the structure’s complexity. Note that some homeowners confuse hip rafters with the ridge board as both needs to be covered. However, the hip rafters align where the two sides of the roof meet to form the outer vertical angle. To avoid any confusion, keep in mind that the ridge board is generally horizontally positioned and makes up the highest point of the roof. It’s also important to note that if your roofing structure is more on the complex side, meaning divided up with a number of sides, you’ll have multiple ridge boards. With all the different sides coming together, the ridge board won’t be horizontally positioned along the entire roof. Every peak will then have its own ridge board where two slopes meet on the roof. Different Types of Ridge Caps: Features & Advantages The different types of ridge caps and their respective installation method depend, first and foremost, on the roofing material used. Therefore, the ridge caps used on corrugated roofing won’t be the same used as on slate roofing. Thus, it’s absolutely necessary that the ridge cap installation be carried out by experts in the field. In Quebec, and throughout Canada, you’ll mostly find the following ridge caps: Ridge Cap Tiles For traditional roofing tiles, most often, regular ridge cap tiles (usually made with mortar) will be used. Ridge cap tiles have a rather aesthetic appeal. Also, in terms of advantages: It gives the house a whole new, aesthetically pleasing look. It is a rather decent choice for warm and humid climates, since it keeps the house cool. Also, it's considered cost-effective in terms of energy saving (reducing electricity bills) and can be recycled to manufacture new ones. These are also heat- and wind-resistant, and they protect roofs against fungal growth. Zinc or Sheet Metal Roofing Ridge Caps If your roof is covered with sheet metal or zinc, in most cases, zinc or aluminum ridge caps will be used to help enhance the roof’s overall aesthetic appeal. With this type of ridge cap, you’ll get a smooth texture and appearance and, most importantly, great resistance to moisture, harsh weather, and fire. Such materials used for ridge caps can last up to 100 years, require little maintenance, and are relatively easy to install. As a matter of fact, once the installation’s done, you don’t have to do much else. Note that zinc (or aluminium) ridge caps are also eco-friendly and lightweight. So, if you’re looking for an Earth-friendly product, look no further! These ridge caps are 100% recyclable and can be endlessly reused to ensure full-leak protection. What more could you ask for? And, on top of that, they’re as easy to install and maintain as roof drip edges. Slate Ridge Cap Here, the ridge cap is made with two crisscrossed zinc strips, which straddle the entire ridge board line (tile can also be used). How to Install Ridge Cap Shingles Source : Canva Installing ridge cap shingles is one of the most important steps, and it’s usually the final step of the whole process. So, to help you achieve this crucial step, we thought it would be a good idea to give you a little rundown of how to install the shingles: Step 1: Make sure that the shingles aren’t too cold; they’re easier to handle when they’re warmed up a bit when it comes to installation purposes. Step 2: To achieve a straight and professional-looking line (50-50 on either side) without damaging it, fold the material in half. Step 3: When applying ridge cap shingles, start at the lowest point of the hip rafter and work your way toward the ridge board (top). On hipped roofs, install ridge cap shingles working from each end to meet in the middle. On gable roofs, lay the ridge cap shingles by starting at the far end facing away from the wind and working your way to the other end. Step 4: Nail the ridge cap shingle roughly 14 cm above the ridge, some 2.5 cm on either side, depending on the type of ridge cap shingle you’re using. Step 5: Once you’ve worked your way to the top of a gable roof, start with the ridge end in the opposite direction of the wind for optimum ridge wind resistance. Step 6: Now’s the final step: set the final shingle in cement and cover the exposed nail heads with cement, too. In fact, the final shingle must be glued with plastic cement specifically, and the exposed nails must also be covered. Ridge Cap Shingle Pricing To give you an idea of the price range of ridge caps, note that for Glacier Hip & Ridge pre-cut cap shingles, you’ll need to spend roughly $61. These are covered with algae-resistant granules and an adhesive sealant which provides top-notch wind resistance. Each pack contains 21 shingles, divided into three sets for a total of 63 units. But, typically, the most popular ridge cap shingle prices are as follows: Ridge cap tiles: $5.40 to $27 per linear metre Metal ridge cap: $20 to $33.70 per linear metre Slate ridge cap: $67.50 to $202.50 per linear metre Are you looking for experts for your roof ridge installation project? Fill in this form to be connected with top-rated contractors! How do Ridge Vents Work? Source : Canva Naturally, your house ought to be able to breathe. The heat generated by the house can build up in the attic, so to avoid any mould issues, humid air has to be released somehow. If left to build up, it’ll cause problems such as the early deterioration of your roof shingles and mould growth, which is potentially harmful to your health, and detrimental to your bank account and your home's structure. One of the most effective ways to ventilate your home is to employ a proper roof ventilation system. A ridge vent is the most effective solution to remove moisture-laden air from your attic, while also ensuring proper ventilation. Quickly, a ridge vent is essentially a metal moulding designed and positioned on the roof’s ridge to draw warm air out of your attic and rooftop. Your roof may have more than one ridge, depending on the number of roof slopes and the size of the ridge boards. So, how does a ridge vent work exactly? The answer to that question is pretty straightforward. Ridge vents function through a natural air exchange process that, when broken down, is a combination of some basic principles you may already know. When warm air flows into your attic and you have a ridge vent in place, the airflow rising over the roof ridge naturally exchanges the air by allowing the rising warm air to escape through the ridge openings. Those are the small sections on the side of the ridge vent that look like a vent. With this natural air flow occurring, warm air is released through the top vents, naturally amassing cool air to then substitute via soffits. This natural air exchange process then creates negative pressure in the attic, which is also known as the venturi effect. Should I Install a Ridge Vent On My Roof? In most cases, the short answer is yes. If you’re building a new roof on your house, your roofing expert will most likely advise you to embed it within your ventilation system. Proper roof ventilation will prolong your roof’s overall durability and will prevent future issues linked to moisture, which result from a build-up of warm air. And for that alone, a ridge vent is a superb option. Cover image source: Micah Carlson - Unsplash

6 min read

SoumissionRenovation.ca 24 Oct 2022

Shingle Roof Maintenance: Ensuring Durability?

Regardless of the type of material used to cover your roof, with time and exposure to the elements, grime can quickly build up and compromise the roof's functionality. Therefore, it's essential to clean your roof regularly to prolong its durability and maintain adequate waterproofing. Below are some tips on how to maintain a shingle roof. Why Is Shingle Roof Maintenance Important? Source: Canva Asphalt shingle roofs are very common in residential areas in Quebec, mainly because of their aesthetic value, superior weather resistance, and ability to conform to various building styles. Shingles are an important investment for homeowners, so maintaining them regularly is essential to avoid any damage and maximize their durability. Moreover, reroofing can be very expensive, whereas regular roof clean-up is much cheaper and helps prevent future damage that could lead to major renovation work. Aside from ensuring the comfort and safety of the home's residents, a well-maintained roof retains its thermal performance and increases the home’s value, which is especially advantageous when putting it up for sale. What Causes Damage to Roof Shingles? Throughout their operational time frame, shingle roofs can be damaged due to several factors: Adverse weather conditions: Between exposure to sunlight, wind, rain, hail, and snow, roofs can easily deteriorate with time, which can cause insulation and ventilation problems that leave room for mould growth. Vegetation: Algae, moss, and lichen growth, as well as plant and tree debris, create micro-fissures in the roof and leave the home with an unappealing appearance. A poor installation technique can also cause damages, as well as inadequate maintenance or dispersal pattern. Certain problem indicators may be visible, such as cracked or warped shingles, missing shingles, mould on the ceiling (as well as brown and yellowish stains), water leaks inside the house, etc. Are you looking for experts for your roofing project? Fill in this form to be connected with top-rated contractors! How to Maintain a Shingle Roof? Source: Canva Shingle roof maintenance is a 4-step process, preferably done twice yearly. It's not advisable to carry out some of the maintenance work yourself; it's best to hire a qualified roofer who is more likely to detect problems and implement effective measures. 1- Roof maintenance Regular roof cleaning is the first step in maintaining roof shingles. This includes cleaning the shingles and flashing, as well as any related parts of the roof such as gutters, skylights, downspouts, chimneys, vents, and solar panels. We recommend that you: Occasionally remove leaves and branches that coat the surface of the roof. Work from ground level or, if this isn't possible, use a leaf blower to remove the vegetative debris. Trim the foliage directly above the roof and hire an arborist for hard-to-reach areas. Alternatively, you can spray anti-moss products that are available at hardware stores over the vegetation. Clean out the leaves and other vegetation from the gutters with a trowel. This will help the water drain into the downspouts. Prevent a build-up of debris in your gutters by installing gutter guards or wire mesh grates. Doing so also makes it easier to remove any debris. If you're not comfortable with heights, have your roofer tackle the job. The Canadian Asphalt Shingle Manufacturer’s Association (CASMA) suggested a simple formula to eliminate rooftop vegetation: ¼ cup trisodium phosphate (TSP, chemical cleaner); ¼ gallon bleach; ¾ gallon water. Carefully mix all ingredients above-mentioned and put on safety gear before ascending the roof. Don’t use a pressure washer, as it could damage the shingles; rather opt for a soft bristle brush. The process is best undertaken under favourable weather conditions, i.e. clear skies. 2- Roof check After thoroughly cleaning the roof, inspect it for any potential damage. Ideally, carry out this inspection twice yearly, preferably during spring and fall. To that end, hire an experienced roofer who'll be able to locate any potential problem, detect any cracks, and carry out small repairs before they exacerbate. They'll also be able to ensure that your ventilation system is working properly and that it doesn't need to be cleaned or unclogged. 3- Roof repairs This step consists of repairing damaged areas noted during the inspection. It's important to carry out any repairs immediately once detected, no matter how insignificant a fissure may seem, because, over time, it may exacerbate and require costly repairs. Water leak damage, even if it isn't initially apparent, is often difficult to repair and can be hazardous to one’s health. 4- Log roof repairs Homeowners are advised to keep a roof inspection log wherein roofers record all potential problems and past repairs made to the roof. This will allow the roofer to identify potential problems during future inspections and make more effective and durable repairs. By using this memory aid, you'll be able to better plan your roof maintenance budget and provide evidence of regular roof maintenance to a future inspector or buyer. Gutters: What to Look Out for During Maintenance Source: Canva Cleaning the gutters is an essential step in maintaining an asphalt shingle roof. And that’s why, according to Marc-André Martin of Toitures Horizon, "When it comes to roof maintenance, all homeowners should clean out their gutters every fall." Cleaning keeps the roof leak-proof and the house in good working condition. A build-up of leaves and dirt can clog gutters, which may lead to issues such as cracks, sagging structures, water infiltration, etc. Regularly cleaning your gutters helps to remove any accumulated debris and thus avoid rust and corrosion, which can damage the rainwater drainage system. Depending on the manufacturing material used, properly maintained gutters can last up to 50 years. To effectively clean your gutters, first, climb up a ladder and remain adjacent to the area. Then, remove any debris from the gutter: bird nests, dead leaves, grit, dust, etc. With a scrub brush, proceed by scrubbing the surface; note that anything sharp could damage the gutters. Repeat this process as many times as needed as you work your way around the perimeter of your gutters. Using a garden hose, start rinsing from the top down, and simultaneously inspect your gutters. If there’s a water leak, then your gutter is probably punctured or cracked. It may also be that your fitting gaskets are worn and some hooks are damaged. Also, the presence of stagnant water in some areas is a tell-tale sign of a sagging gutter, which must be realigned. If water just isn't flowing, then, in all likelihood, your gutter is probably clogged up with debris or something else. When to Clean a Shingle Roof? The best time to clean an asphalt shingle roof is during dry seasons. Ideally, it shouldn't rain for 3 days following the maintenance work. We suggest avoiding rainy seasons, as rain results in a slippery roof. For safety reasons, windy weather conditions are also excluded. High temperatures cause the roof to dry too fast or expose the roofer to potential heat stroke. Rain and cold weather will wash away products before they can even take effect. Heat also causes the products to evaporate. Thus, it's important to find a happy medium. Furthermore, to ensure that your restoration project is as efficient as possible, only proceed with maintenance work when the trees around your roof and property have shed all their leaves. Cover image source: Steve Johnson – Flickr


Looking for a contractor?

Submit a project and get 3 free quotes now!