Whether it’s on a floor, wall, or directly on to-be-installed ceramic tiles, painting ceramic tiles is a relatively simple task. This process can be summed up in three steps: clean, sand, and paint.
If you don’t wish to repeat this process soon thereafter and hope the result lasts a while, it’s best to take your time and carry out each step according to specifications.
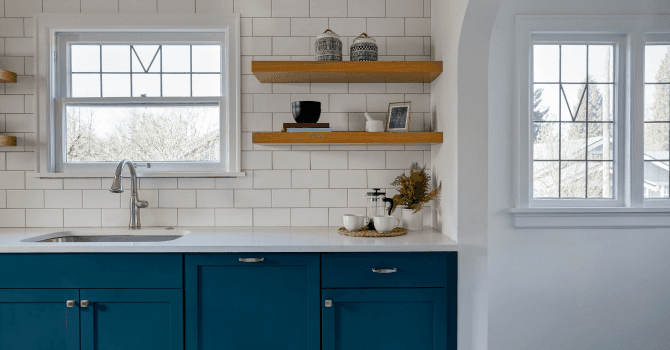
Painting Ceramic Tiles

Source: Canva
First off, you’ll need a ceramic primer and paint. Independent retailers and department stores carry a variety of ceramic tile painting products, and some will recommend kitchen and bathroom paint, while others will suggest furniture and cabinet paint.
Keep in mind that paint has to be room-specific, otherwise, you risk having to repeat the process much earlier than intended.
Painting a tiled wall near a water-prone area or a room in which the humidity levels are elevated can make the paint peel shortly thereafter.
If you decide on painting a tiled countertop, it’s imperative to ensure that the latter is resistant to potential sources of heat, like a warm pot or pan. Furthermore, the tiles could be vulnerable to scratches when in contact with knife blades or other utensils.
You’ll also need to exercise good judgment when it comes to the state of the surface-to-be-painted: If it’s too damaged, it’s best repaired entirely. And that way, you can pick the colour you want right away, thus avoiding having to paint the tiles afterwards.
How to Paint Your Ceramic Tiles
Prior to laying your ceramic tiles, you may choose to change the colour of your bathroom altogether. If you want to lay tiles on walls that match that of the painted walls, you can opt for a quick and cheap solution: repaint the to-be-installed tiles.
To paint your ceramic tiles, you’ll need protective gloves, heavy-duty cleaner (TSP - trisodium phosphate), rag, medium grit sandpaper, primer, foam paint roll, paint, and varnish (should you want to varnish the tiles as a last step). Note that some primers and paints are water- or oil-based. Avoid layering a water-based product onto an oil-based one.
A ceramic bathroom floor requires a few more pointers—ensure that you consult our article to know exactly how to renovate a ceramic bathroom floor.
Follow the steps detailed below:
Thoroughly clean the tiles with a cleaner;
Dry the tiles;
Sand with the palm of the hand for an even surface;
Dust tiles;
Spread primer with a roller;
Wait until the primer dries;
Apply colour.
Repainting the tiles is a quick and easy method, however, the less durable one long term. Note that ceramic floors tend to wear and scratch more easily compared to walls.
How to Paint a Ceramic Kitchen Backsplash

Source: Canva
After several years, chances are that you may want to change the look of your old tiled backsplash to give it a colour that better fits the rest of the décor. To paint your kitchen backsplash, you can use the following tools/products:
Protective mask;
All-purpose cleaner;
Rag;
Sander with 400- or 600-grit sandpaper;
Primer;
Synthetic silk paintbrush;
Vacuum;
Furniture or cabinet paint.
Follow the steps detailed below:
Wear a protective mask;
Thoroughly clean the surfaces with an all-purpose cleaner that won’t leave any residue behind;
There should be no traces of dust, dirt, or mould left behind;
Rinse and dry the surfaces thoroughly;
Sand with 150-grit paper, light and even sanding will suffice;
Wipe the surfaces with a damp rag;
Apply a coat of primer with a synthetic silk paintbrush;
Allow that coat to dry for 3 hours;
Lightly sand the dry coat of primer with 220-grit sandpaper;
Vacuum up the dust and wipe all surfaces with a damp rag;
Apply two coats of furniture and cabinet paint;
Wait 5 hours between the two coats.
The above-detailed process gives your ceramic kitchen backsplash hard-wearing quality when exposed to repeated cleanings, spots, and scratches.
What are some tile painting tips?

Source: Canva
Kitchen and bathroom ceramic tiles may need to be redone after quite some time. You can always decide to paint them, however, beware! Adding a coat of paint won’t fix any damage. If some of the tiles need a little repair prior to receiving a coat of paint, make sure to do so beforehand. Note that flooring tiles require more heavy-duty paint than wall tiles would need since floors are constantly exposed to more friction. Polyurethane paint is quite resistant.
If you wish to proceed in an eco-friendly way, clean the tiles with an all-purpose cleaner to remove all lime stains and white vinegar then rinse the whole with clean water. Once the surface is dry, you can degrease it with an acetone-soaked sponge. Cover all surfaces you don’t wish to paint with adhesive tape.
Then, you can apply a primer on the outer edges of every tile. Once the primer is dry, you can start painting while still ensuring to paint in crisscross strokes for an even-looking result.
Don’t wait until the paint has dried completely before removing the adhesive tape to prevent the paint from chipping, and apply touch-ups where needed.
Looking for something else?
Related articles
The latest industry news, interviews, technologies, and resources.

Christine Simard
•08 Nov 2023
The rusty look has never been on trend and unfortunately for us, it is inevitable when we have exterior metal structures that are exposed to the elements. If you are a person who enjoys doing small renovations on your own, it's good to know that metal, especially rusty metal, requires specific maintenance if you want to achieve a professional end result.
Editorial Team
•17 Feb 2025
Kitchen cabinets can be the centrepiece of the space, and beautiful, well-designed ones will make a huge difference in both the layout and feel of the room. Custom kitchen cabinets are an excellent way to add a unique element to your home as well as increasing the resale value.

Editorial Team
•11 May 2026
Are you looking to design a cozy and relaxing lounge area in your backyard to spend quality time with your family? Even though summer is coming to an end, nothing’s keeping you from planning ahead for next summer! Here are a few ideas to help you design your landscaping project accordingly.

Editorial Team
•08 Nov 2023
Often on the blog, we discuss decor and design trends but we usually focus on the home front. This allows our readers to find inspiration to create the perfect layout for their interiors and exteriors. But what about those looking for ideas for their business?

Christine Simard
•08 May 2026
With fall at our doors, the feeling of wanting to cuddle up in a cozy blanket with a hot beverage is being felt by many. While in relaxation mode, your bedroom's ambiance will play an important role on your mood. This is why the colour of your walls should be chosen according to what you want to reflect.