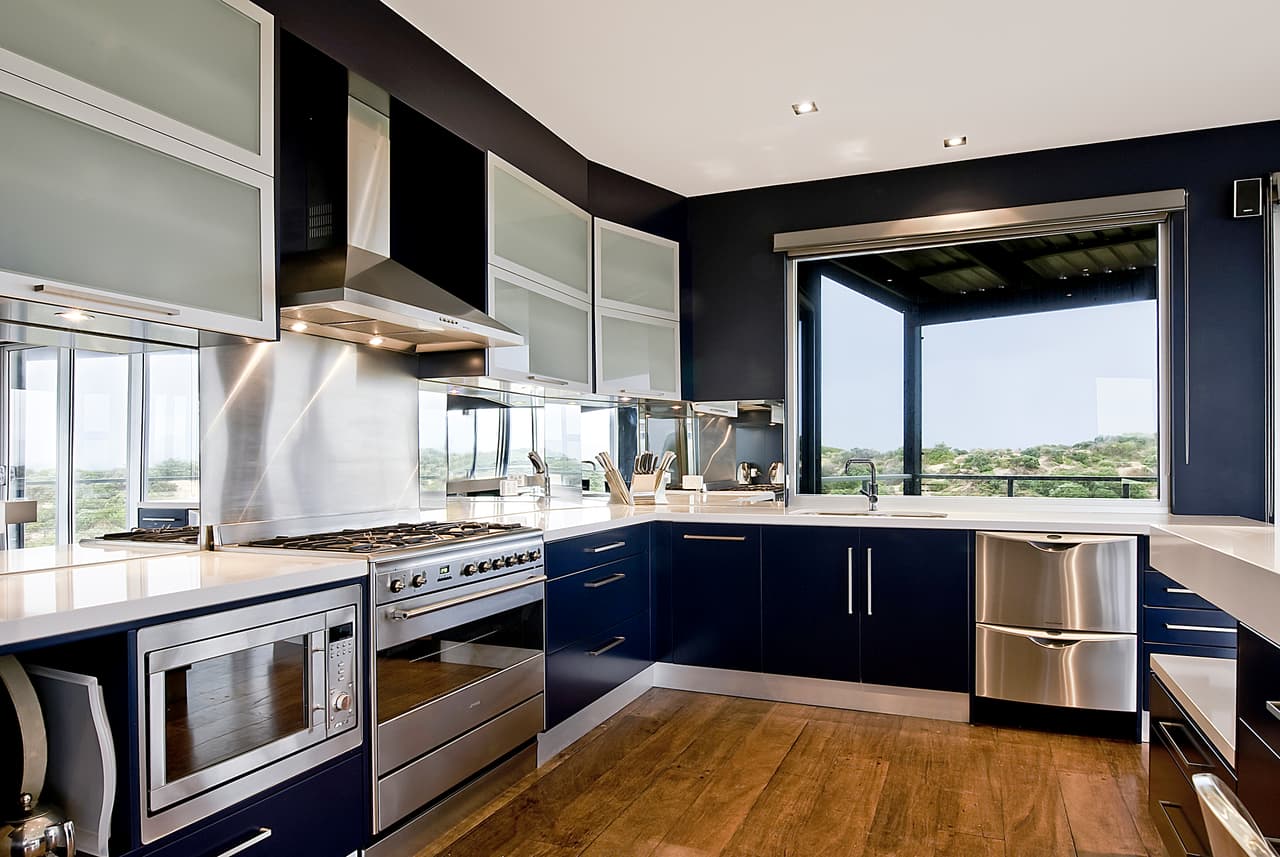
Are you looking for a contractor?

Submit our quick form and get quotes now!

Are you looking for a contractor?

Submit our quick form and get quotes now!

Table of Contents

Renovation tips

5 min read

How to Choose Your Kitchen Flooring Material: 6 Top Materials

Renovation tips

5 min read

How to Choose Your Kitchen Flooring Material: 6 Top Materials

Renovation tipsKitchenHow to Choose Your Kitchen Flooring Material: 6 Top Materials

Are you considering changing your kitchen floors? Well, you’re in luck! There are so plenty of kitchen flooring options on the market. If you’re having trouble choosing the right material for your home, look no further. We’ve gone ahead and prepared a practical guide with all of the details of the most popular types of floor coverings plus their characteristics.

Remember, the kitchen is one of the busiest rooms in the house. It’s common for the average person to visit their kitchen at least 3 times a day, if not more. Moreover, it’s no secret that this particular room is exposed to various elements such as dirt, water and heat. When choosing a floor covering for your kitchen, you will need to consider these facts.

Here are the 6 best types of flooring materials for your kitchen!

kitchen flooring_wood

Photo: unsplash

1) Tile kitchen flooring

Tiles are the most widely-used material for kitchen floors, and this is due to their versatility and durability. There are several different types of tile and as a result, you can easily find almost any colour, texture or finish to match your personal needs as well as your home decor. Kitchen tiles generally come in a few materials and these include ceramic, porcelain or glass.

tile floors

Photo: unsplash

The different types of tiles for kitchen floors

Ceramic tiles have a long life and are a modern choice. Also, ceramic is a popular choice among those with allergies as well as homes with pets, as this material resists allergens. 

Porcelain tiles are a heavier material than ceramic, collect less water and are more stain-resistant. If you choose this material for your kitchen floor, make sure it is slip-resistant. Porcelain tiles are also exceptionally durable and will not crack as easily as ceramic.

Glass tiles are expensive, but they have a beautiful finish. This type of tile can be cut into many shapes and sizes, so most homeowners choose it due to its versatility.

Travertine tiles are another option that has begun growing in popularity. This type of tile is not as versatile as the others mentioned, but it can easily mimic the look of natural stone at a fraction of the cost. This material is environmentally-friendly, so it’s favourable for homeowners who are interested in green living. 

However, travertine is very porous and is susceptible to stains. So, if you plan on hosting several dinner parties, this may not be the right flooring for you.

Since tiles aren’t very thick, they can also be used as kitchen backsplashes. Tiles can work in almost any kitchen, but in the end, it's always a matter of taste. You can achieve an excellent, modern and chic look with all the aforementioned styles of tiles.

2) Stone kitchen flooring

If you're looking for something more exclusive than a tile floor, stone flooring is the way forward. However, we should mention that you can expect a hefty price tag.

Although it looks great once it’s been laid, stone flooring can be very difficult to install. For this reason, it requires special arrangements that need to be completed by a professional. Furthermore, note that stone is porous and is sensitive to water as well as stains. 

If you choose this type of flooring, maintenance is key. Every year, you’ll be required to apply a water-repellent product on the floor's surface to keep it from getting damaged.


Planning to renovate your kitchen floor?

Fill out the form so that we can put you in contact with certified contractors from our network

wood flooring for kitchen

3) Wood flooring

Wood flooring has been favoured for years and continues to remain popular. It’s a beautiful material that adds a touch of warmth to any room. Traditional oak and engineered wood are just some of the options available. Wood flooring comes in many different styles, shades and grains so as with many of the other mentioned materials, it is quite versatile.

In terms of price, a wood floor can tend to be on the expensive side. Make sure that the type you choose is waterproof or it will be necessary for you to apply a waterproof varnish each year. Specifically, you should look for these wood options, as they are well-suited for kitchen floors: Teak, Merbau and Ipe.

4) PVC flooring

PVC flooring is a very common material. The major advantage of this type of floor is that it almost perfectly mimics the look wood, metal and stone at a fraction of the cost. This material is relatively simple to install because the application process involves sticking it to the ground, and this makes it watertight. 

Simply clean the surface where you’ll be installing the floor covering, stick the PVC down and voilà! This material is very affordable but doesn’t always age well.

vinyl floors in kitchen

Photo: pexels

5) Vinyl kitchen flooring

Like PVC, Vinyl is consistently trending in the world of kitchen flooring. Vinyl an excellent economical option as an alternative to wood and tiles and available in a wide array of colours and patterns. The installation process is simple, as this material comes in rolls or tiles that are stuck to the subflooring with adhesives. Cleaning and maintaining vinyl is very easy.

6) Bamboo flooring

bamboo flooring_renoquotes.com

source: unsplash

Bamboo flooring is an eco-friendly flooring option that’s gained popularity over recent years as an alternative to wood. Bamboo can be processed to take on colours aside from its original beech to resemble oak and pine. However, this process affects the surface of the material as it hardens it.

However, there are plenty of grain variations on the market. There is also the option of engineered bamboo which is more affordable and still eco-friendly. Although both are green-friendly, bamboo is susceptible to scratches and stains and needs to be looked after carefully.

Get 3 renovation quotes for your kitchen floor project

RenoQuotes.com will put you in contact with 3 reliable contractors for your  kitchen floor renovation project. Fill in the form on our homepage (it only takes a few minutes), and you will receive quotes from trusted professionals.

Dial 1-844 828-1588 to speak with one of our customer service representatives

Get 3 free quotes for your project!

Submit a project and get 3 free quotes!


Last modified 2023-01-16


Get 3 free quotes for your project!

Submit a project and get 3 free quotes!

Looking for something else?


Table of contents


Get 3 free quotes for your project!

Submit a project and get 3 free quotes!

Are you a contractor?

Join our network and receive real leads!

Download the price guide for renovations

We’ll be emailing you the latest market price guide for renovations.

Did this article meet your expectations?


Related articles

The latest industry news, interviews, technologies, and resources.

9 min read

SoumissionRenovation.ca 09 Aug 2023

Showcase Your Interior Design with Exposed Ceiling Beams

Once considered rustic, perhaps even old-fashioned, ceiling beams have now become a sought-after, stylish design element. Embrace them; unearth their beauty, customize their style to your liking, and genuinely appreciate their presence. Or, draw inspiration from them, create something new, and adapt them to your different indoor settings. Exposed beams exude an undeniable charm, no matter the room they grace. Paired with high ceilings, they instill a sense of spaciousness and magnificence. Whether you’re harnessing existing structural elements or introducing decorative faux wood beams to revamp a particular décor, we’ll delve into how to make the most out of this striking architectural feature. An Abode with Exposed Ceiling Beams Source: Canva The framing (or beams) is the wood or metal—at times concrete—structural components used to support a building’s roof, as well as the insulation materials, ventilation system, etc. Structural framing for new constructions Oftentimes, when dealing with new construction, there’s the option of leaving the structural beams exposed. Doing so will result in a striking feature and significant space gain in a room that can be stretched high into the attic. Since it will inevitably influence numerous architectural parameters, it must be specified at the very beginning of the project. Restore exposed beams during a remodel If your attic encloses striking wooden beams, why not consider undertaking a remodelling project aimed at exposing them? On the other hand, if the framing is already exposed, there are ways to restore the beams, even if, at first glance, they appear to be pretty shabby. For one, they can be painted or capped with wood to revamp their look with an aesthetic, modern, and sophisticated twist. Naturally, one can choose to break through the attic to expose the beams within, thereby becoming making the beams the focal design aspect of the room sitting directly beneath, or redesign the space entirely. Whatever the case may be, there’s no doubt your house will benefit from this unique feature. Again, if you decide to expose structural elements, best let the contractor know ahead of time. The roof’s insulation must be renewed accordingly, and the beams and rafters may have to be restored as well. Replacing existing structural features can also mean gaining a significant amount of space, height-wise. Are you looking for a general contractor for your renovation project? Fill in our form to be connected with top-rated contractors! What type of timber is best suited for beams? Source: Canva Choosing the type of timber, not unlike the transformation process, will largely depend on the selected architectural style, interior décor, and materials used to craft and coat the exposed beams. There are two types of structural framing styles: light-frame and heavy-frame construction. Typically, timber framing, or heavy-frame construction, is especially sought-after courtesy of its aesthetic aspect. On the other hand, light-frame construction will most often be made with finner, less fire-resistant wood, and ultimately, timber that has been tool-worked. While it’s exceptionally decorative, it isn’t crafted with solid wood, thereby won’t allow for the possibility of transforming the attic into a living space. An unfinished wood, timber framing In its natural state—or as close to it as possible—unfinished wood adds a unique appeal to any setting. From its veining to its exposed knotting, by way of different shades that really shouldn’t be concealed with paint, are both charming and appealing aspects. Roughly trimmed exposed wood beams have an undeniable rustic charm, while light wood will inspire a rather trendy, Scandinavian look. Unfinished wood framing isn’t limited to a traditional, rustic, or Scandinavian style since its warmth and coziness create a striking contrast at the heart of a contemporary setting. When preserving the look of untreated wood, homeowners can choose to stain, sand, or buff the wood’s surface to align its finish with the desired style. The aesthetic outcome is up for grabs—one can achieve an amalgamation of looks, all seamlessly merging conservative and modern elements. Mixed material framing or light-frame construction Exposed beams may be the result of a combination of different materials, thereby giving light to striking outcomes. Metal beams (steel, aluminum, etc.) showcase a more modern, loft-like, dwelling, which is also really appealing. Dare to Paint Exposed Beams Covering exposed beams with white paint can convey a certain lightness to the décor, thereby creating bright rooms, with meticulous and sophisticated details. This also brightens the rooms, adding a modern twist. Black-painted beams are chic and elegant, conveying an industrial-inspired, stylish and modern setting. If there’s sufficient ceiling height, one can even go as far as painting the ceiling black too. Otherwise, the simple contrast of black beams on a white ceiling is just as striking. Don’t limit yourself to black and white! Bluish-grey beams will garner all the attention in a rustic or older-model home with coastal-inspired décor. Grey beams will convey the unique appeal of cedar wood in a country-living-inspired house or the divine farmhouse look. Pro tip: If you have beams installed, opt for wood instead of polyurethane or polystyrene, which are both short-lived and flammable options. Space them out sufficiently to avoid overloading the room, while ensuring their size isn’t exaggerated in regards to the height of the ceiling. Areas to Favour for Peak Results Source: Canva Exposed beams and their numerous decorative possibilities are simply to die for. Their style and authenticity, much like the added ceiling height and the formerly lacklustre walls, are all part of the charm. Renovated, painted, or left untreated, exposed framing beams revamp any room, showcasing its uniqueness. On that account, it’s not all that surprising that exposed beams have crossed over into modern, traditional, Scandinavian, boho-chic, industrial, or country-living interior décors. Such an architectural feature can metamorphosis any room, from the living room and bedroom to a home office and dining area. Some bedroom-specific exposed beam ideas: White beams convey a homebody and coastal vibe, with daydreams at the forefront. A cute duvet cover, light veiling covering the windows, and refined furniture pieces…you can’t do it better than that! Untreated wood has an authenticity, a natural look that when paired with plants channels a refreshing look, one with a slightly exotic touch. To sharpen the rustic side of unfinished wood, one may choose to build a bed frame using wood pallets, while opting for wall-mounted bedside tables. For a Zen-inspired look, opt for polished wood beams, which will effortlessly reflect the light. For an industrial-style bedroom, split up the space using a partition with a black frame… It’s a beautiful way to blend a makeshift lounge area, walk-in closet, or home office. For a well-done, country-chic look, pair a wood-panelled ceiling with white beams. A living room exuding undeniable charm with exposed beams: There’s nothing like a bright, cozy, and welcoming living room to set a rustic and modern tone to a timeless décor. As such, use leather furniture and dark wood coffee tables, a few British-inspired decorative pieces that also have a subtle masculine touch. In a farmhouse-inspired living room with exposed beam work, favour neutral shades and noble materials. In a narrow room, opt for neutral and light colours to brighten the space and create a sense of spaciousness. As for the beams, select the same shades as the walls and ceilings, and limit the use of any other colour to a few decorative pieces. To showcase untreated beams in a spacious living room, paint the ceiling and walls white. And, rely on elegant materials to highlight your furniture. For a high-tech look, paint the beams light grey or beams with a metallic finish to set the tone. To create an industrial look, try to seamlessly balance metals, glass, and wood. And, try adding a bit of brick into the mix! Exposed Beam Insulation and Upkeep Source: Canva How can you insulate an exposed beam ceiling? A comfortable and healthy home is well insulated against drafts, heat, and noise pollution. Typically, homeowners will choose to insulate their ceilings from the inside due to its cost-effectiveness and ease. However, when insulation materials are added between and under the rafters, they may conceal, partially or entirely, the exposed beams. Therefore, the best option consists of insulating from the outside. Combining various insulation materials—rigid, batts, or sprayed—will maintain the necessary ventilation, while the structure benefits from high-performing insulation, thus limiting thermal bridges. The complexity of this aforementioned process calls for expert hands. How can you ensure the durability of exposed beams? Protecting a wooden structure calls for regular maintenance and upkeep while also ensuring the roof is leak-proof. It’s equally important to make sure insects and fungi aren’t permeating the structure, addressing these issues as necessary. Lastly, a well-functioning ventilation system should have priority, while excess moisture should be meticulously controlled. On the other hand, steel framing is resistant to pests and fungi, but is especially vulnerable to corrosion. Regular maintenance, as well as applying a coat of intumescent paint, which safeguards against heat in case of fires, is highly recommended. Lighting and Décor Ideas for Exposed Beams Source: Canva No matter which room in your house you’re decorating, focus on the structural framing to showcase said space in a unique way. The beams can be embellished with pendant lights or sconces. Another idea would be to hang incandescent light bulbs from the ceiling with a long electric cord wrapped around the beam. Lastly, string lights are just as appealing. For a more contemporary look, secure recessed lights on the beams. This type of lighting, when positioned on either side of the beams, results in a beautiful interplay between light and darkness. Affixed between the beams, the lighting will highlight the length of the beams, and visually enhance the size of the room. Another option would be the use the framing as the room’s main decorative feature, meaning using the wooden beams to their fullest. Hang a hammock, swing, or wispy veils that frame the canopy-like bed, for a cozy and romantic look. Use the beams to cleverly divide the space into distinct areas: lounge area, home office, storage, etc. Wall beams can double as shelving to store plush bathroom linens, small and exotic plants, or a collection of related coffee table books. Furthermore, to seamlessly blend in your furniture, there’s nothing better than merging with the framing. A tall storage unit or custom-made, wall-mounted bookcase will allow you to create a beautiful, focal furniture piece while also instilling a unique appeal to the room as a whole. Last but not least, climbing vines will benefit from the constant stream of daylight courtesy of the windows while gracefully stretching about the room, floor to ceiling.

5 min read

SoumissionRenovation.ca 02 Aug 2023

Build a Well-Designed Home Extension with an Architect's Expertise

A home extension is a significant undertaking, no matter how you look at it. It calls for solid technical expertise and extensive design know-how. Learn why an architect’s expertise is indispensable to building a well-designed home extension. Home Extension Blueprints Source: Canva Blueprints can spare you a considerable amount of trouble: Avoid administrative roadblocks; Mitigate the risks of a contractor rejecting your plans and halting the process; Prevent the need to completely redo the plans. If you deem yourself quite talented in terms of technical drawings and believe designing the plans for your new home extension is a good idea, think again. Plans drawn up by a homeowner almost always end up rejected by city officials. When not outright rejected, architects and architectural technologists are quite likely to refuse to collaborate on your plans and rubber stamp them with their professional seal. Therefore, drawing up your own plans for your home extension project is altogether a waste of time. While certain contractors may suggest having them designed on your behalf, this idea isn’t much better. Why, you ask? Because in the event that you terminate your contract with said contractor, they might not be willing to hand over your home’s extension plans. The best solution is to team up, from the get-go, with an architect or architectural technologist, who will draw up, and subsequently hand over, the blueprints of your home extension. Are you looking for general contractors for your renovation project? Fill in our form to be connected with top-rated contractors! When do you need to hire an architect for a home extension? Source: Canva An architect will come in handy when: Inspecting the state of your home; Drawing up the extension plans; Handling administrative requests; Managing companies/vendors involved. An architect also has an advisory role, as adding to or expanding a home does come with a set of consequences. In this regard, the architect will define your property limits in terms of positioning and dimensions: How will the house stand out from a remote viewpoint? Who can see the extension (neighbours, passers-by, nobody)? What’s the extension overlooking (landscape, factory, etc.)? Is an easement of views necessary (Civil Code of Quebec, article 993)? Which architects are approved by the urban planning department (Services de l’urbanisme)? These factors might prompt you to reconsider your initial home extension project. On the other hand, collaborating with an architect ensures a strong start, right off the bat. Architect or Architectural Technologist? In Quebec, the question is all the more pertinent given the two competing associations. Architects and architectural technologists aren’t trained alike. The former completed a university program, while the latter obtained a college diploma. The first are members of the OAQ (Ordre des architectes du Québec), while the others are part of the OTPQ (Ordre des technologues professionnels du Québec). Is one diploma better than the other? That’s for you to decide. The main difference may pinpoint the fact that an architectural technologist is more inclined to the practical side of things, as opposed to creative conception. However, an experienced and qualified architectural technologist is better than a poorly skilled architect, and vice versa. Base your decision on their reputation and past work. However, note that architects are the only qualified professionals who can design single-family homes, provided these exceed 6,458 sq. ft. (600 m²). Check out our article 3 Factors to Consider When Choosing an Architect. Architects Have a Ton of Experience to Go Around Source: Canva Planning a home extension is often done for one (or more) of the following reasons: Increase the square footage; Revamp aesthetics; Adapt the home (ageing occupants, disability); Increase the property’s market value; Have more natural light. Rightly, an architect’s role is to draw upon their experience, potentially guiding you to an entirely different architectural outcome. In fact, the home extension can: Extend the existing structure; Be separate from the neighbouring structure; Bridge two distinct spaces; Be ethereal (thin metal beams with glass partitions) or protective. While the decision rests on the client’s shoulders, an expert’s know-how is indispensable, as they’re able to present these different options and assist their client in the final decision-making. In essence, building an appealing extension requires the spark of an idea or creative concept. This is exactly where the skillset of an architect comes into play. It’s all the more important if you’re looking to increase the square footage of an older home with a modern-looking extension. Few are the trades with the know-how to blend older designs with more modern ones, as part of a structure that serves both as a contrast and a balance. Cost of an Architect-Designed Home Extension Source: Canva A number of factors come into play: Firm’s reputation; Size of the home extension; Technical difficulty in drawing the plans; Number of sub-contractors to supervise throughout. Then, note 3 types of fees: Rates ($50 to $200 per hour) Cost per square foot ($2 to $3.50/sq. ft.); Percentage. The percentage is calculated based on the scale of the intended home extension. As such, the architect’s fees amount to about 10% of the project’s total cost. Architectural Technologists Are Budget-Friendlier The disparate qualifications of these two associations mean architectural technologists offer more budget-friendly service fees. While architects typically charge 8% to 10% of the total cost of the home extension, architectural technologists will bill at a lower cost, 1% to 3%. This significant difference in costs opens to door to undertaking a more ambitious home extension than what might’ve been possible with an architect.

9 min read

N/A 27 Sep 2023

How to Set Up Your Home Workout Space

Setting up a workout space in your home is a great way to maintain your fitness and wellness goals. Yet, the benefits aren’t limited to physical fitness; physical exercise also helps develop self-control. There are several advantages to having a dedicated workout space at home: Time-saving (you don’t need to factor in travel time); Cost-effective (gym memberships aren’t free); Comfort; using your own equipment in the comfort of your home can be very appealing; Convenience; you can work out whenever you want, whether at midnight or during peak hours. Pro Tips for Setting Up a Home Workout Space Source: Canva We reached out to Samuel Oseas Escobar, a personal trainer and kinesiologist, for advice on properly setting up a home fitness corner. He’s the founder of Resilience physique and a bodybuilding medalist. Oseas Escobar strongly emphasizes that you don’t need to spend thousands of dollars to work out at home. Your body is your most important piece of equipment. “Not having the budget for it is just not an excuse,” he said. “There’s a plethora of functional exercises and worthwhile online resources that solely require your body weight.” As long as your body is healthy, you can work out. The possibilities for setting up a home gym are endless, so first, establish a budget. Budget-friendly home workouts? We got you! If you’re working with a limited budget but are still looking to buy some type of workout gear, Oseas Escobar suggests a few must-haves for a little over the hundred-dollar threshold. Surface Area Once you’ve established your budget, then consider the square footage needed. You’ll need to move comfortably, both lying down and standing up. If need be, move furniture aside to avoid bad falls and injuring yourself. “The area in which we work out has to be functional and can’t limit our movements,” the personal trainer explained. Starter Kit When asking, “Do I need rubber flooring?” Oseas Escobar simply said no. Not if you’re looking just to keep fit. According to him, typical gym rubber flooring ends up being rather expensive. Instead, he suggests buying a yoga mat and/or padded floor mats. Free weights To get into shape, the fitness expert suggested equipping yourself with 5- and 10-pound free weights, which retail for about $1.50 a pound. Working with free weights allows you to build muscle easily. It also can be used to correct muscular imbalance because, with the help of a dumbbell, you can strengthen a weaker bicep, for example. Free weights allow you to target a specific muscle or muscle group. Resistance exercise bands Resistance exercise bands are made from robust rubber, giving them a unique sort of resistance. When stretched, your body weight or free weights offer the same type of resistance throughout the movement, whereas exercise bands become increasingly resistant when stretched. With exercise bands, you can work out differently. You can work on your lower and upper body. You can also use it solely when warming up or stretching out at the end of your workout session. Swiss balls Swiss balls (exercise balls) allow you to work your stabilizer muscles (abdominal and lumbar). Unbeknownst to you, you’re strengthening your deep muscles and those around your spine. By strengthening your abdominal muscles in this way, as well as your deep muscles, you’re improving your athletic performance. The force transfer between different body parts becomes much easier, while the strength built with stabilizer muscles allows you to move more efficiently. Swiss balls aren’t too expensive—you can buy one for about $30. If you’ve been diagnosed with a musculoskeletal injury, stabilization exercises (dead bug or wall squats) will help with muscle strengthening and rehabilitation. Vibe The environment in which we exercise can also influence our motivation and determination. So why not get all the necessary elements to create the ideal workout space? Think about setting up your workout corner in a bright and luminous area. Ideally, your body can absorb a little vitamin D while exercising in a room with windows. You can also add a big mirror. It has a dual function: it’ll make the room look bigger and ensure that you maintain the proper posture, which is the goal. For example, exercising with free weights requires the proper technique and posture to prevent injuries. By looking at yourself in the mirror, you’ll have greater self-awareness and are more likely to correct your movements and posture. Moreover, seeing your body in motion and your muscles contracting during physical activity helps with personal motivation! Consider leaving a window open, even during winter, to ensure the space is properly aired. You can also improve air quality by adding a few plants. The most sought-after plants for air purifying purposes are peace lilies, common ivy, spider plants, devil’s ivy, and snake plants, just to name a few. If you’re not a fan of using headphones while working out, get yourself a little Bluetooth speaker to still listen to upbeat music. Are you looking for experts for your home renovation project? Fill in our form to be connected with top-rated contractors! What if money is no object? Source: Canva As mentioned earlier, there are endless ways to set up a home fitness corner. But, just like we did with a more limited budget, you still have to establish some budgetary constraints. This time around, let’s say you have a budget of around $10,000 to set up and furnish your home gym. What should you be considering for a home workout space? Once again, Samuel Oseas Escobar came to the rescue and answered our questions. Cardio When thinking about getting into shape, he mentioned how important it is to consider one’s cardiovascular health. Starting out your exercise routine with 10 to 20 minutes of cardiovascular exercise is a great way to jumpstart your workout. You don’t need to spend an hour working out intensely using the equipment below. Not only can simply doing a few minutes before and after your workout often suffice, but you can also—and it might be even preferable—turn to low-intensity exercises on a treadmill or stationary bike and maintain the physical effort over a longer period of time. Treadmill (must-have) The cost of a treadmill varies, but the expert we consulted highly recommends investing around $1,500 for a machine. Check out the Horizon 7.0 treadmill on The Fitness Factory website. The model is foldable with incline settings. Rowing machine The advantage of a rowing machine is that it allows you to warm up and/or do a full-body workout. This piece of equipment works out the bottom half of the body just as much as the upper half, as well as the midsection. Therefore, it’s a great way to start your workout. There are numerous different rowing machine models, like a waterrower. The latter simulates real-life water resistance. Squat rack A squat rack is another piece of equipment to consider if your budget allows it. This device has the added bonus of being extremely versatile. Squat racks are used to perform several different exercises paired with a straightforward weightlifting apparatus and bench. Think of squats, lunges, and bench presses. Using this equipment, you can work out all muscle groups. 45-pound Olympic bar An Olympic bar is indispensable to a squat rack. Those who are further along in their fitness journey, and are a little more experienced, can use this piece of equipment for muscular hypertrophy, stamina, and strength exercises. Bench A bench that can be fully inclined or declined during various routine workouts means you can slightly change the exercise and progress along your journey. Deadlift platform A deadlift platform is a piece of equipment that can very much turn people off exercise altogether, and it’s understandable. It’s very demanding, muscle-wise. Why put yourself through that? Because weightlifting is one of the very rare exercises that allows you to gain muscle strength efficiently and swiftly. Unlike many exercises that don’t necessarily target specific muscular zones, the benefit of adding deadlifts to your workout routine means training different muscular zones simultaneously. This creates tension from your quads to your forearms. Such a difficult motion puts significant stress on the body, which, in turn, must quickly adapt to this new physical strain. Few exercises yield quick progress in terms of strength and muscle mass. Flooring Source: Canva Having shock absorption flooring will make your workout sessions much more pleasant. Carefully consider the type of flooring or mats you’d like installed to protect your current flooring, body, and equipment adequately. The kinesiologist and trainer we consulted recommended rubber horse stall mats. According to him, they’re quite affordable and the best type of flooring available for home gyms. There’s also another range of foam floor mats that are budget-friendly too. Elliptical machine Not unlike a rowing machine, the elliptical allows for a full-body workout. It helps burn calories by exercising both the upper and lower parts of the body. Free weights and kettlebell set As for these, Oseas Escobar suggested getting 5-, 10-, 15-, 20-pound, up to 50-pound free weights. Kettlebell exercises are more intensive and dynamic. Such workouts can allow you to develop both your muscles and good cardiovascular health. Mats Even if you cover your workout space in a specific gym-appropriate flooring, you’ll still need to use floor mats during floor exercises. Opt for a quality yoga mat or a thick foam floor mat. Functional trainer (pulley system) This weightlifting apparatus is great because its resistance can be adjusted accordingly. It also allows you to work different muscle groups, like triceps, pectoral muscles, dorsal muscles, etc. It opens the door to countless possibilities. Sauna Is it a luxury or not? If you think you can afford it, why not go for it? Different indoor saunas retail for anywhere between $2,000 and $3,000 and can be plugged into a 120-220-V outlet. Time spent in a sauna post-workout helps blood flow. Doing so helps heal damaged muscles from your body's physical strain while exercising. A faster recovery period means you can resume your workout routine as you normally would. Muscle roller Speaking of recovery, the primary use of a muscle roller is to relax muscles. The foam roller decontracts muscles to reduce muscle tension or stress. This relaxing sensation is perfect for post-workout recovery. It can also be used before a workout, given that the roller stimulates blood flow, which prepares the muscles for physical strain. At-Home Workout Routine with a Personal Trainer and/or Kinesiologist Source: Canva A non-negotiable advantage of working in a gym is that you’re surrounded by health-conscious enthusiasts, people who are both motivated and determined. And there’s nothing more contagious than another person’s motivation! For at-home workouts, you have to be disciplined. It’s not always easy to get through it alone. That’s why a lot of personal trainers like Samuel Oseas Escobar offer personalized training programs tailored to your physical condition, your experience level, and your equipment. Therefore, a personalized training program and a remote follow-up can benefit you. It’s pretty straightforward: Being accountable to someone else equals more motivation. Depending on the number of follow-ups you have scheduled with a professional trainer, it can cost between $200 to $300 to get a custom workout routine tailored to your goals. Also, having a routine allows you to focus during your workouts, whether at the gym or home. It can also boost confidence, building your self-esteem, not only muscle tone.

6 min read

SoumissionRenovation.ca 30 Aug 2023

Efficient and Precise Cuts with a Concrete Circular Saw

A concrete circular saw is an efficient and precise tool provided you’re using the right equipment. From the saw to the blade type, here’s how to choose your material to cut concrete like a pro. Why Use a Circular Saw to Cut Concrete? Source: Canva That’s easy because it’s lightweight and easy to handle. A circular saw can slice concrete slabs over a depth of 6.49 inches (165 mm). To do so, such a concrete saw must be fitted with a diamond blade, the sole mineral rated 10 on the Mohs Hardness Scale, which true to its name, characterizes the hardness of minerals. As such, it’s solid enough to cut concrete at great depths. However, there’s another type of blade, one made with a mineral rated 9 on the Mohs Hardness Scale: corundum. Albeit not as hard as diamond, corundum is a hard aluminum oxide. Sold under the name of “abrasive disc,” it’s cheaper and less durable, and its cuts aren’t as precise nor as fast to carry out. To that, it can also be said that the cuts aren’t as deep, since they only hit depths of ¼ to ½ inch. How to Spot a Concrete Circular Saw Source: Canva A concrete circular saw blade is easily recognizable. Unlike a miter saw, which has hard-toothed edges, a concrete circular saw is either smooth or segmented. Entry-level blade models are 7 inches wide and cost a little under $8. A concrete circular saw is often paired with a water line to constantly cool down the blade during its use. If this isn’t the case, you can cool down the zone with the help of a garden hose. What Type of Saw Should Be Used to Cut Concrete? Source: Canva Wet Saw As we’ve already mentioned, concrete circular saws are often paired with a water line to cool down the blade, which means that there’s also a way to dry-cut concrete, as is the case with the power tool we’ll discuss next. The advantages of a wet saw hinge on the following: Expert cut Speed Dustless The device can be equipped with a water reservoir or directly supplied by a garden hose via a connection meant for that very purpose. Power Saw A corded concrete chainsaw is ideal when working in a closed-off environment. In fact, using said tool allows one to bypass diesel exhaust generated by a thermal circular saw. Typically, the dry concrete cutting method is used with this type of device. However, some manufacturers retail circular power saws that are also fitted with a water cooling system. The blade can measure up to 16 inches wide, with 3,200 W of power, much like thermal cutting tools. Are you looking for general contractors for your renovation project? Fill in our form to be connected with top-rated contractors! Which Blade Is Best Used to Cut a Concrete Wall? Source: Canva Choosing the right blade isn’t as easy as it may seem considering there are differing options available. The blade can be: Continuous Segmented Continuous Blade A continuous saw blade ensures the best cut for fragile materials, such as flooring and roofing tiles. In fact, it prevents a chisel-like effect that could result in the material cracking. Segmented Disc On the other hand, the segmented disc is favoured when working with hard materials like concrete. The segmented blade prevents the disc’s rim from cracking. As such, to effectively slice concrete, a circular saw fitted with a segmented blade is best. Choosing the Right Size: 12, 16, or 14 Inches? As for the width of the blade, it depends on the depth to which the concrete must be cut: 12-inch wide blade: a 4-inch depth (100 mm) 14-inch wide blade: a 5-inch depth (120 mm) 16-inch wide blade: a 6-inch depth (152 mm) How to Cut a Concrete Slab with a Circular Saw Source: Canva Step 1: Measure the width of the slab The width of the slab is key to determining the size of the blade you’ll need to purchase. In any case, to cut concrete, you’ll need a segmented blade. Step 2: Choose a type of circular saw Your device can be: thermal or powered; with dry- or wet-cutting. The tool type very much depends on your needs. For indoor use, it’s best to opt for an electric circular saw to avoid inhaling diesel exhaust generated by the apparatus. If you’re planning on carrying out numerous fast and precise cuts, a circular saw with a wet cooling system is what you need. However, if your cuts can be done outside and aren’t as thorough, a dry-cutting method will do. Why, you ask? Because dry-cutting results in a lot more dust and the blade risks overheating faster. Therefore, this type of cut isn’t meant for indoor spaces or thorough work. Step 3: Mark cutting guidelines Using a ruler, string, or chalk, mark the concrete with your cutting guidelines to ensure the saw’s blade hits the intended spot. Step 4: Set cutting height While the blade’s diameter is either 12-, 14- or 16-inch wide, you can adjust the saw’s cutting height to your liking. To do so, adjust the knob or lever on your device. Step 5: Gear up To cut concrete, not only will you need a circular saw, but you’ll also need the following handy: Safety goggles Face shield Gloves Mask Step 6: Cut the concrete Manually operating a circular saw is pretty straightforward: place dominant hand on the power trigger; hold the front grip with other hand. Holding a circular saw in such a way only serves to hold the power tool firmly in place. Under no circumstances should you push down on the blade when cutting the concrete. The blade’s 3,500 or 4,200 spins/minute will do that. Step 7: Cool down the blade If your circular saw is a wet saw, it cools down while cutting. However, nothing’s stopping you from lifting the blade out of the concrete every 30 seconds to help cool it down. When dry-cutting concrete, the process of cooling down the blade is a must. Otherwise, you risk breaking the blade.

7 min read

SoumissionRenovation.ca 09 Aug 2023

The All-Important Use of Concrete Panels

Concrete panels are durable, cost-effective, and viable options for both indoor and outdoor walls. Their list of attributes doesn’t end here: they're also easy to install, especially aesthetic-looking, thermal insulators, and soundproof. We’ll delve into why and how these panels should be installed. Characteristics of Lightweight Concrete Outdoor Wall Panels Source: Canva Concrete panels are considered lightweight when their density is between 90 to 115 lb/ft³, as opposed to regular concrete’s 140 to 150 lb/ft³. As such, they weigh roughly forty pounds (20 to 30 kilos) apiece and have: low thermal conductivity; high thermal resistance; reduced likelihood of shrinkage; increased ability to withstand rotting. Variations are made using different types of aggregates. With lightweight concrete, it can be: Slate Ash Schist Pumice Clay Perlite Introducing New Aggregates Over the last few years, materials from agricultural waste have made their way into the manufacturing process of lightweight concrete panels, OPS (oil palm shell) concrete being one of them. Furthermore, innovations aren’t curbed yet, as experiments are carried out to manufacture concrete panels sourced from the slag generated by gasification processes and fly ash issued from petrochemical incineration. These products, stemming from an integrated gasification combined cycle (IGCC), are used to produce glass-ceramic, and with lightweight concrete, exhibit compressive strength exceeding the requirements established by the international standards organization ASTM International (formerly known as American Society for Testing and Materials). PCSP Also available are PCSPs—precast concrete sandwich panels—which are rightfully named for their 3 layers (concrete - insulation - concrete), and have valuable characteristics: withstand compression load; lightweight; energy efficient; durable, safe, and comfortable. Specifically, it’s a mix of 3 mm expanded polystyrene beads and cement, to achieve a density equalling 9 kN/m³. Why is lightweight concrete cheaper than regular concrete? Simply because regular concrete, being heavier than its lightweight counterpart, requires rebar (structural reinforcements), like framing, steel beams, etc. As such, the total cost of a project will be higher using regular concrete as opposed to lightweight concrete. Are you looking for general contractors for your renovation project? Fill in our form to be connected with top-rated contractors! How to Install Fibre Cement Panels Source: Canva Fibre cement panels can just as well be installed inside as outside since they’re fit for roofing. They’re used as a thermal barrier coating, and reinforced with a fibreglass mesh to withstand UV rays. Here’s a 9-step guide for installing fibre cement indoor wall panels: Step 1: Gather materials Here’s everything you need to secure fibre cement wall panels: Low-expansion construction foam Caulking gun Electric drill Hammer Compressor with 16-gauge nailer 1 ¾ inch finishing nails Wood shims Laser level or 4-inch line level Tape measure Grinder or mechanical saw with a diamond blade Step 2: Inspect plywood Once installed, lightweight concrete is just as resilient as plywood. However, if the plywood isn’t properly installed, or isn’t sturdy enough, the lightweight concrete panels will mirror the former’s characteristics. Step 3: Unbox and store panels Upon delivery, your panels will be boxed in protective packaging. To remove the panels from their packaging, lay the panels sideways, vertically on their edge. If laid horizontally, they risk breaking. The same concept applies during transportation. Always transport concrete panels vertically rather than horizontally, to prevent breakage. Step 4: Mark the wall To install concrete panels, always start with the first row, meaning at the bottom of the wall. Make a mark to indicate the wall’s midpoint as well as to indicate the height of the first concrete panel. Based on the height of the concrete panel, you can then set your laser level or use your line level. Step 5: Prepare panels Once you’re certain of where the first concrete panel should be secured (centre fit at the bottom of the wall), you can go ahead and apply the low-expansion construction foam on the back of the panel. You can apply the product in a sinuous-like wave pattern, from top to bottom, over the panel’s entire back surface. Step 6: Wedge the panel Should you not want the panel to sit directly on the floor, especially if the latter isn’t level, you can wedge a wood shim beneath it. Otherwise, you can simply hold it in place for a few seconds until it adheres to the wall. You can then nail them in place using a nail gun. The concrete’s texture will conceal the nails. Step 7: Cut panels accordingly The last panel in each row will most likely need to be cut. To do so, you can use a grinder or mechanical saw fitted with a diamond blade. Step 8: Check level and thickness This is a crucial step. The first row must be completely level, otherwise, the subsequent rows will also be crooked. Once the panels have all been installed, you may notice a discrepancy between one panel to the next. Should this be the case, use a wood shim to adjust the panels accordingly. This will allow you to have a perfectly flat and levelled wall. You can also drive a screw into a panel in question and use it as an anchor point to then pull the concrete panel toward you to adjust it accordingly. Keep in mind that you only have about 5 to 10 minutes to make any necessary adjustments before the adhesive cures. Step 9: Caulk the edges Caulk the panels’ edges with an adhesive, while using a trimming tool to apply the silicone. You can remove any excess product using a putty knife. Lastly, sand the surface of every concrete panel with a fine-grit sandpaper. Doing so will effectively remove any and all fingerprints, as well as accumulated dirt resulting from the installation. Types of Panels Source: Canva Concrete panels have made their way into all construction-related fields: Architecture Interior use Décor Fireplace walls Flooring Architecture Lightweight panels are available in an array of colours and are more often than not the sought-after choice amongst architects. So much so that it resulted in the inception of a new trend: photo-engraved façades. This involves using patterned concrete to depict a grooved image. When it comes to pre-fabricated concrete, the image is moulded and positioned at the bottom of a mould. There are two other techniques: Graphic Concrete Béton picturalⓇ Both methods are distinct. The first method involves using a retarder to delay the concrete’s curing process in certain areas, thereby allowing aggregates to show through. This is achieved using a special membrane with a retarder. On the other hand, the second technique entails digitally printing an image onto a concrete slab. Therefore, concrete panels are the perfect canvas for a new, vector graphic-based architectural art. For Indoor Use Walls aren’t the sole surface to accommodate concrete panels. They’ve permeated every corner of the home: Floors Behind fireplaces Bathrooms etc. They’re just as used in single-family homes as in administrative and commercial buildings. Decorative Concrete Although lightweight concrete panels are designed to withstand loads, they’re, first and foremost, thought of as decorative pieces when used indoors in their ultra-lightweight versions, weighing roughly forty pounds (20 to 30 kilograms). Concrete panels are available in various shades of grey and are particularly valued for instilling modern-looking interior designs. They exude a sophisticated ambience that combines elegance and charm. For Fireplace Walls If you’re looking for fireplace wall cladding, fibre cement panels are perfect for that, given that they can be positioned around and behind fireplaces. Panels are retailed as 4-, 8-, or 10-feet high boards, with thicknesses ranging from ¼ to ½ inches, as provided by manufacturers. As Flooring Concrete panels can be glued onto subflooring, whether the latter is made of plywood or OSB. Concrete panels and subfloors are adhered together by mortar or using an adhesive. When proceeding with installation, avoid overlapping the panels’ joints with those of the subfloor.


Looking for a contractor?

Submit a project and get 3 free quotes now!